- Science Toys
- Magnetism
- Electromagnetism
- Electrochemistry
- Radio
- Thermodynamics
- Aerodynamics
- Light and optics
- Simple laser communicator
- Make your own 3D pictures
- Making permanent rainbows.
- A solar powered marshmallow roaster
- Make a spectroscope from a CD.
- The impossible kaleidoscope
- Make a solar hotdog cooker
- Exploring invisible light
- A high resolution spectrograph.
- Time-lapse photography.
- High speed photography.
- Stacking photos for high depth of field.
- Biology
- Mathematics
- Computers and Electronics
A Homemade Microgram Balance
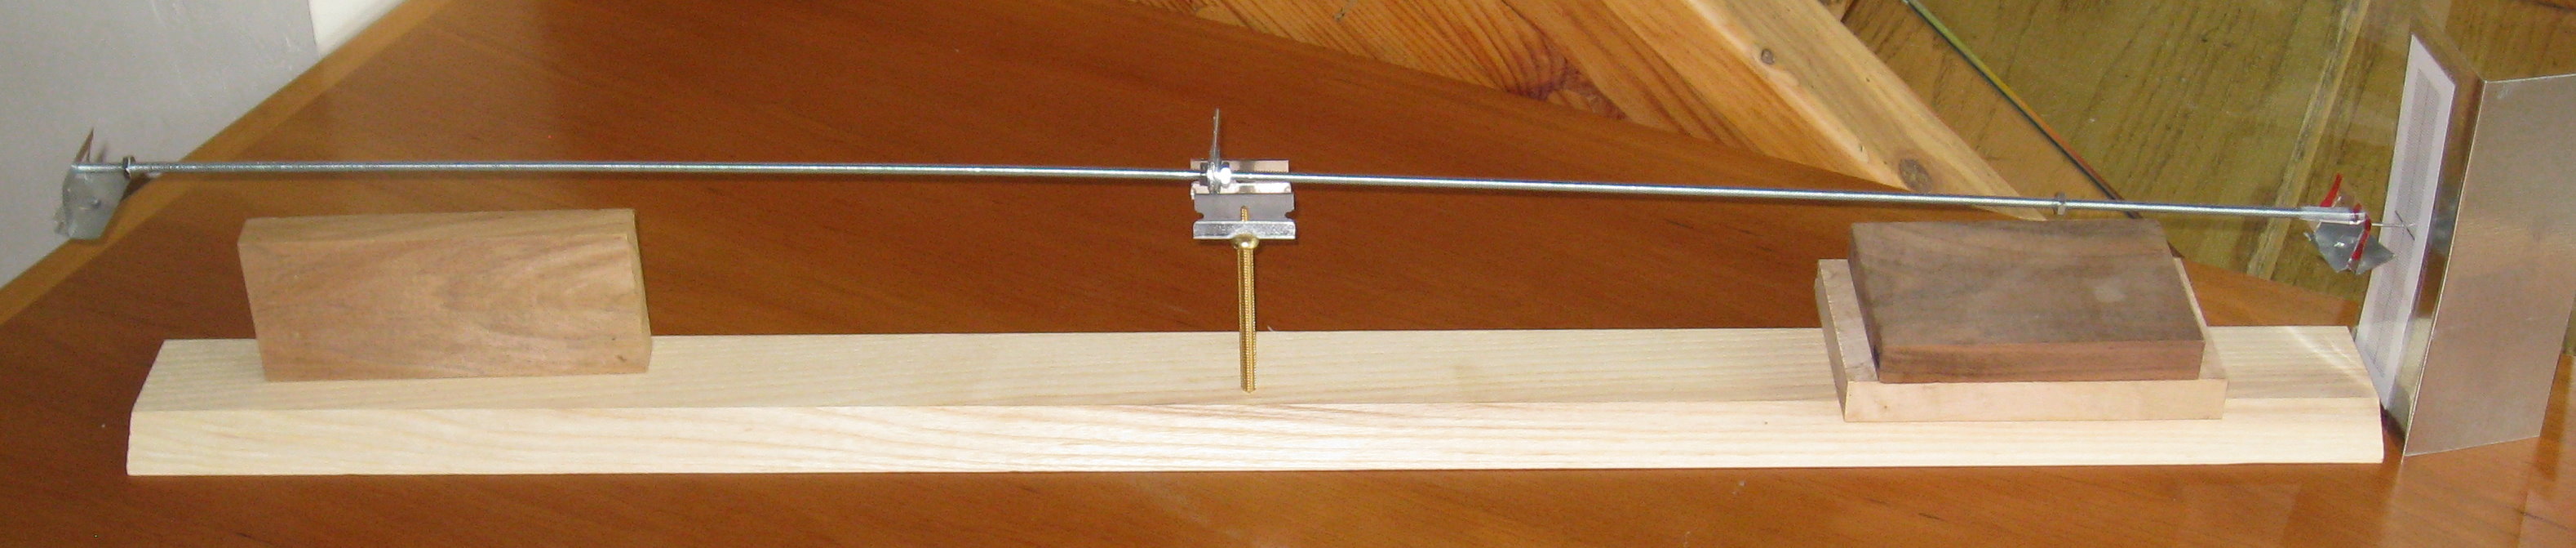
Click on photo for a larger picture Commercial scientific scales that can weigh objects as small as a tenth of a gram can cost hundreds of dollars. But with a trip to the hardware store and a little ingenuity, you can build a scale that can measure things that weigh less than a milligram. Our scale is a simple balance — a rod with a pan at each end that is suspended in the middle. What makes ours special is a knife edge fulcrum that is extremely close to the center of gravity of the bar. This gives our balance a huge multiplying effect, making it exceptionally sensitive.
What you need:
- A three foot board to use as the base. I chose an oak door threshold because it looked nice.
- A three foot long threaded rod. The diameter and threading are not critical — I used a 10-32 threaded 3/16 inch diameter galvanized steel rod.
- Two 7/8 inch fender washers that fit nicely on the 3/16 inch rod.
- Two 1/2 inch washers that fit on the rod.
- Two machine screws about 3 or 4 inches long, with slot heads. I used 1/4 inch brass because they were pretty.
- Four hex nuts that fit on the rod.
- An empty aluminum soda can.
- Three single-edged razor blades.
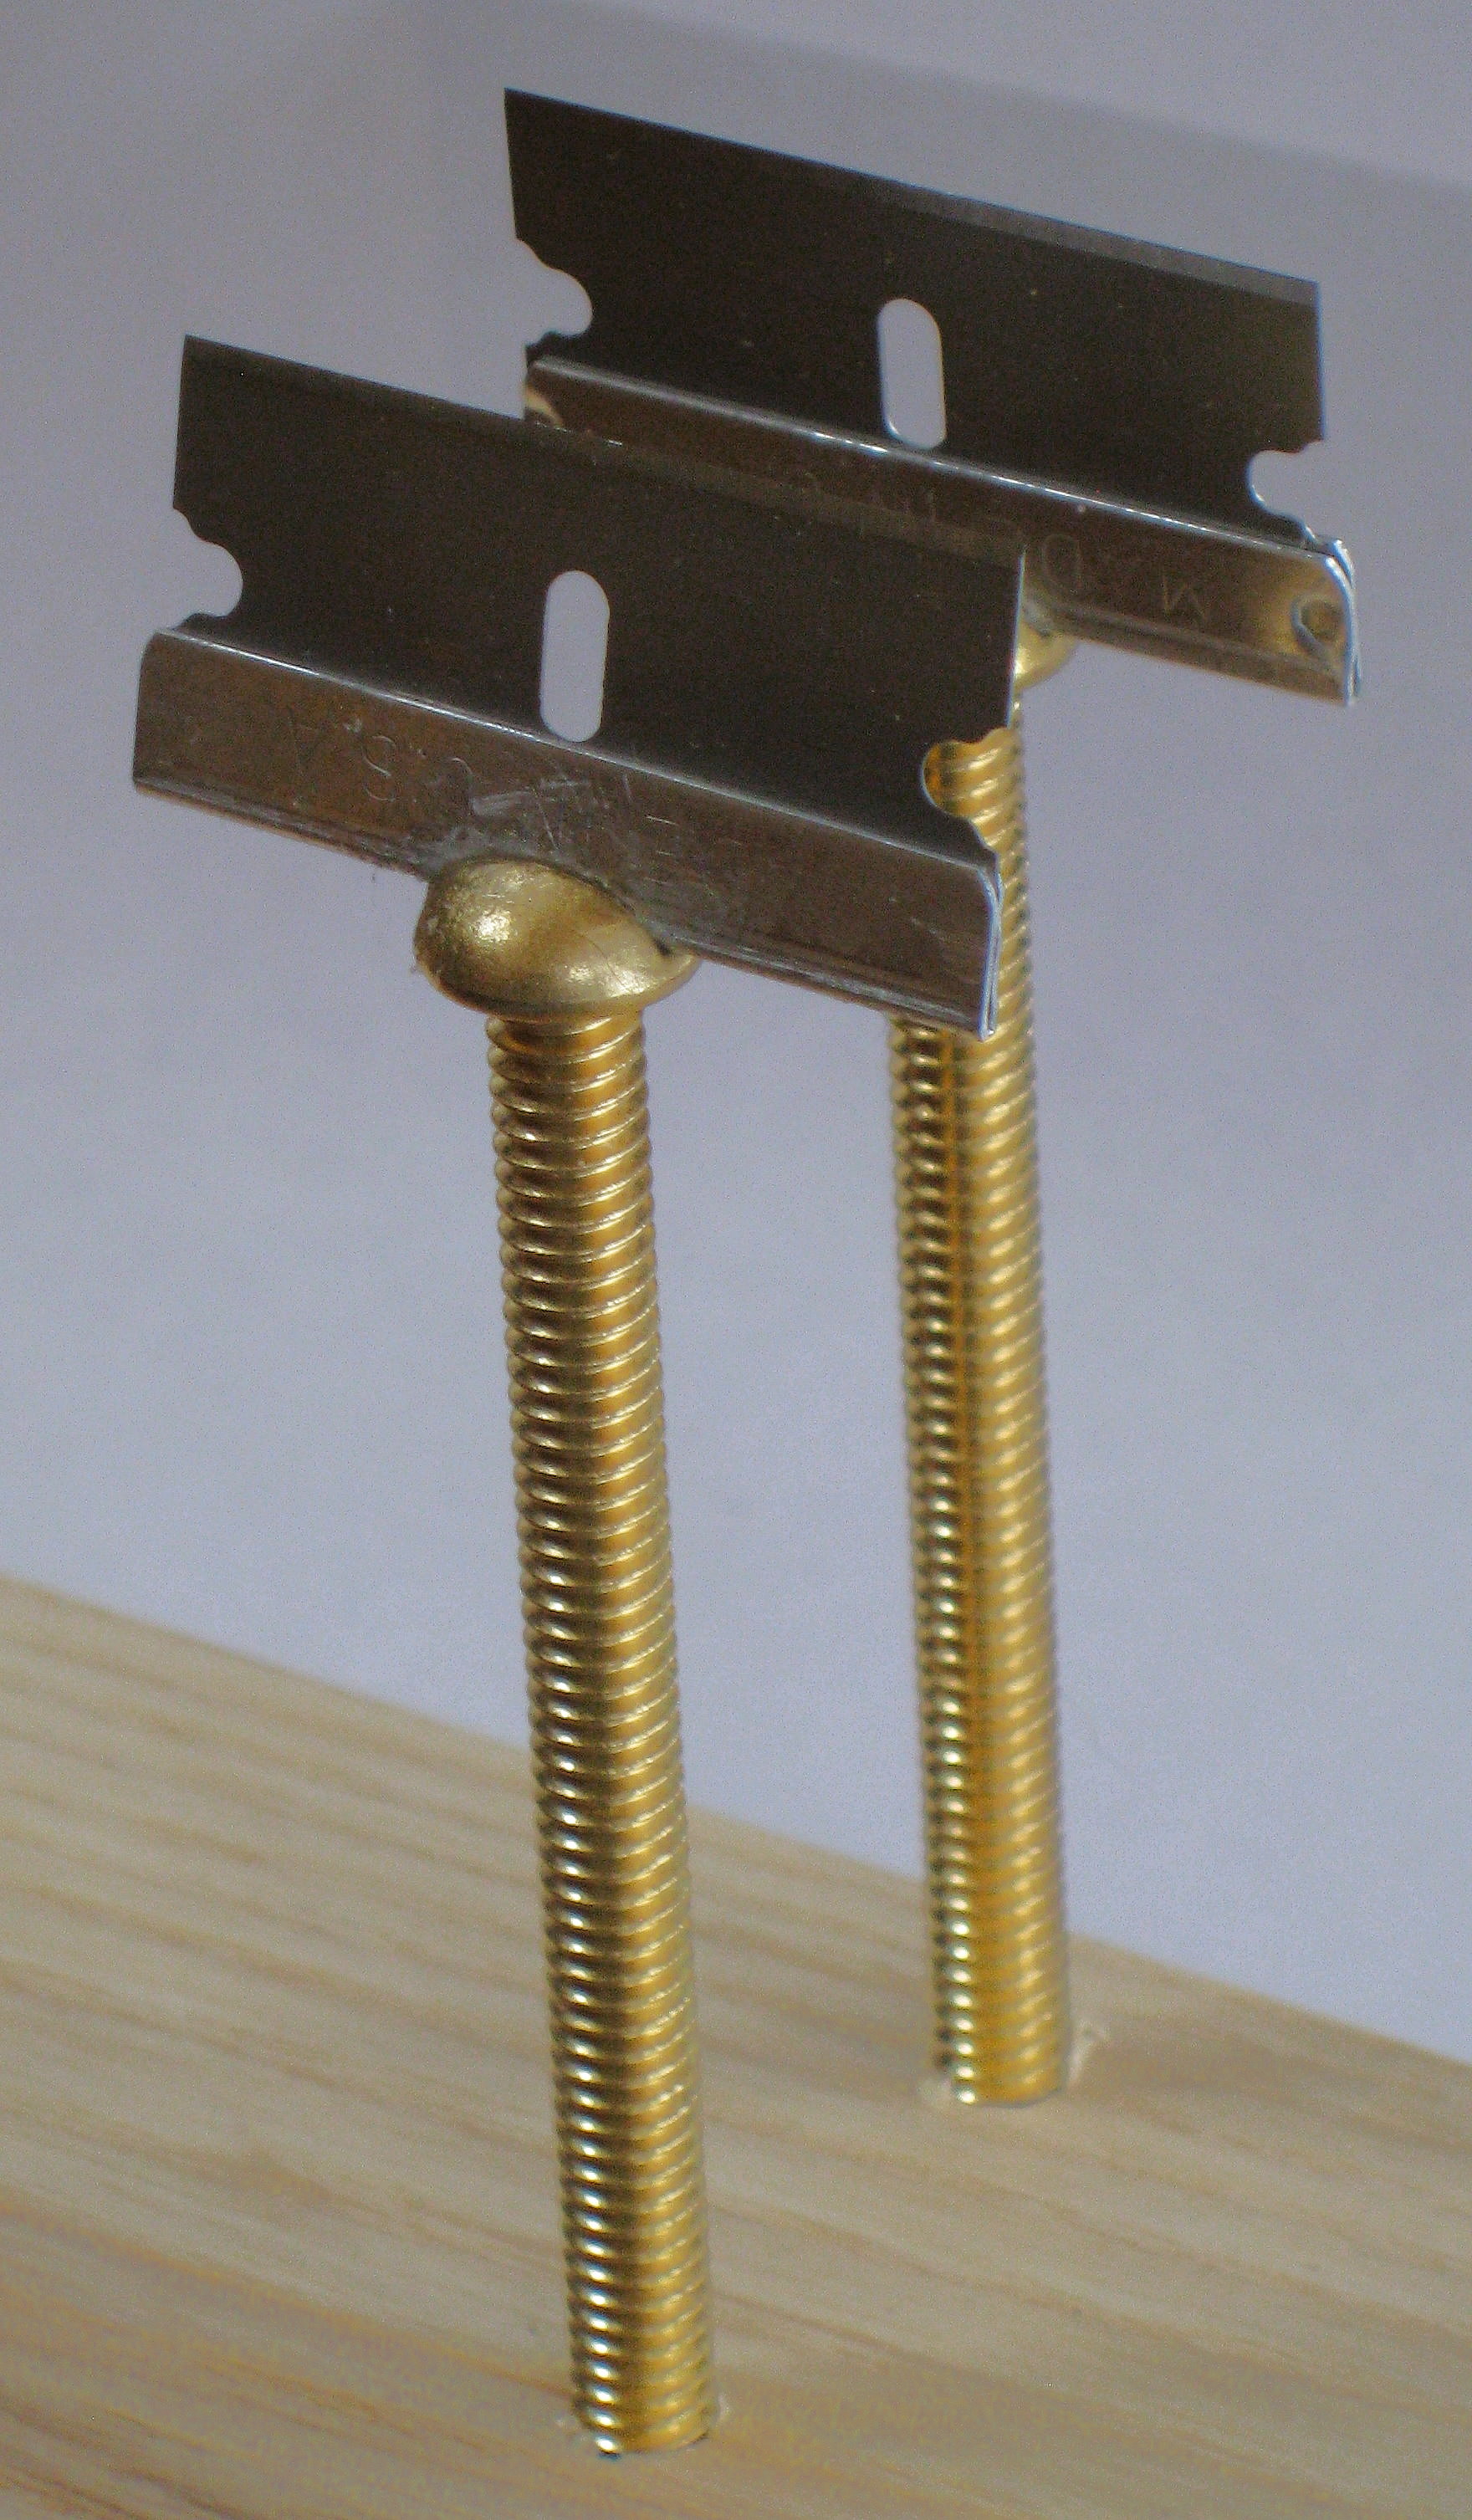
Click on photo for a larger picture We build the base first. Drill two holes in the center of the board, spaced about an inch apart. The holes should be just a bit smaller than the machine screws, so the screws can be screwed tightly into the wood. We are not using wood screws, but the machine screws will screw snugly into the wood nonetheless. Line the slots in the screws up with the length of the board. Glue two of the razor blades into the slots in the screws. The razor blades won't fit tightly in the slots, but that is fine — just angle them towards each other a bit, as shown in the photo. Leave the protective cardboard on the razor blades until we are ready to mount the scale arm on top of the razor blades. The cardboard has been removed in the photo.
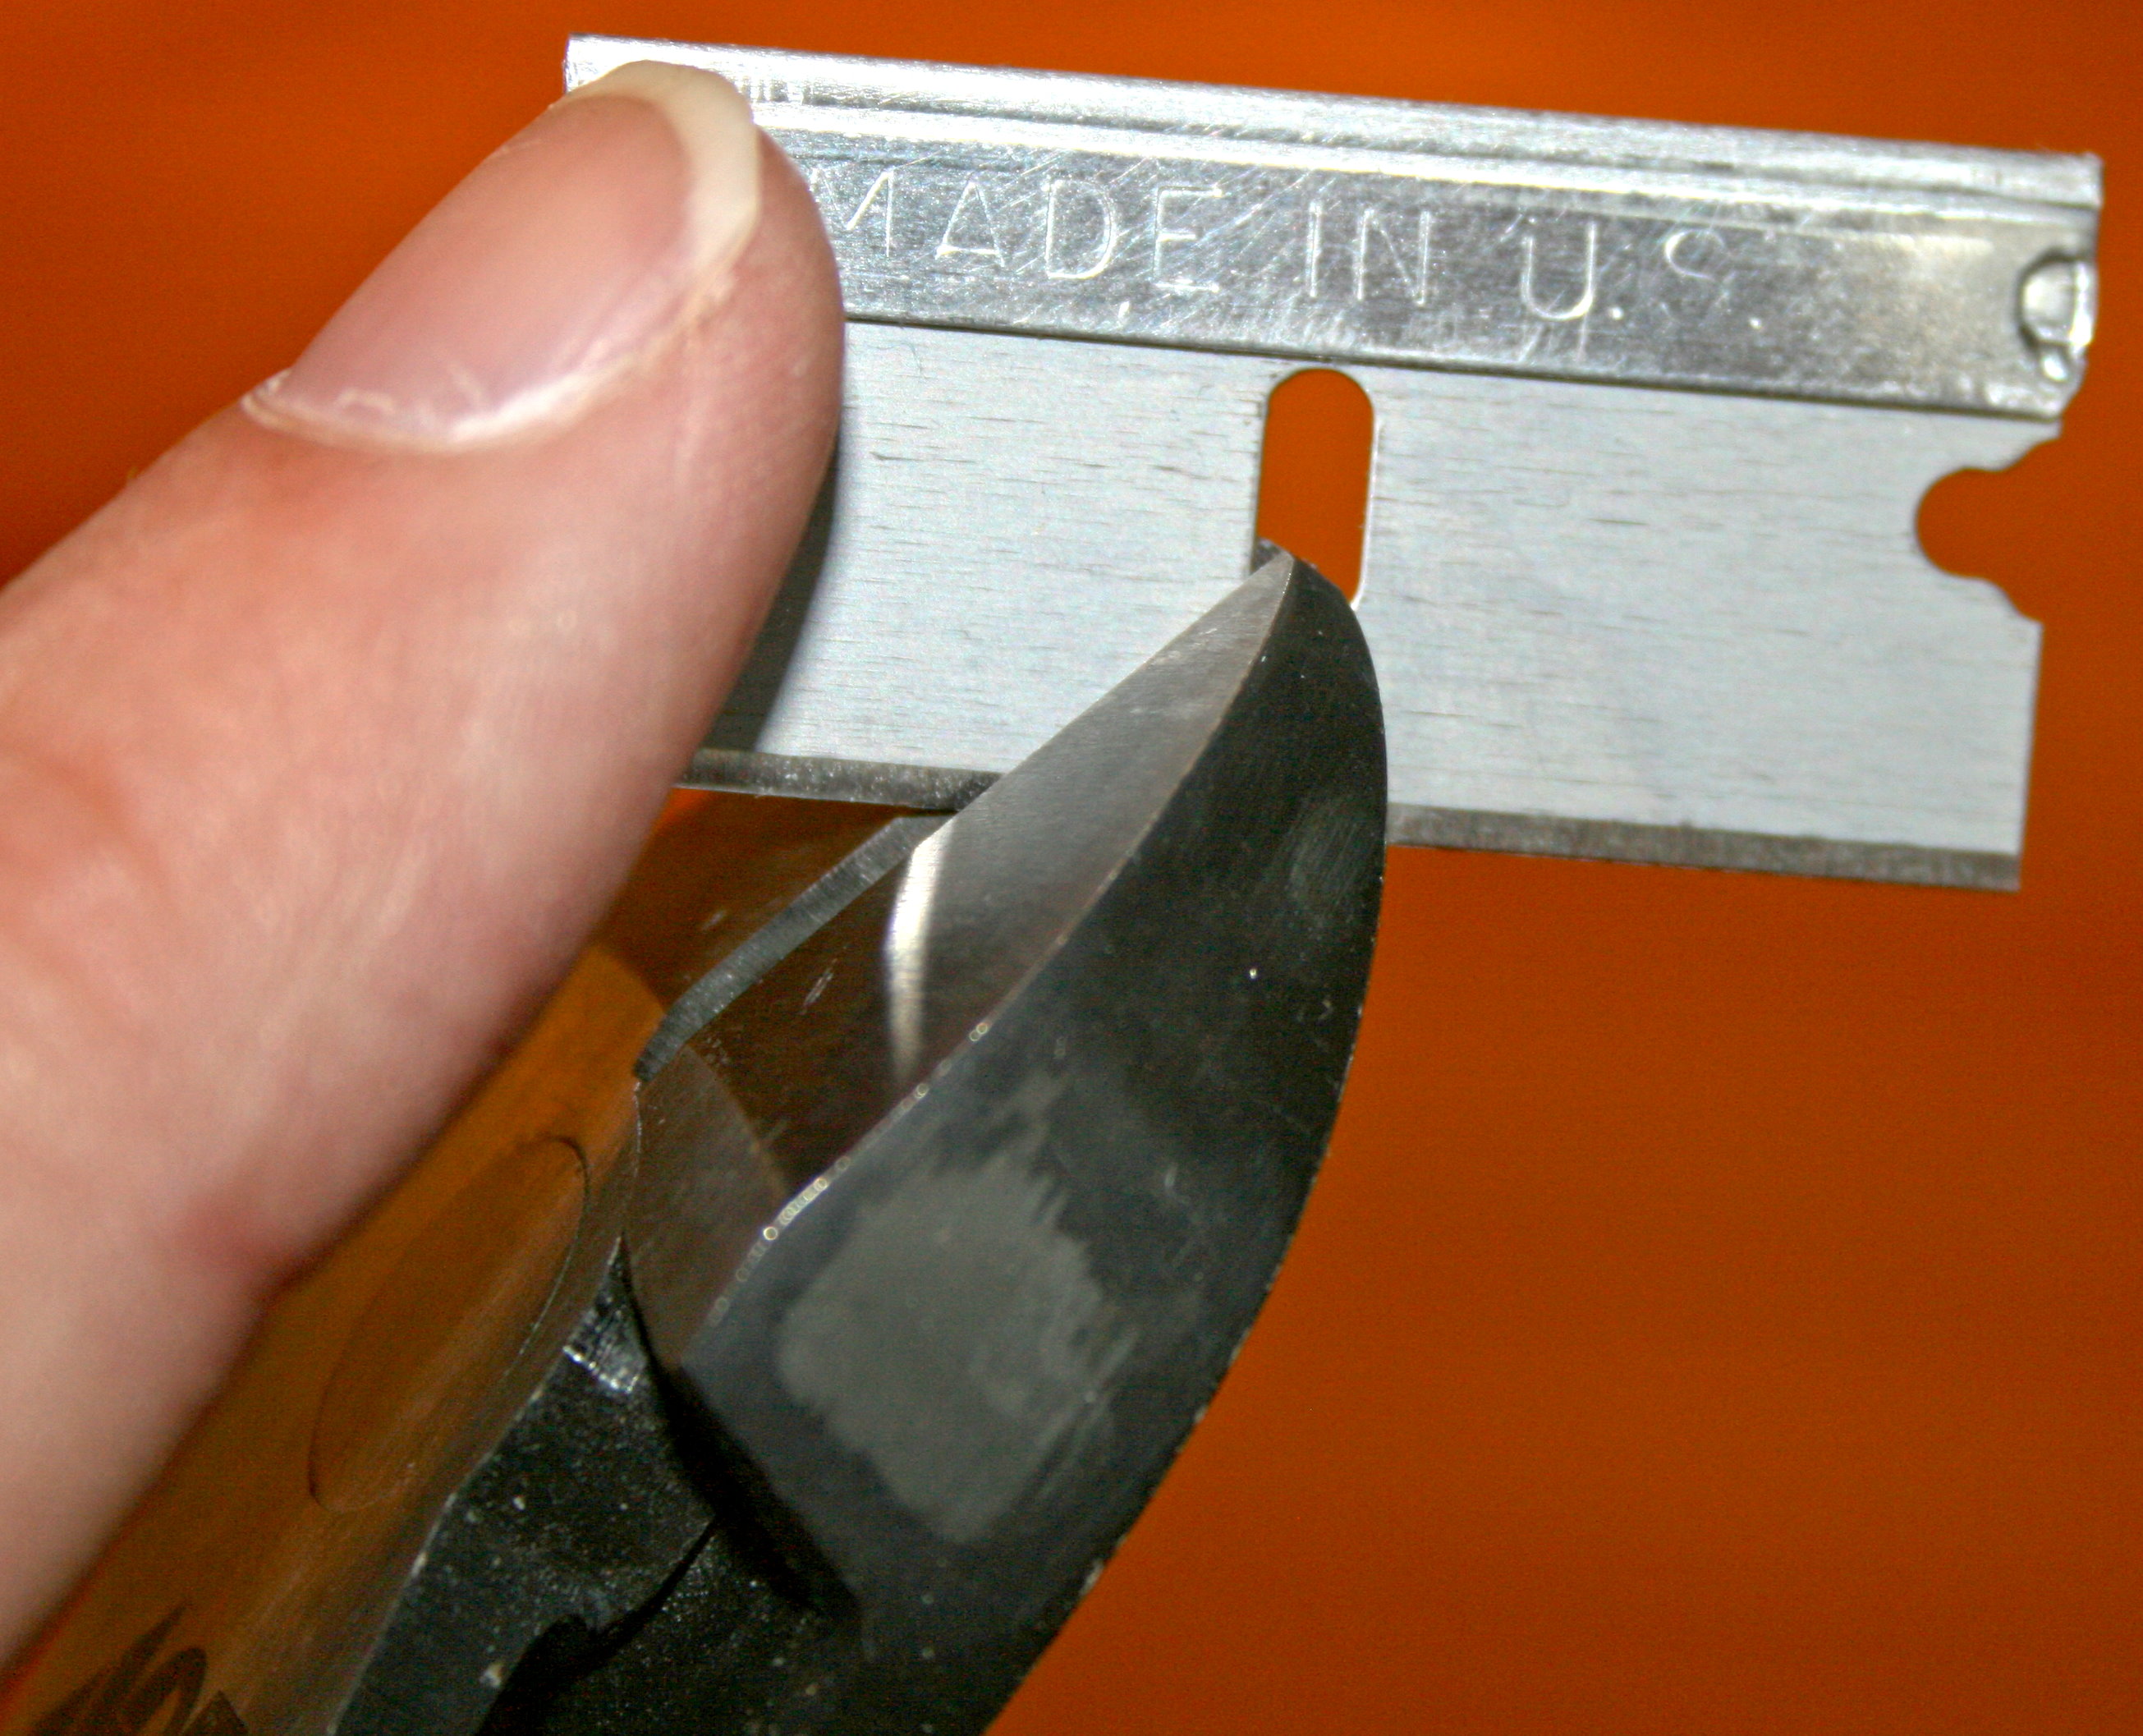
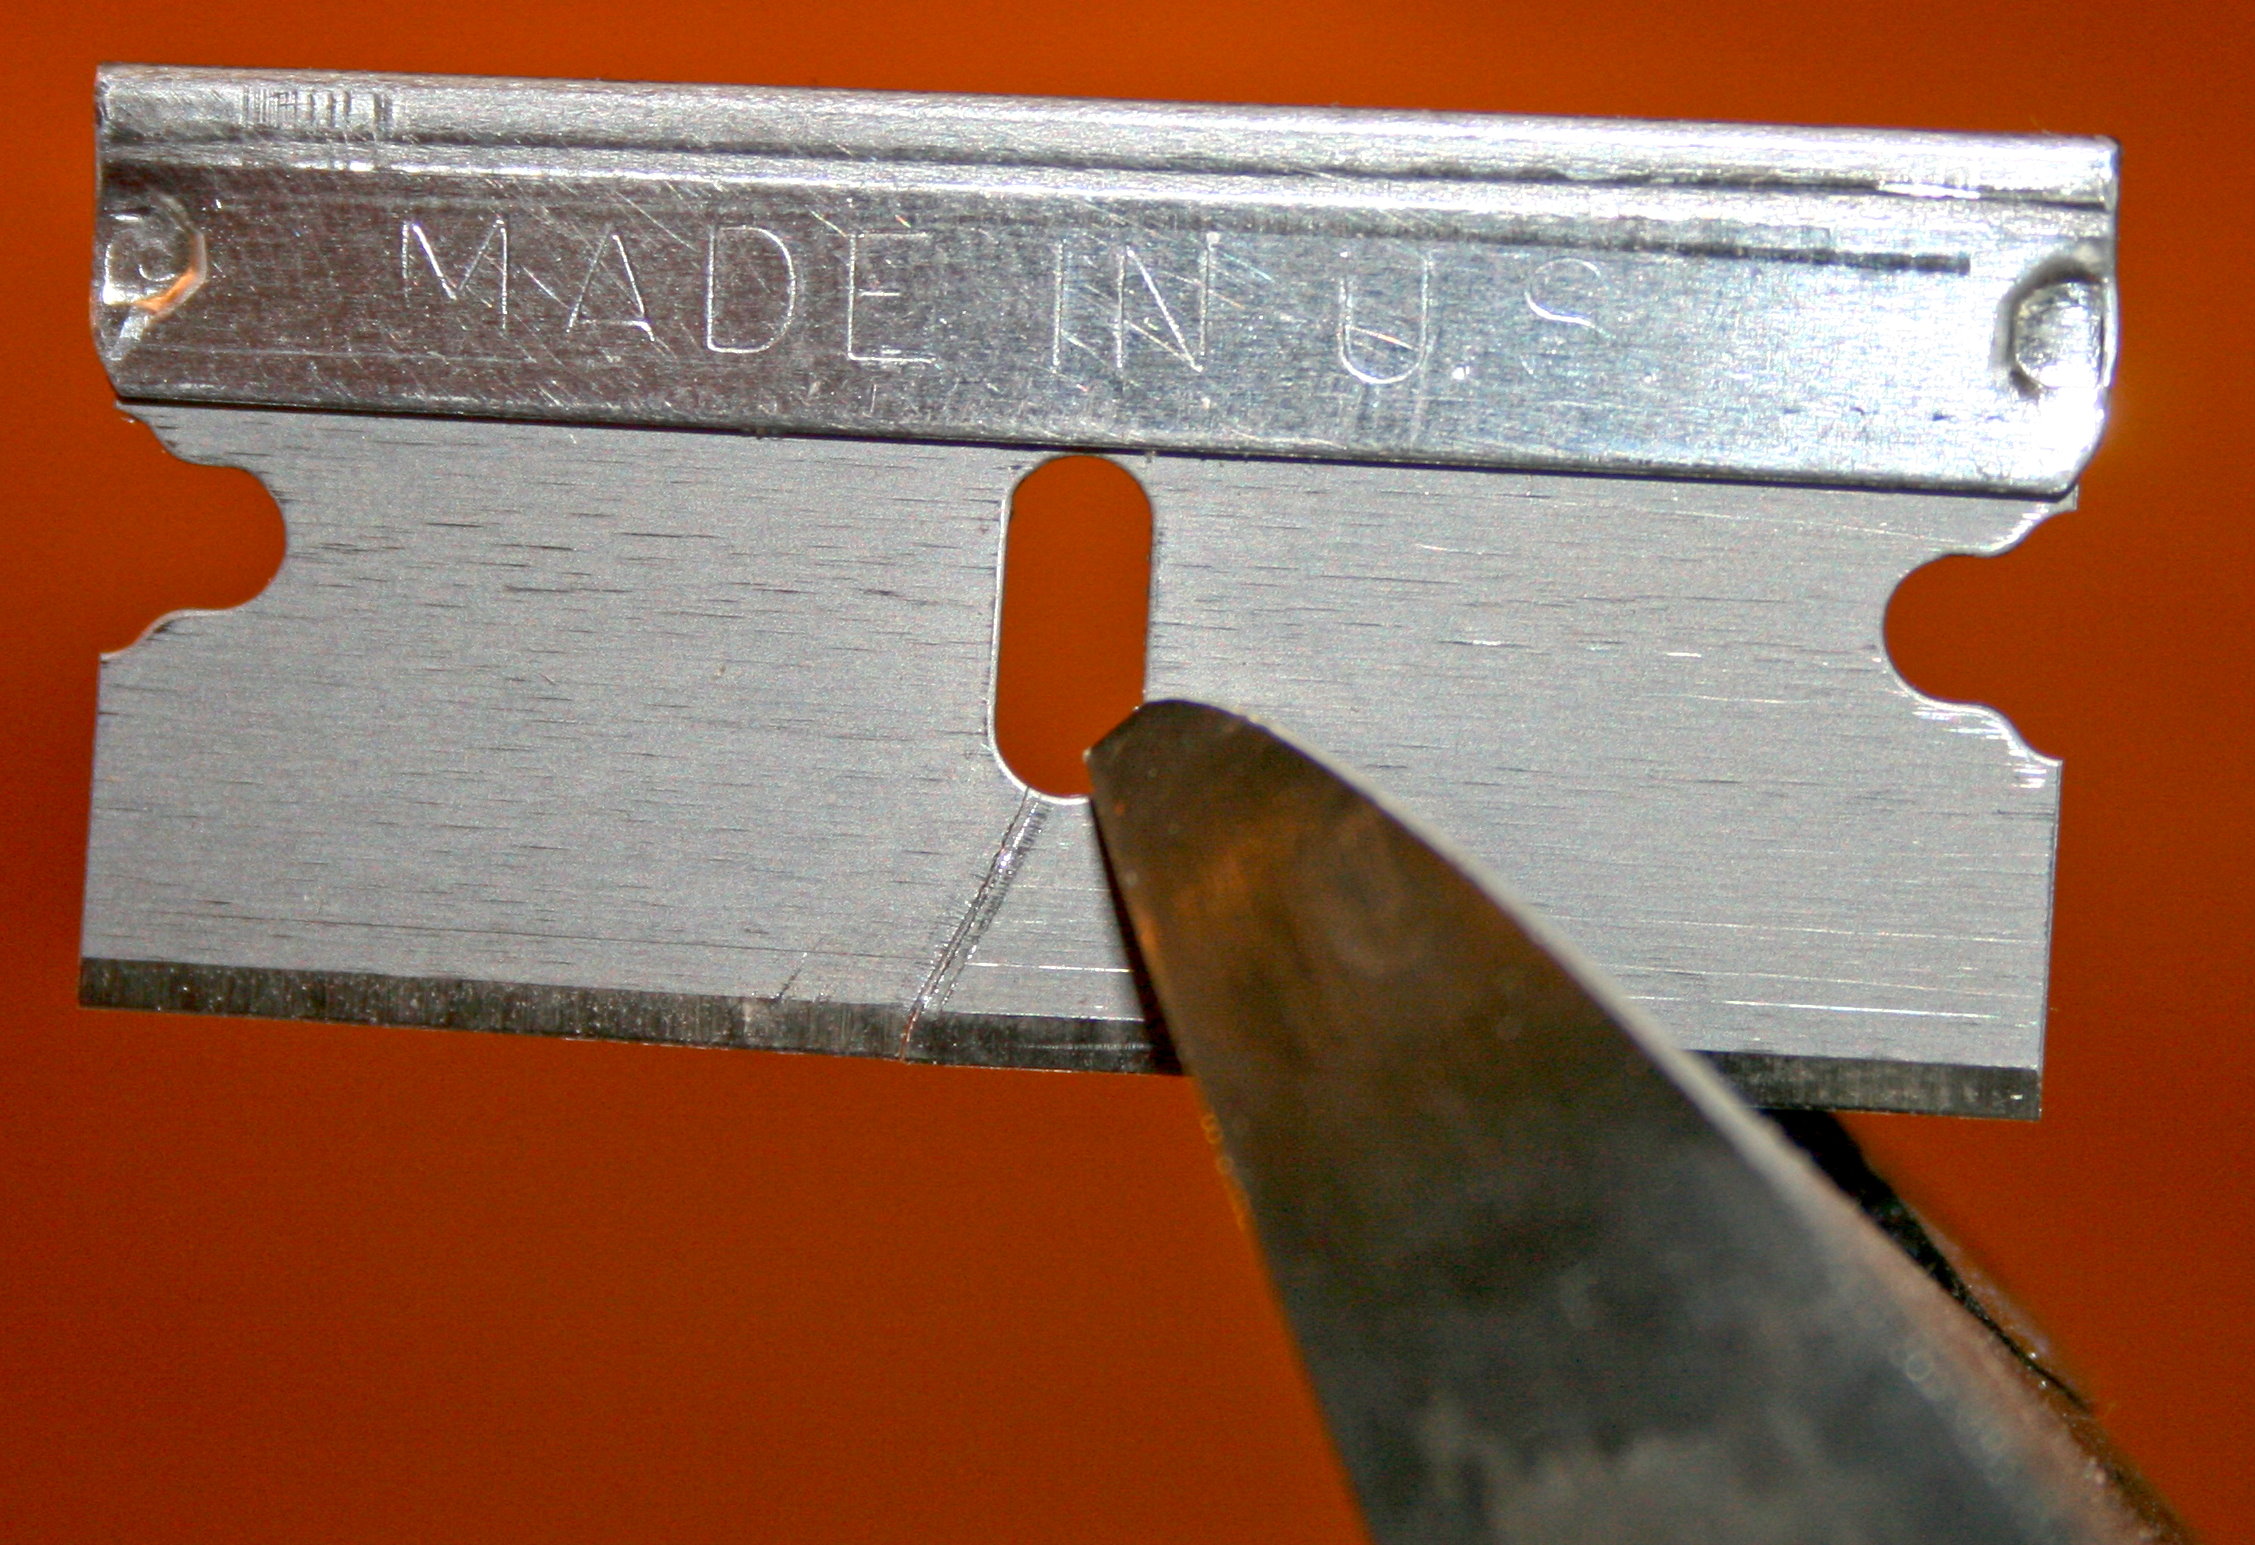
Click on photo for a larger picture In the next two steps you will have to be very careful. We are going to cut a notch into the blade of the remaining single-edged razor blade. We use a pair of diagonal cutters. They will not cut through the razor blade. But the razor blade is brittle, and if we hold the blade firmly and rock the diagonal cutters, the blade will snap neatly along the line of the cutters. The notch is cut at an angle so the blade will fit over the threaded rod.

Click on photo for a larger picture You can see the result in the photo above.
Click on photo for a larger picture We do this again to complete the notch.
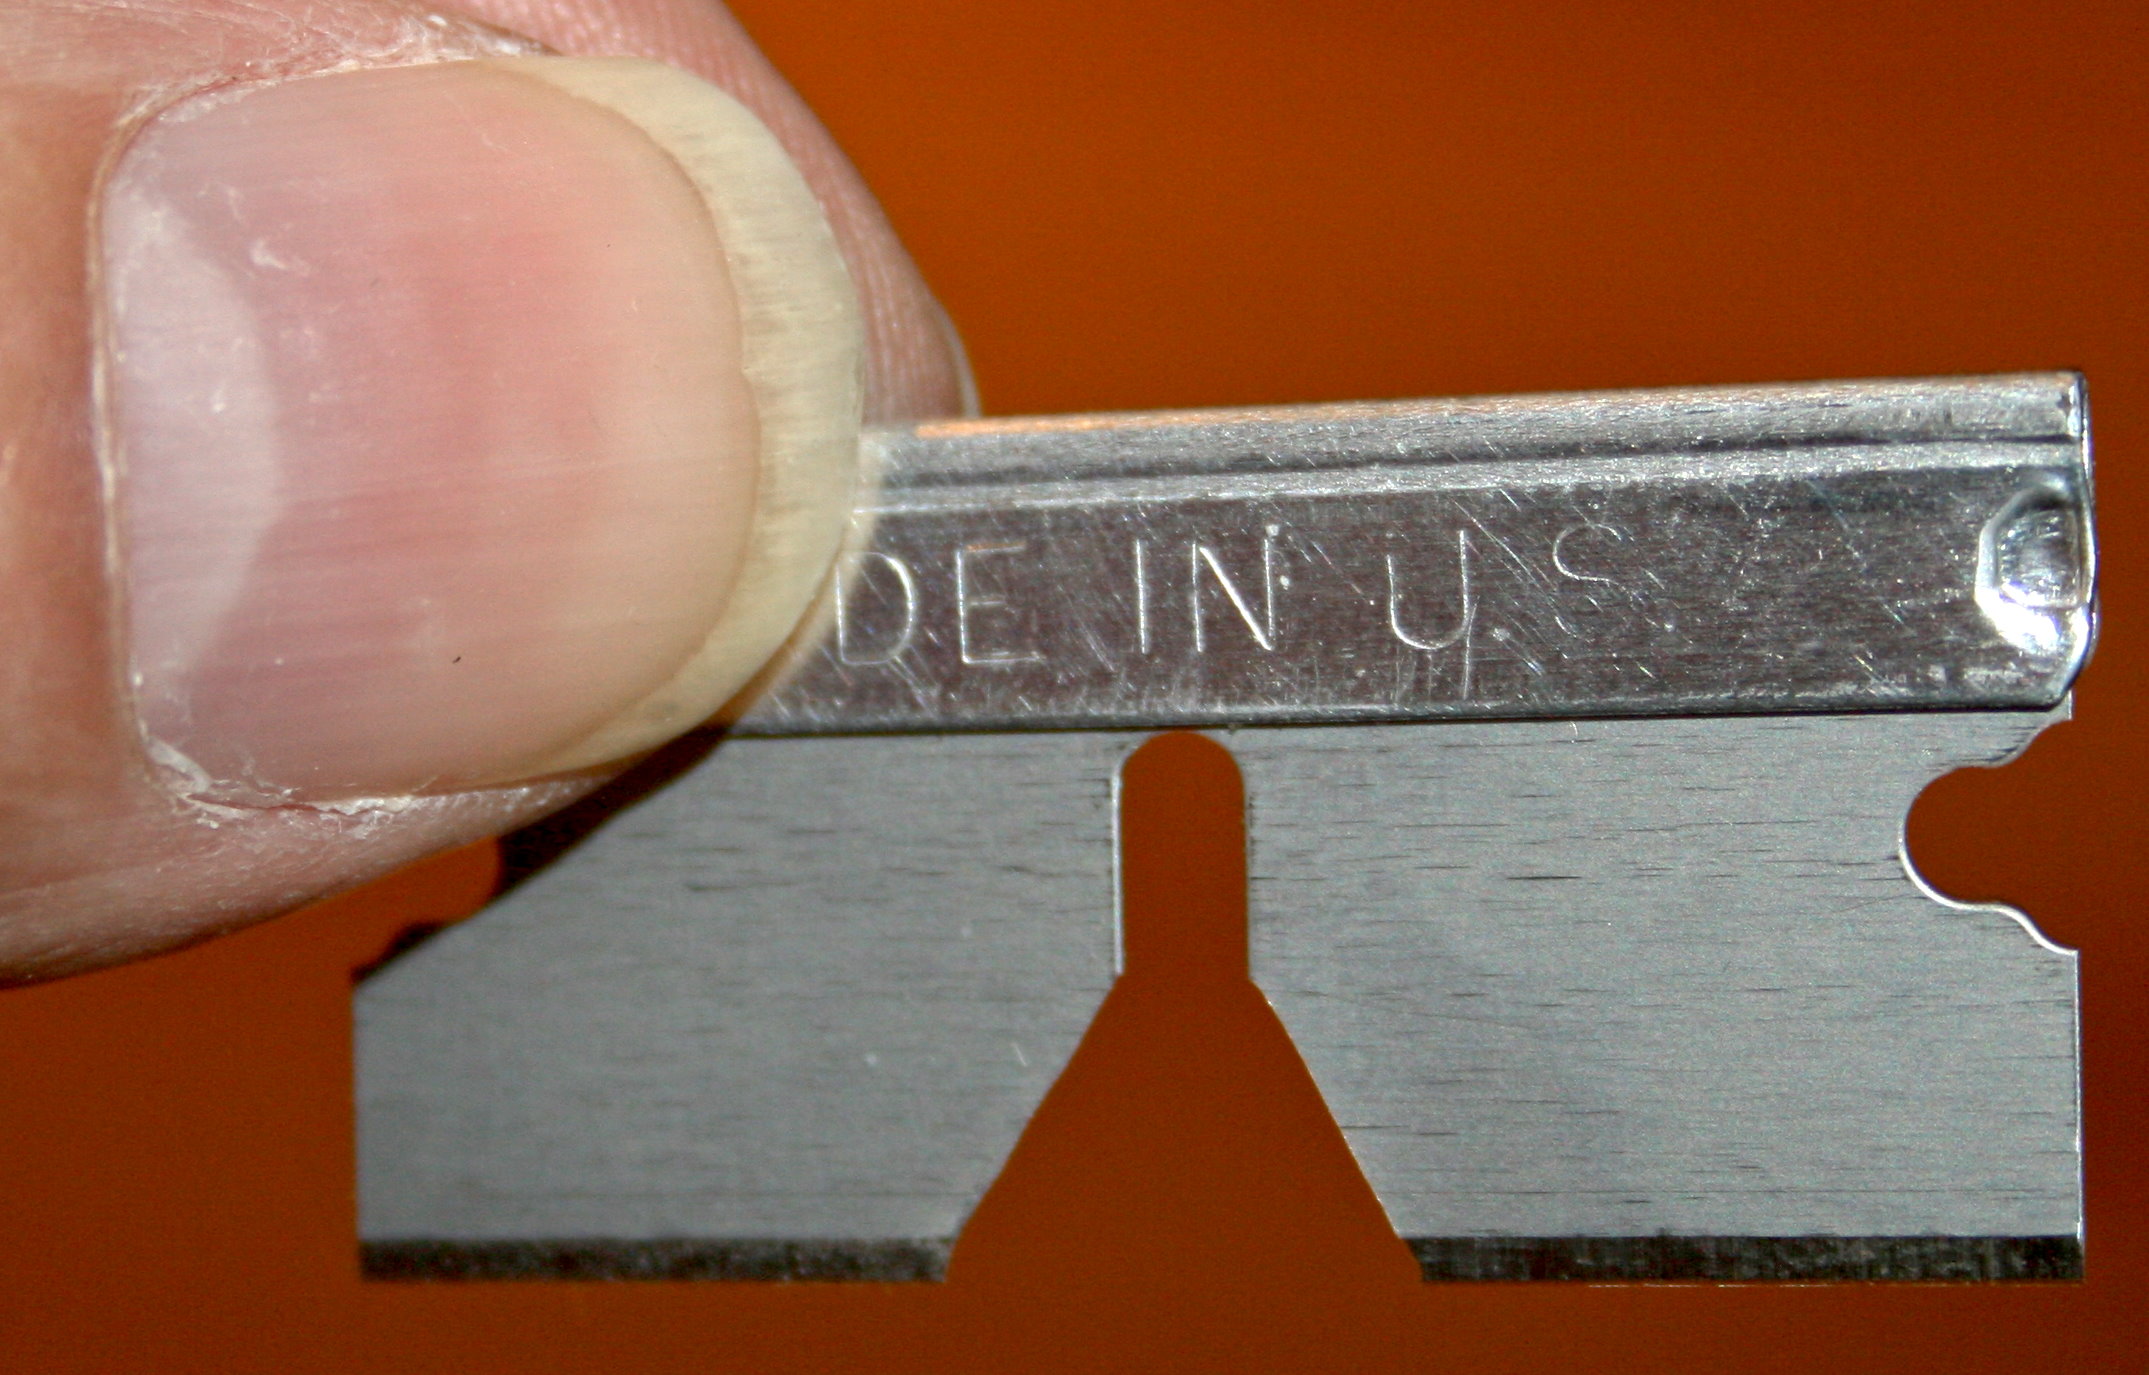
Click on photo for a larger picture Now we have a razor blade that has a nice big piece missing from the middle.

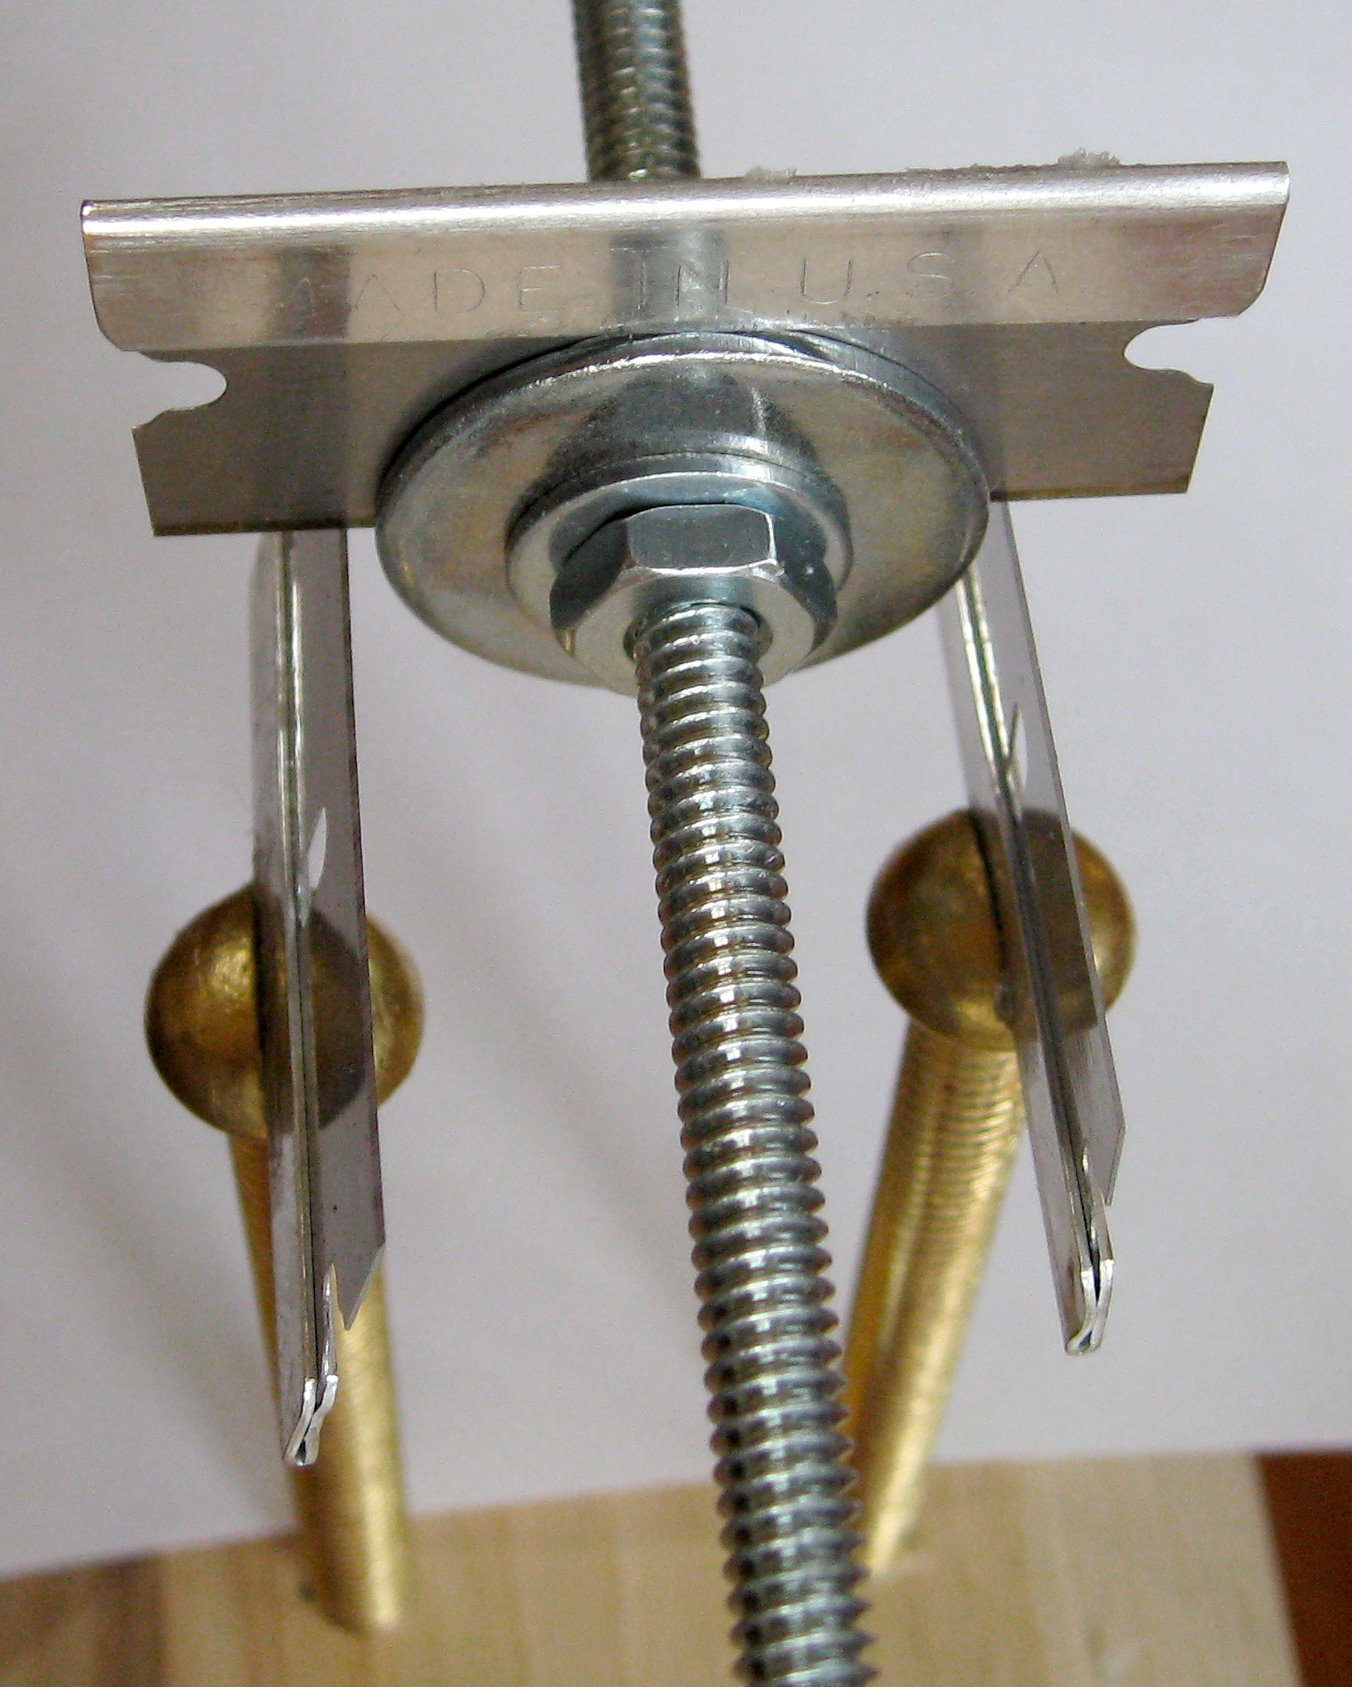
Click on photo for a larger picture Put one of the hex nuts onto the threaded rod, and screw it all the way down to the center of the rod. Follow it with a half inch washer, then the two 7/8 inch washers, another half inch washer, and finally another hex nut. Screw the second hex nut all the way down until it almost tightens against the washers. The notched razor blade can now be slipped in between the two large washers. Tighten the hex nuts to hold the blade firmly in place.
Click on photo for a larger picture It is now time to remove the cardboard protection from the two razor blades on the base. Now you can rest the rod assembly on top of the two razor blades on the base. The rod will not balance properly yet. To make it balance, screw a hex nut onto each end of the rod, about an inch from the end. Balance the rod by screwing one of the hex nuts closer to the center until the rod balances. Don't worry about getting it perfect yet — we are not done adding things to each end of the rod. Now is a good time, however, to make sure the balance actually returns to the center when each end is briefly pushed down. If you push down on one end of the rod, and that end stays down, then the fulcrum is below the center of gravity of the rod. To fix this, loosen one of the hex nuts holding the razor blade, and lift the razor blade up just a little, and tighten the nut again. We want the blade to be very close to the center of gravity of the rod, but not below it. The closer it is to the center, the more sensitive the scale will be.
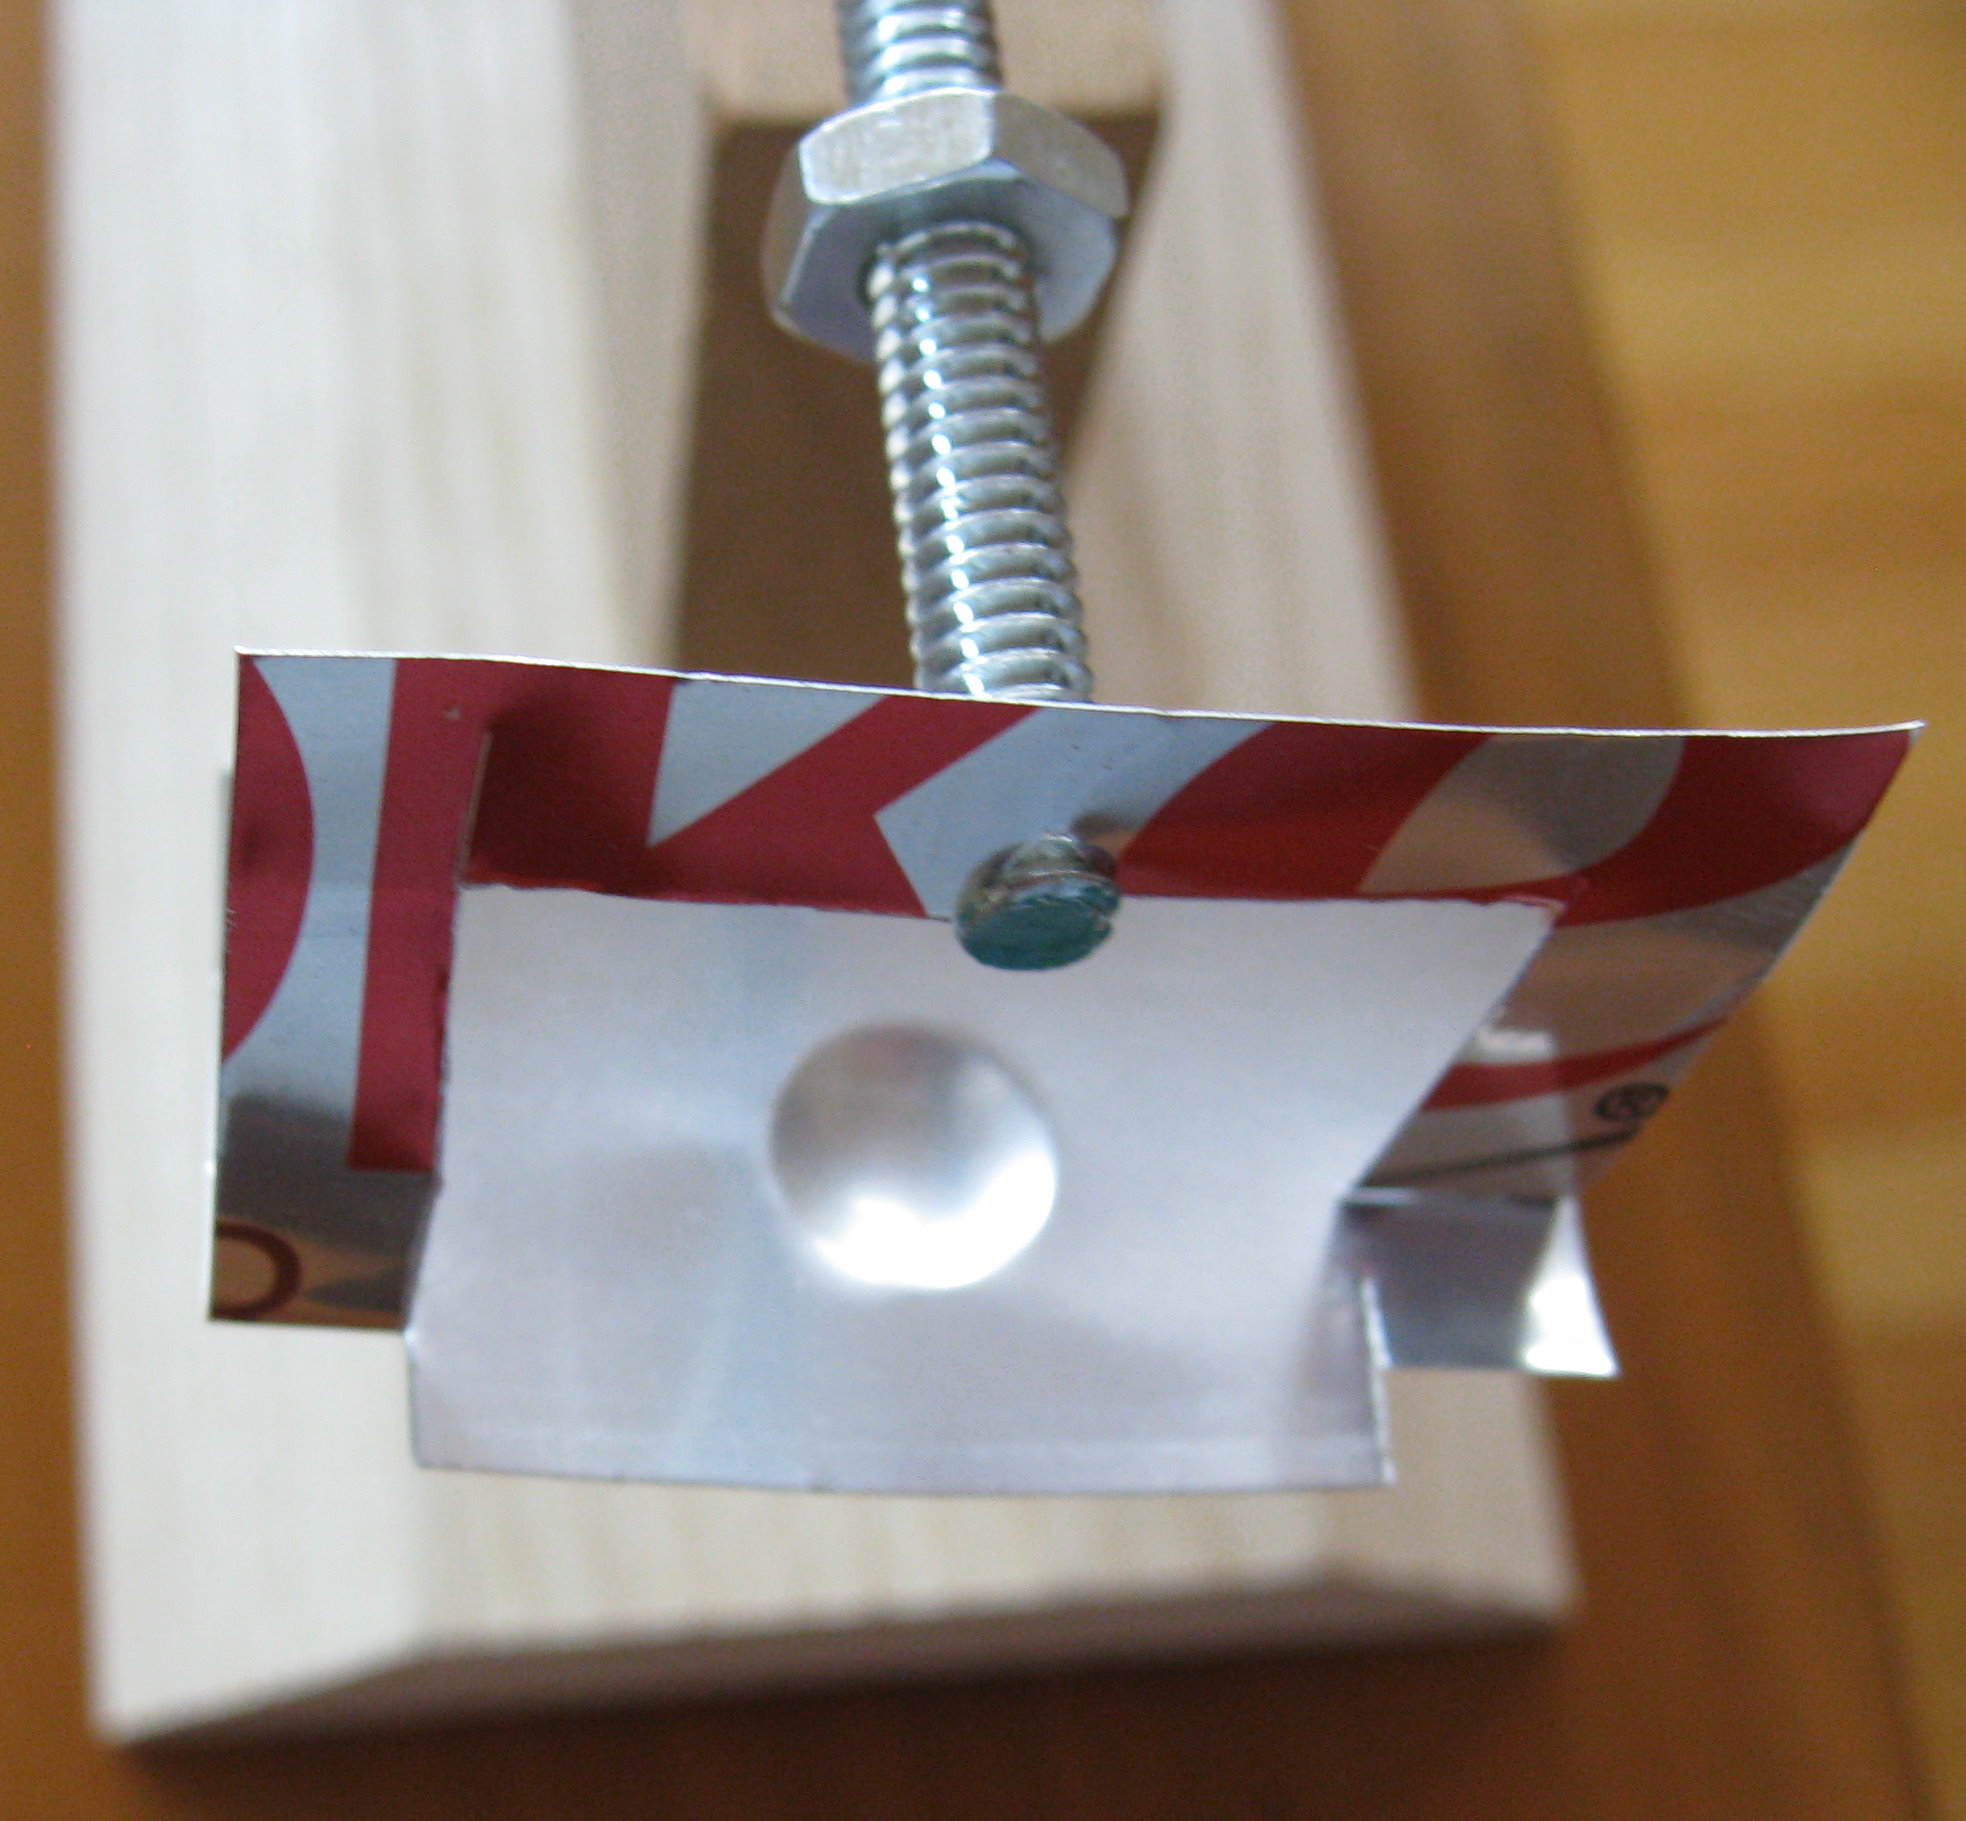
Click on photo for a larger picture Next we make two balance pans from the empty aluminum soda can. Carefully cut the can apart so that you have a smooth sheet of aluminum. Don't cut yourself on the edges. Cut the sheet into two pieces. In the center of each piece, make a dimple by holding the sheet on a board and hitting it with a ball peen hammer. You can also do this by hammering on a steel ball placed on top of the sheet instead. Cut a U shaped handle for the pan as shown in the photo. Be careful not to crease the aluminum as you bend the handle up. You can see what happened when I did that in the photo above — one of the ends broke off. But it worked anyway with just the remaining end of the handle attached, so I left it that way. I was more careful with the second pan. Cut a V shaped notch in the center of the handle. This will keep the handle in place as we gently set it on the very last thread of the threaded rod.
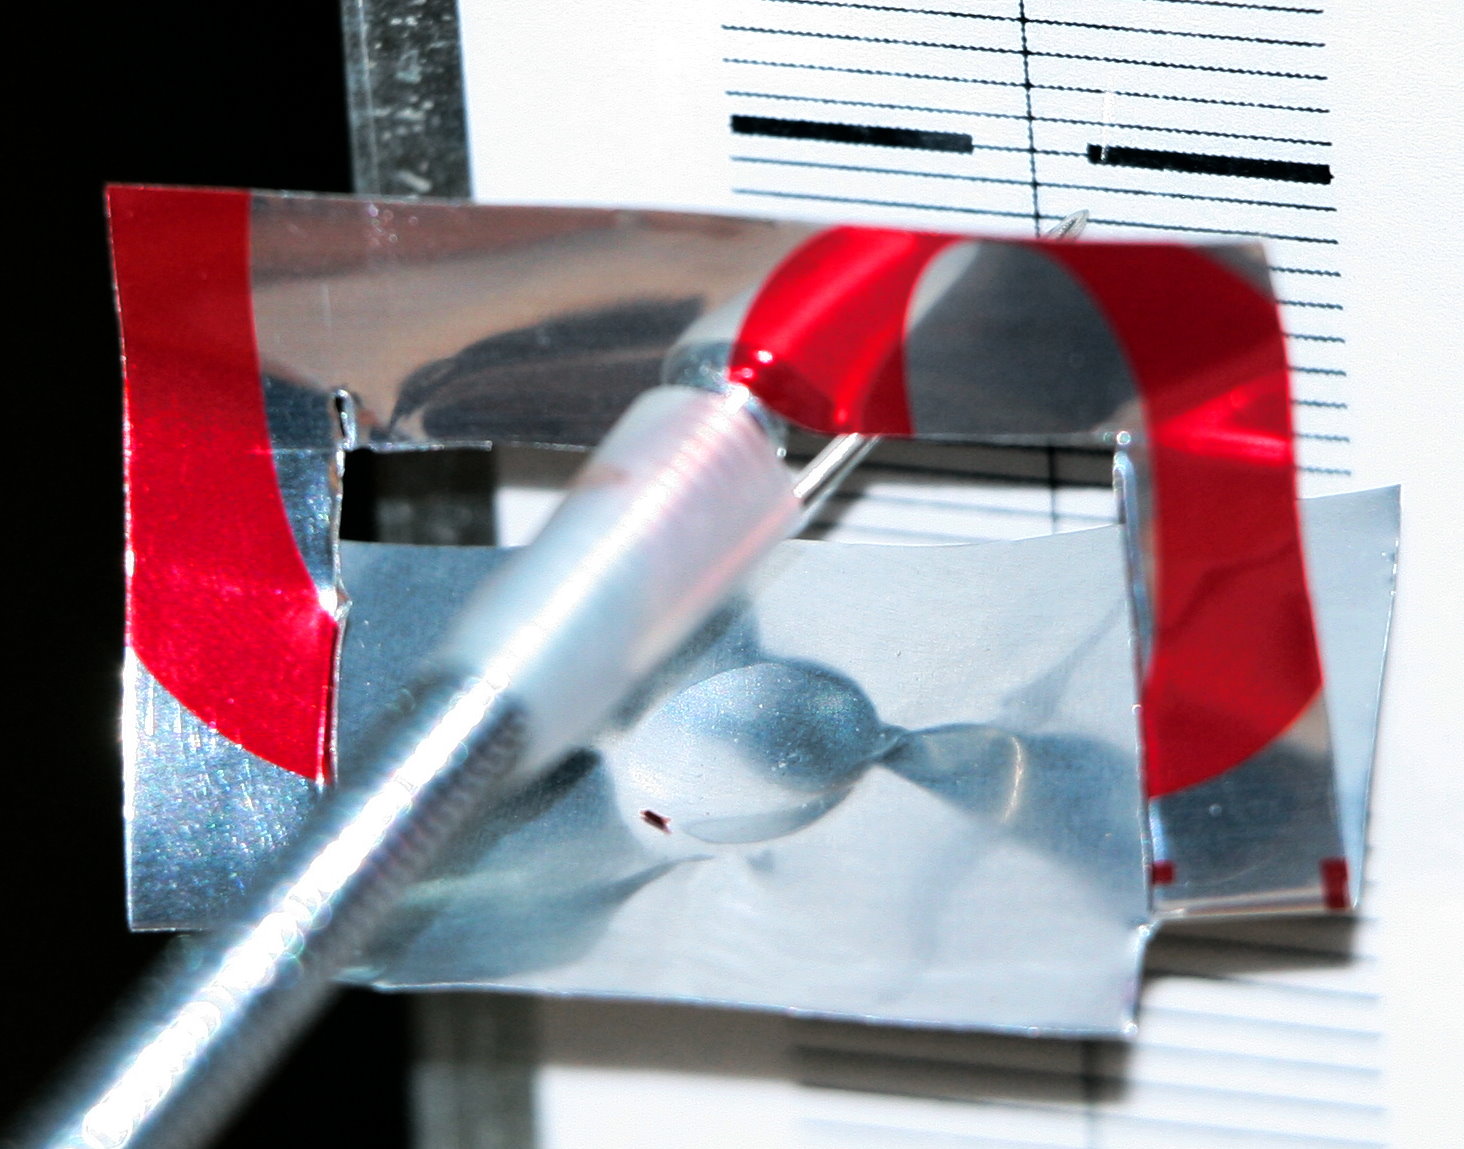
Click on photo for a larger picture Before we place the second pan on the other end of the rod, we tape a needle to the rod to act as an indicator. Leave a few threads untaped at the end so the pan can rest on the last one and not touch any tape.
Click on photo for a larger picture Click on the scale above to get the large version, and print that out on a printer. http://sci-toys.com/scitoys/scitoys/mathematics/microgram_balance/balance.html Glue or tape the scale to a block of wood, a soda can, or some other convenient brick-like object, and rest the scale next to the needle point. Now balance the scale by adjusting the hex nuts at the end. In general, I like to move them towards the center until the needle points to the center of the scale.
Using the Microgram Balance
If you look closely at the photo of the pan with the needle, you can see a tiny piece of copper wire sitting in the pan. The wire is 30 gauge copper wire, and it is one millimeter long. The weight of this tiny speck of wire is pulling the needle down almost two markings down from the center line. It is easy to see that you could make an even finer ruling on the paper, and measure very small variations in weight. It takes 3287 feet of the 30 gauge copper wire to make a pound. That's 1,001,877.6 millimeters of wire. One millimeter thus weighs about 450 micrograms. If you print out a fine ruling for the scale that has 50 lines in the space where mine has two lines, you can measure weights down to 10 micrograms. If you have a set of calibrated weights, you can balance the scale, and then add known weights to one pan, and the unknown mass to the other, and get a weight that is accurate to whatever accuracy your known weights are (up to about 10 micrograms). The scale is somewhat sensitive to drafts, but not so much that it needs to be covered. People walking by will cause it to oscillate, but it will settle down when they have passed. Next: A Computer Controlled Radio Transmitter Del.icio.us- Science Toys
- Magnetism
- Electromagnetism
- Electrochemistry
- Radio
- Thermodynamics
- Aerodynamics
- Light and optics
- Simple laser communicator
- Make your own 3D pictures
- Making permanent rainbows.
- A solar powered marshmallow roaster
- Make a spectroscope from a CD.
- The impossible kaleidoscope
- Make a solar hotdog cooker
- Exploring invisible light
- A high resolution spectrograph.
- Time-lapse photography.
- High speed photography.
- Stacking photos for high depth of field.
- Biology
- Mathematics
- Computers and Electronics
Some of my other web sites:

Send mail to Simon Quellen Field via [email protected]