So we have just put a lot of work into building a thermometer. Big deal. You can buy one for a dollar at a drug store.
But how about a thermometer you can check from anywhere in the world, over the Internet?
Our tiny computer is connected by a USB cable to a computer that can access the Internet. Why not have a web page running on the larger computer that can display the data from the tiny one?
Doing that is fairly simple, once all the requirements are met. Those requirements are:
- The host computer is running a web server
- The host computer has the language PHP installed (later we will play with other languages)
- The host computer has the PHP extension DIO installed (to talk to the tiny computer)
Most likely, your computer does not yet meet all of these requirements. But we will fix that.
The first two steps are installing a web server with PHP. We can do them both at the same time by downloading and installing the free software package XAMPP. It runs on Windows, OS X, and Linux, and chances are your computer is running one of these operating systems. Take a few minutes to download and install XAMPP on your computer, if it isn't already running a web server. If your computer is already running a web server, but is not running PHP, you can download and install PHP as a separate package.
That takes care of requirements 1 and 2. Right out of the box, PHP is not able to talk to the tiny computer over the USB serial cable. It needs help, in the form of the Direct Input/Output functions in the DIO extension.
Download and install DIO into the PHP extension directory. On my Windows computer, that is located in the C:\xampp\php\ext directory. On your computer, it will be wherever you installed XAMPP or PHP. To make PHP use the extension, you need to edit the php.ini file, and add the line:
extension=php_dio.dll
Then, to make PHP wake up and notice the new extension, we need to stop and restart the web browser. We can use the XAMPP control panel to do that, or we can just reboot the computer.
To test that the web server is up and running, bring up a browser and type "http://localhost" into the URL bar. You should get a web page. If you have just installed XAMPP, you will probably see a congratulation page. You can also try "http://localhost/xampp".
Now we are ready for our first PHP program. Copy the code below, and paste it into a file called temperature.php in the directory "htdocs" where XAMPP was installed. On my Windows computer, that is C:\xampp\htdocs\temperature.php.
<?php
exec('mode com3: baud=115200 data=8 stop=1 parity=n');
$fd = dio_open( "com3:", O_RDWR );
if( $fd )
{
$count = 0;
for( $x = 0; $x < 1000; $x++ )
{
$data = dio_read( $fd, 1 );
echo $data;
if( $data == "\n" || $data == '\r' )
{
if( $count++ > 0 )
{
break;
}
}
}
dio_close( $fd );
}
else
print( "Can't open com3:" );
?>
You will have to edit the file, and change all three mentions of "COM3" to whatever port your tiny computer is listening to (you can find out by using the Tools|Port menu item in the Arduino IDE).
In the Arduino IDE, paste this program into the IDE, and upload it. It is a slightly modified version of out calibrated thermometer program.
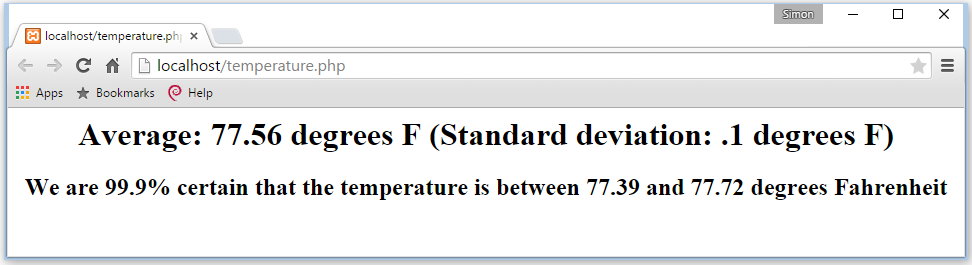
Now that the tiny computer has the program running, we need to exit out of the Arduino IDE, so that the serial port is free for other programs to use. Once there is no IDE hogging the serial port, we can bring up a browser and type "http://localhost/temperature.php" into the URL bar.
Here is what my browser looked like when I did that:
Now of course you should go back into the Arduino IDE and modify the program so that it uses your calibration constant instead of mine, so the temperature is accurate.