Next to the objective lens, the substage condenser is the most important part of the microscope's optical system. It allows the objectives to operate at their highest resolution, and is also essential for many types of contrast enhancement techniques.
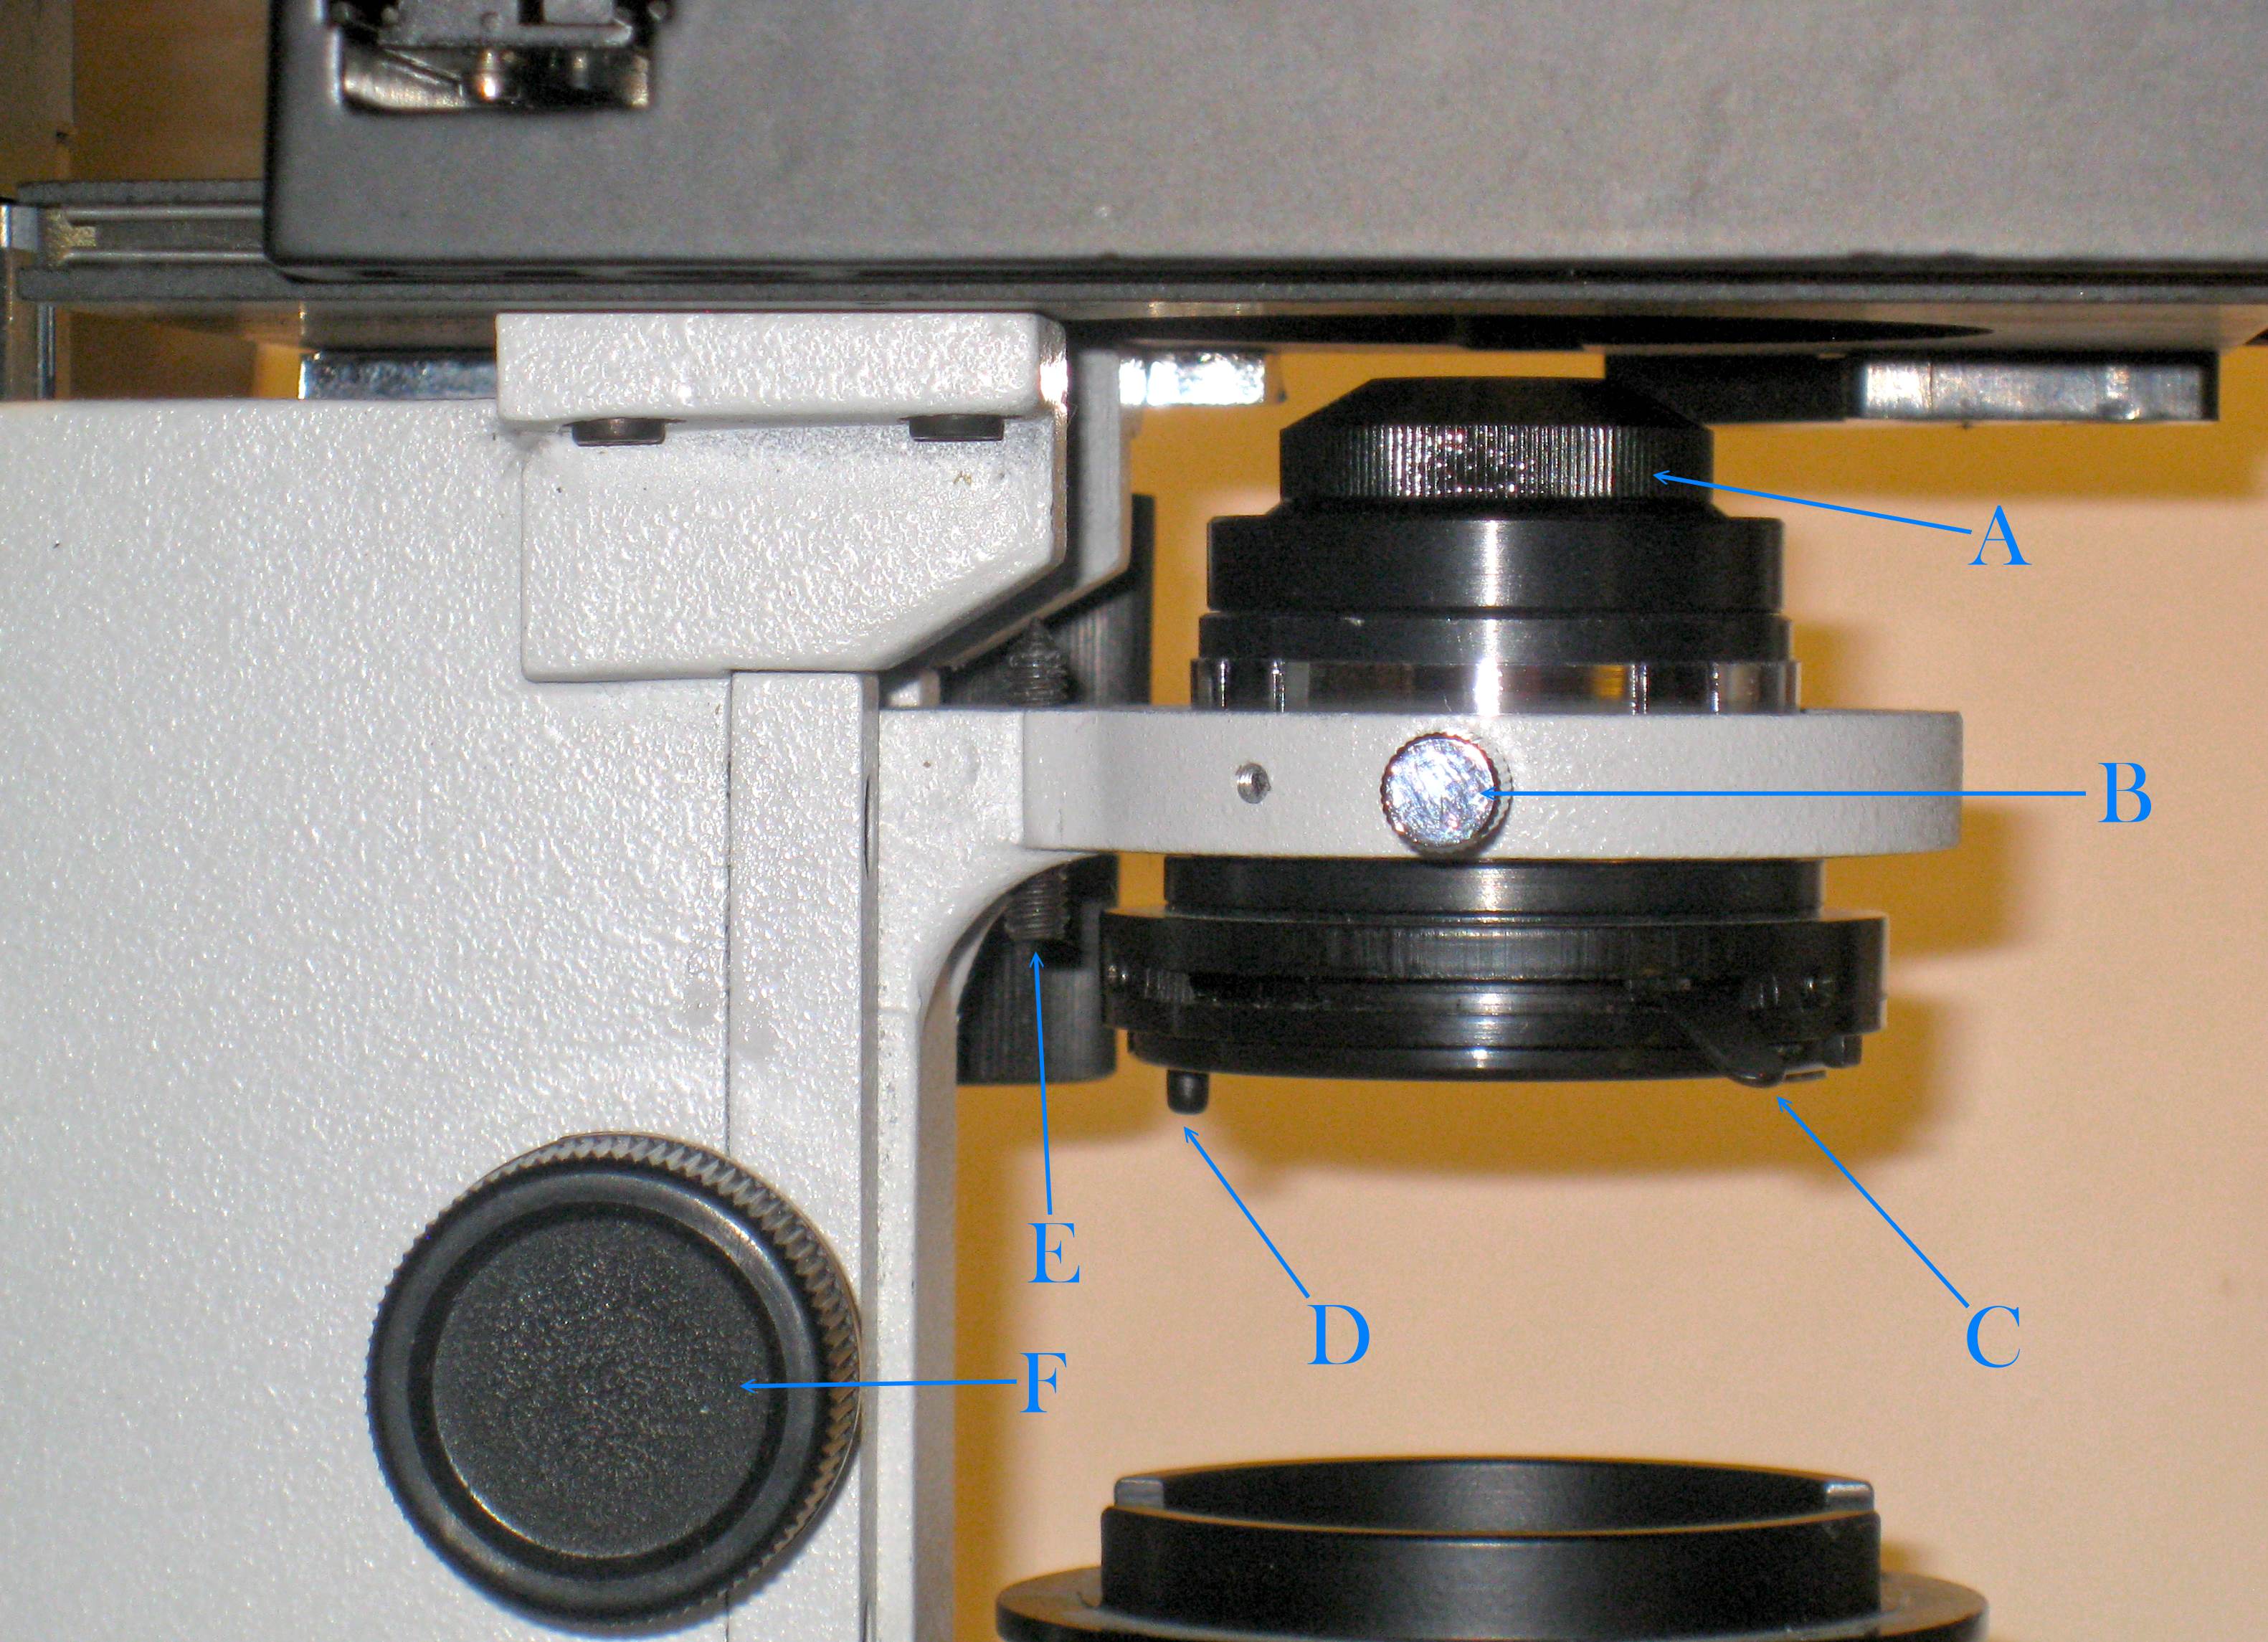
The parts of interest here are:
- A: The removable top lens (Abbe condenser)
- B: The condenser set screw
- C: The aperture diaphragm control
- D: The filter stop
- E: The motion limiting screw
- F: The condenser focus control knob
By far the most common type of substage condenser is the Abbe condenser. It has a removable top lens, so that low powers can use the simple lens, and high power objectives can use both the simple and removable lenses. For most work, the low powers can be used with the removable lens in place, since they are generally used for positioning and focusing before switching to the higher power objectives.
How the substage condenser is used will make a difference in the amount of detail that can be seen in an image. The condenser should be adjusted to match the numerical aperture of the objective. This is done by closing down the aperture diaphragm to the right diameter. Some condensers will have markings on the side to indicate what the numerical aperture is, others will depend on the judgement of the user.
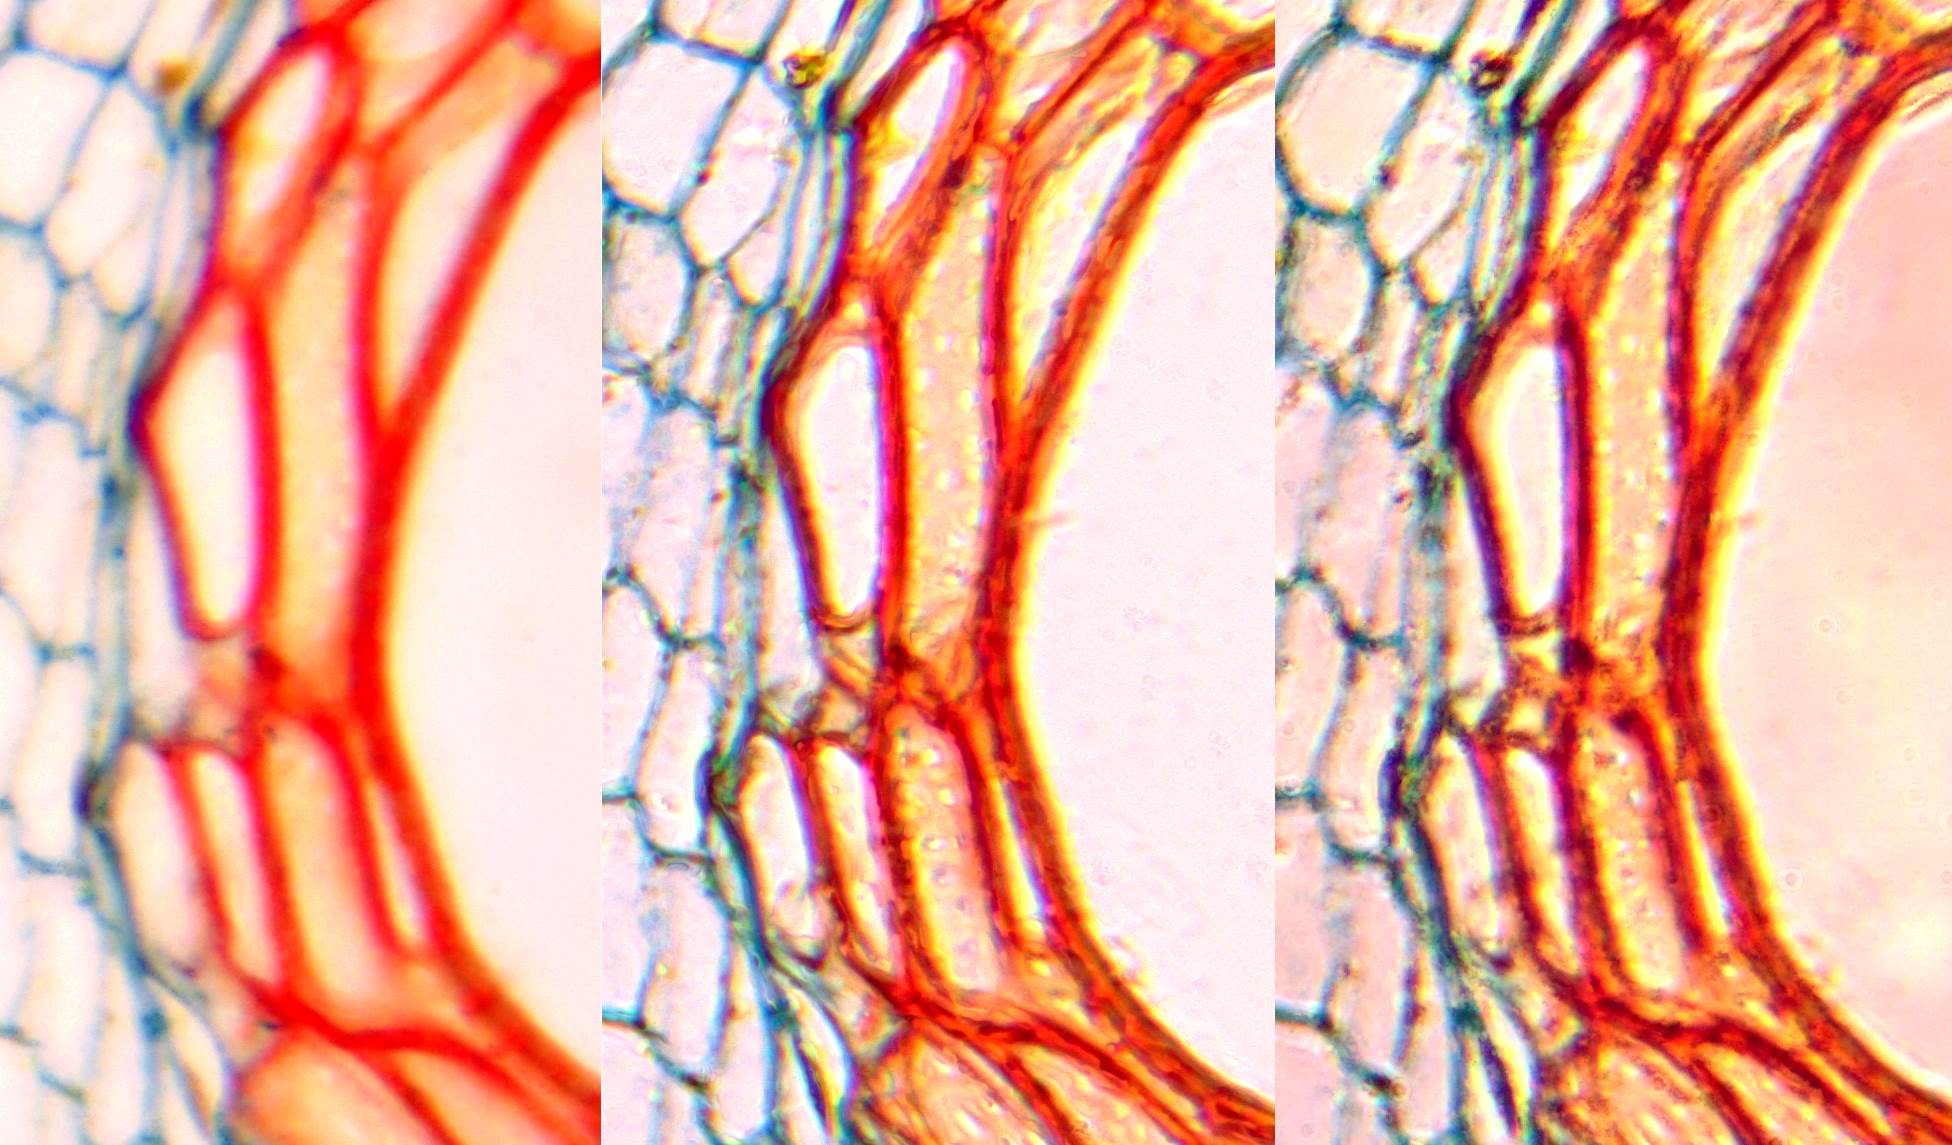
The composite photo shown above shows the effect of changing the condenser aperture. If the condenser aperture is too wide, the numerical aperture will be too high, and light that is scattered from parts of the specimen that are out of view will enter the objective lens. This extra light will wash out details, and reduce the contrast. You can see the effect in the image on the left.
As you stop down the aperture, at some point the numerical aperture of the condenser will match the numerical aperture of the objective lens, and you will get the best resolution, and some decent contrast. This is demonstrated in the center image in the photo above.
Continuing to stop down the condenser will reduce its numerical aperture to something less than that of the objective lens. This means that the cone of light from the condenser will not completely fill the objective lens. The objective lens with therefore not get the benefit of its full numerical aperture, and the resolution will suffer. The contrast may continue to increase, so you need to carefully judge the resolution instead of relying on increasing contrast. The composite photo below shows a closeup of the first photo, showing the difference in resolution as we look at how fine details are more visible in the center image than the ones on the left or right.

The other condenser control is the focus knob. The condenser provides a cone of light to illuminate the specimen. Ideally, the cone of light will exactly fill the opening of the objective lens, no more and no less. Focusing the condenser allows you to get the most light possible while still keeping the circle of light that hits the objective lens the right size.
The photo below shows the effect of changing the focus of the condenser.
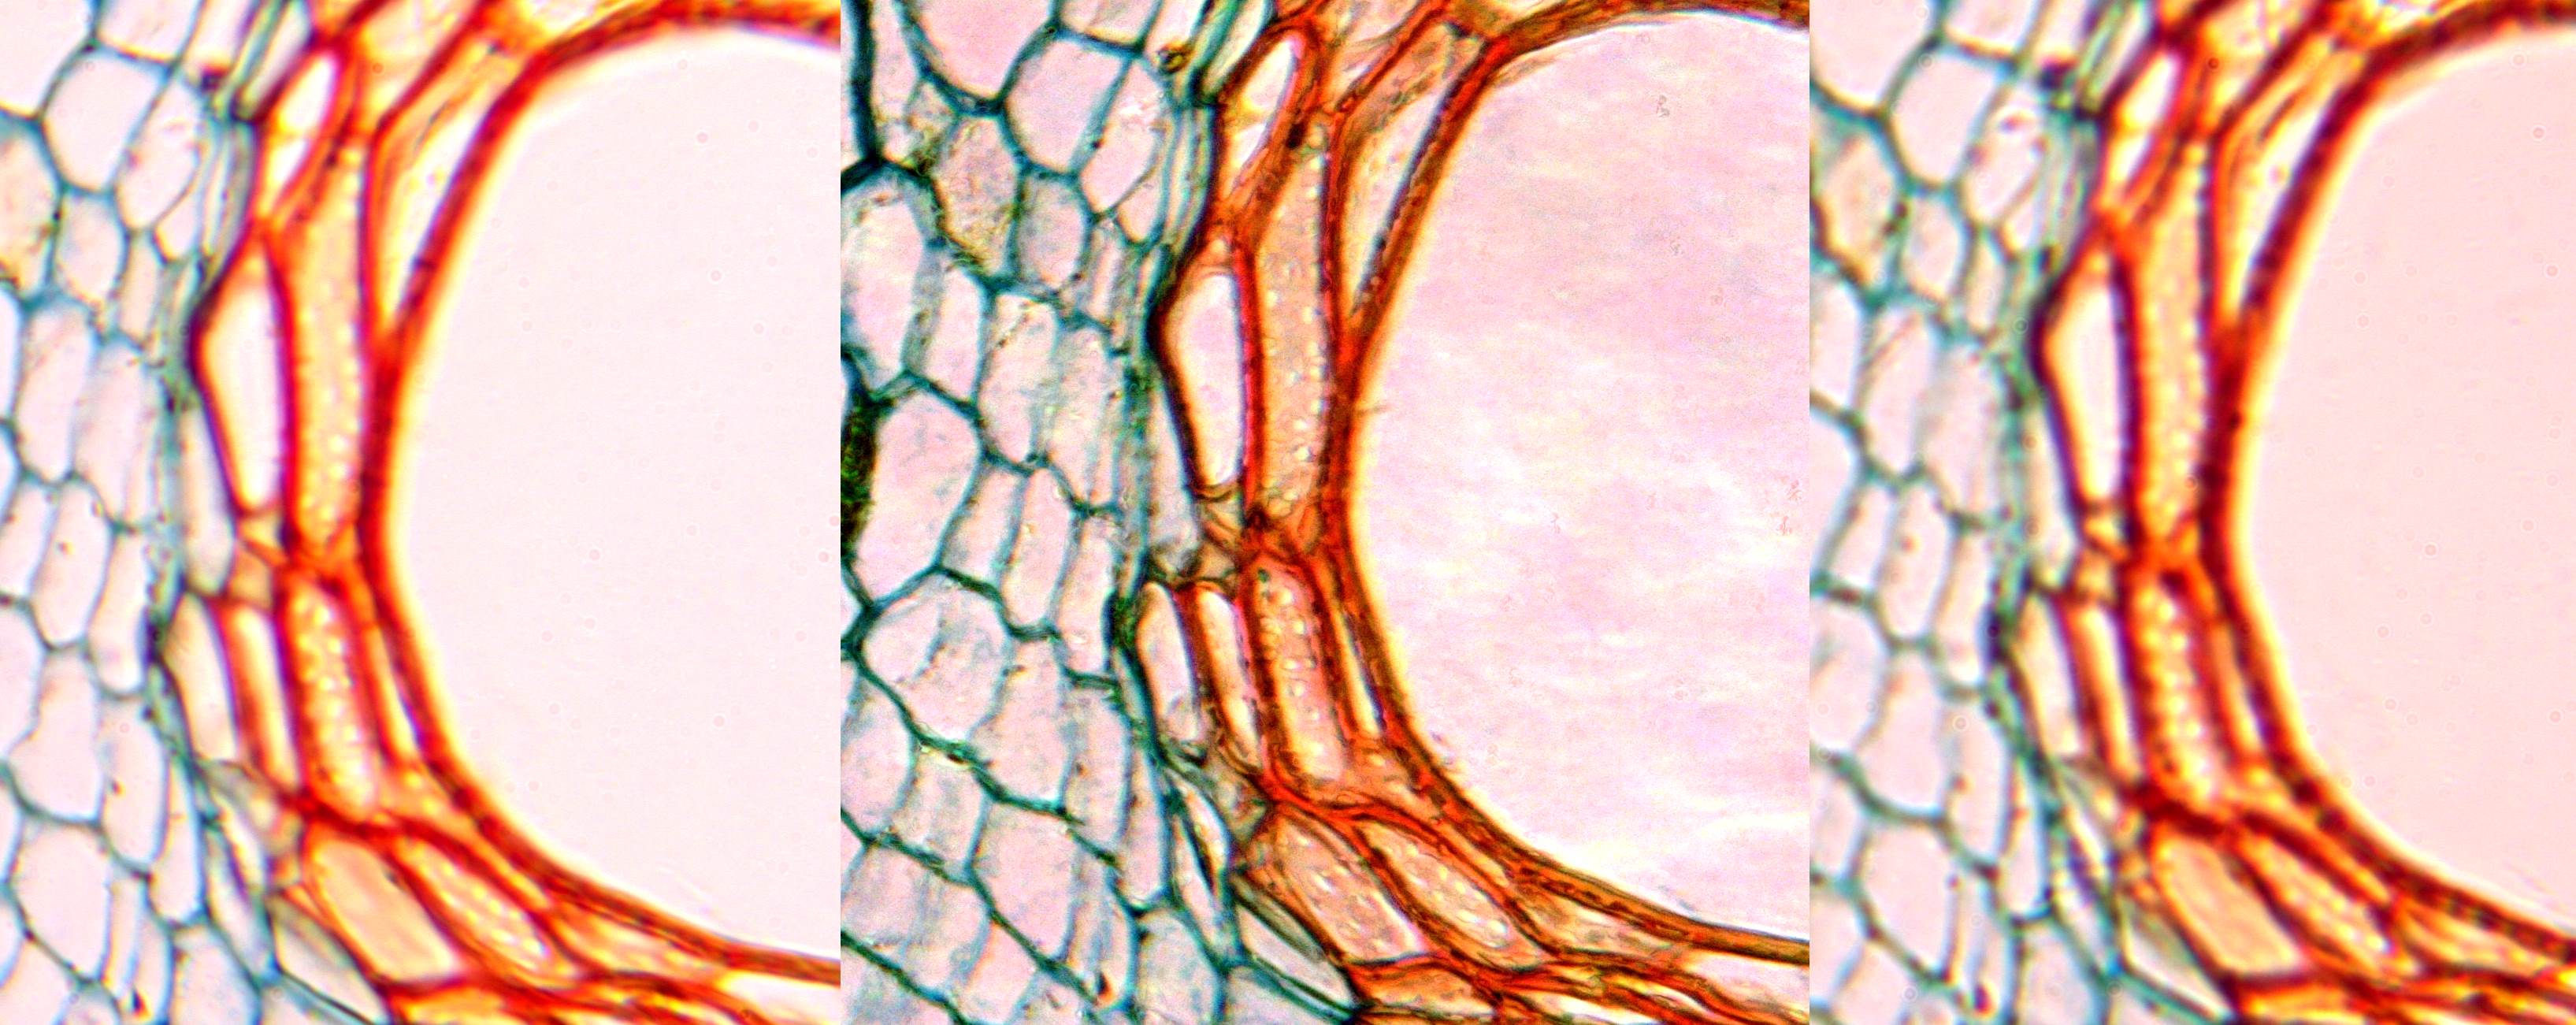
On the left, the condenser was brought as close to the slide as possible. On the right, the condenser was withdrawn as far as possible from the slide. In the center, the condenser was focused close to its optimal setting.
To find the optimal setting on a microscope that does not use expensive Kohler illumination, I find it useful to start with a low power objective, and focus on a simple specimen slide that has lots of free open spaces in it. Then I adjust the condenser focus until I can see the image of the ground glass diffuser on the lamp. This would be a bad setting for low powers, since the image of the roughened glass would be visible in the eyepiece. For low powers, adjust the condenser focus to just a bit closer to the slide, so the ground glass is out of focus.
For high powers, however, we leave the ground glass in focus. When we switch to the higher power objective, it will focus on the specimen, and because it has a very shallow depth of field, the ground glass will stay out of focus.
Once the condenser is focused, adjust the diaphragm diameter to get the best combination of contrast and resolution, as described above.
The condenser has another item we can play with. At the bottom is a slide-out ring that holds filters. We will discuss using filters when we look into contrast enhancing techniques.