Some wonderful things can be done once we get rid of the pesky atmosphere we live in. Feathers drop like rocks. Bells go silent. Water boils at room temperature. Balloons inflate themselves. Frozen foods dry out but keep their shape.
Sometimes all you need is a little bit of vacuum to help dry something out, or move a liquid through a tube, or remove gasses from a liquid.
In this project, we will make a vacuum pump from common inexpensive plumbing parts. We will then use it to inflate marshmallows to twice their size, remove the air from them, and then shrink them down to a wrinkled, rubbery candy with the density of a gumdrop.
If all of the materials are at hand, the pump goes together in about a half hour.
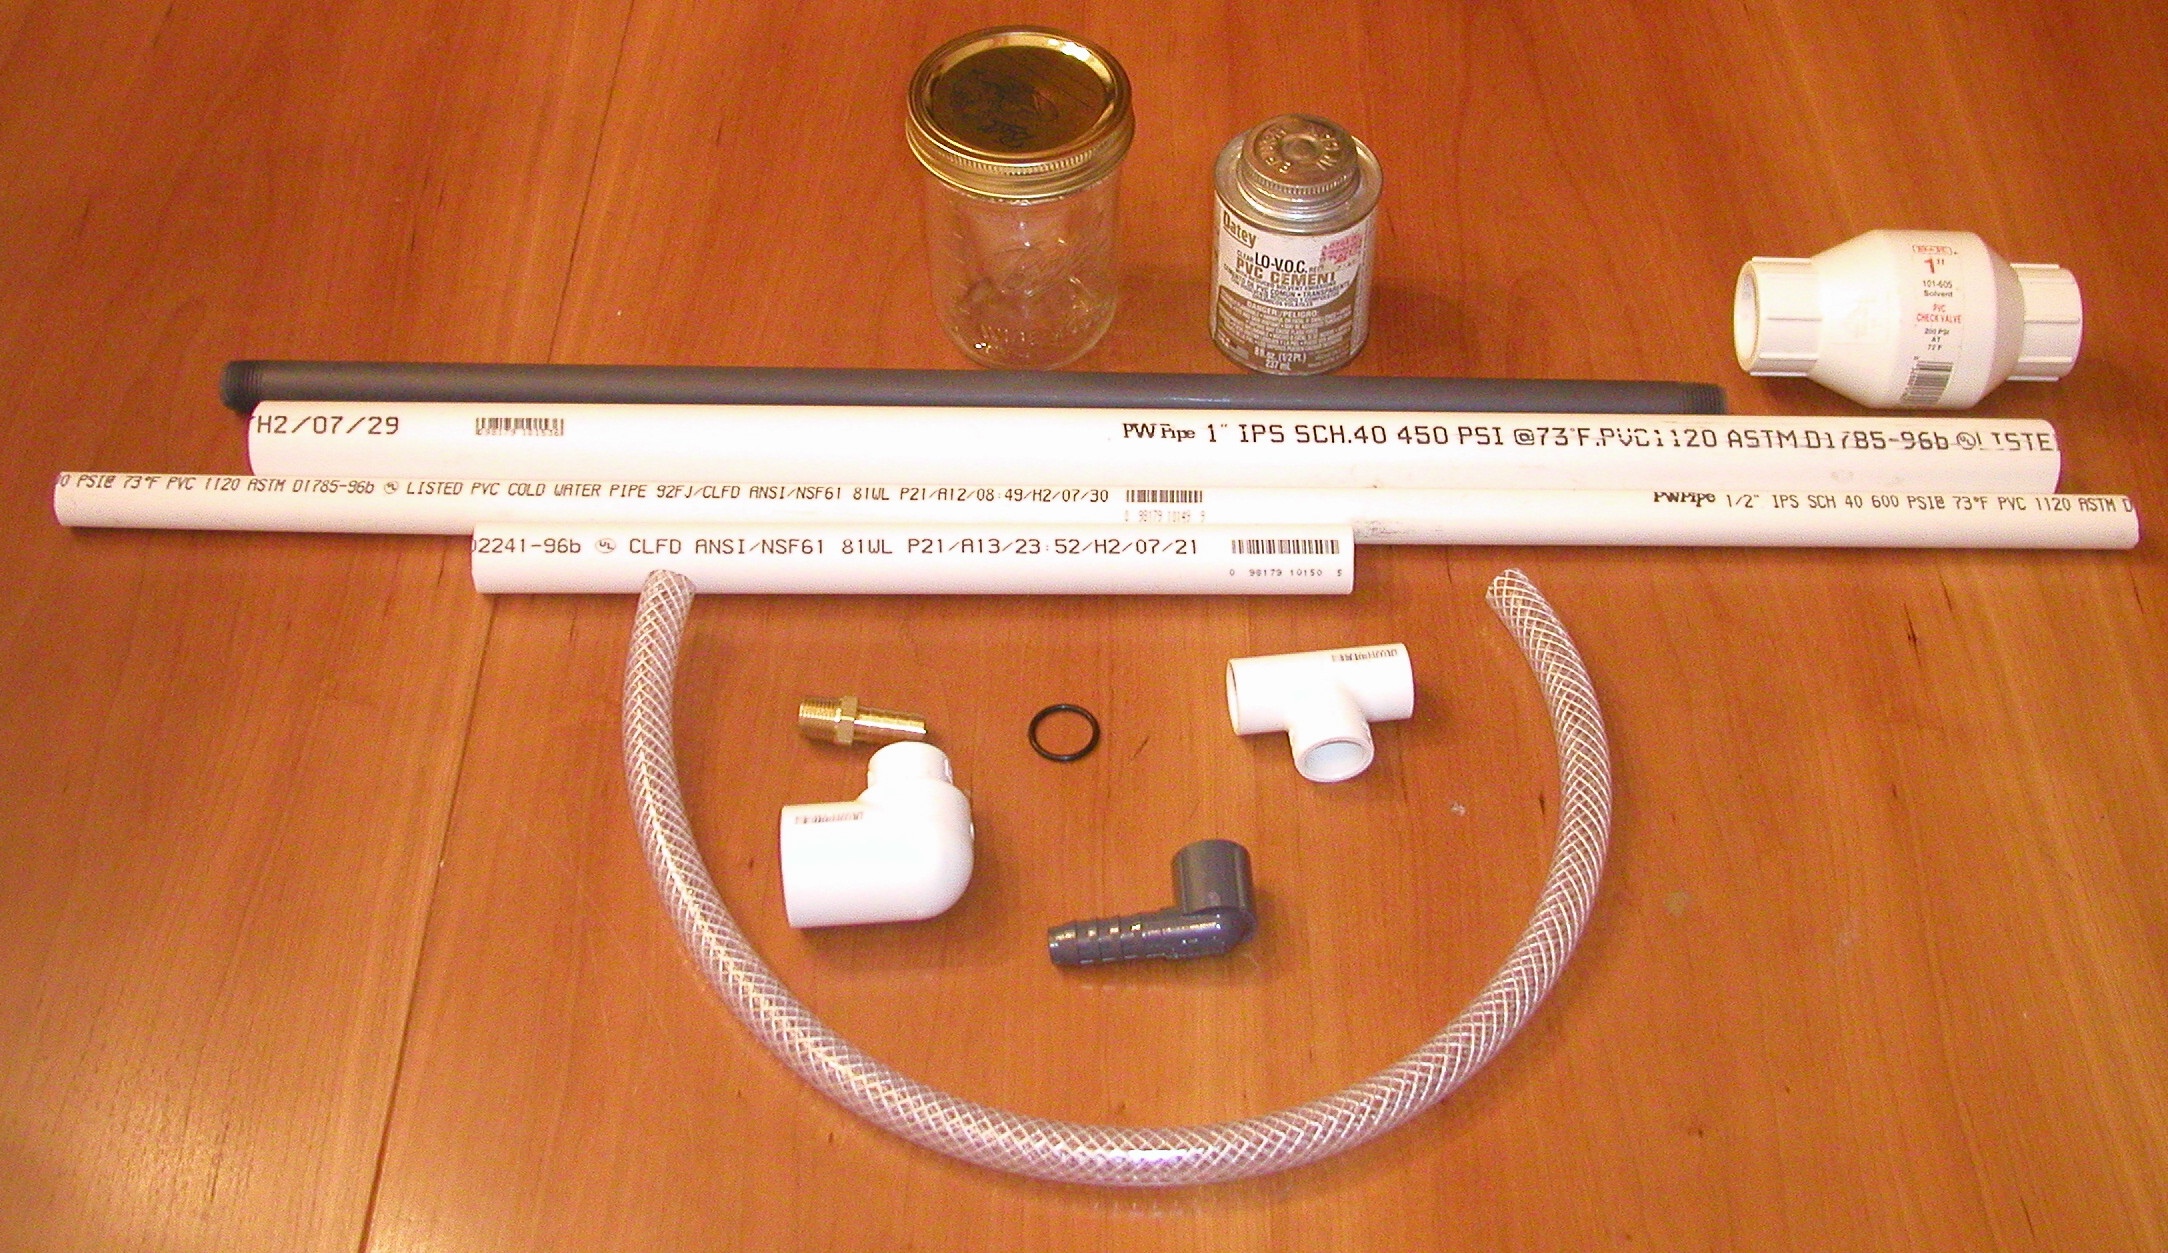
What you need
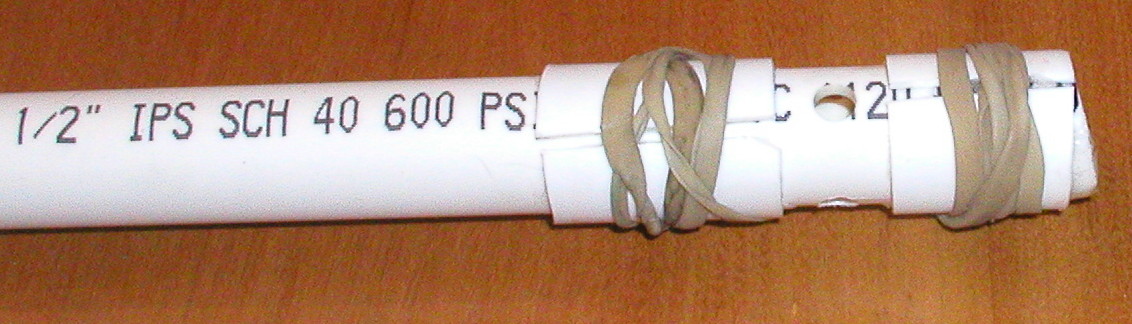
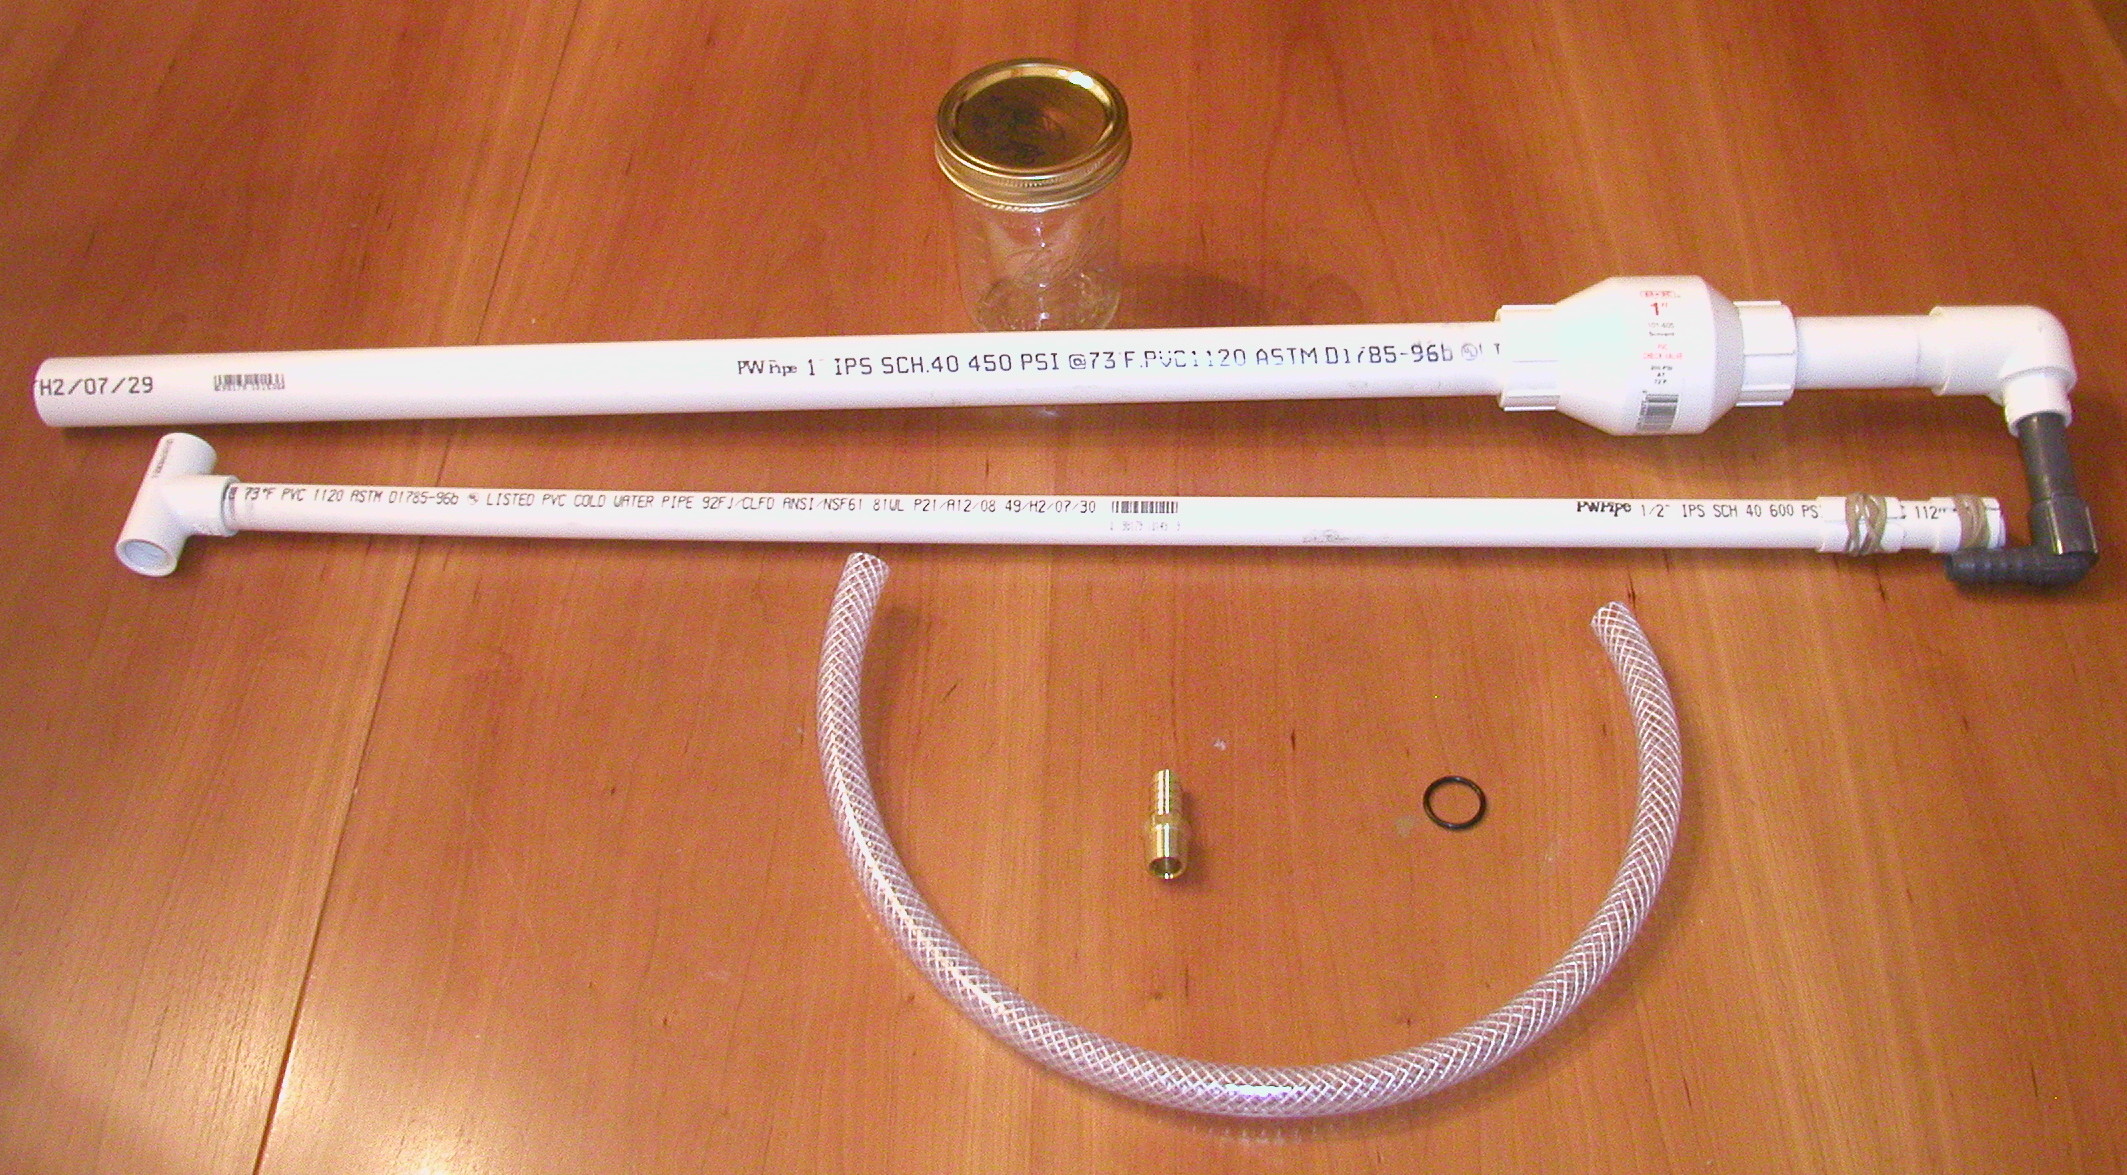
- Four feet of 1 inch diameter Schedule 40 PVC pipe.
- Four feet of ½ inch diameter Schedule 40 PVC pipe.
- One foot of ¾ inch diameter Schedule 80 (thin wall) PVC pipe.
- One 1 inch diameter PVC check valve
- One ½ inch diameter PVC "T" fitting
- One foot (or so) of clear vinyl hose
- One ½ barb fitting to match hose
- One foot of ½ PVC to fit barb fitting
- One elbow to mate 1 inch PVC pipe to ½ inch
- One rubber "O" ring. This must fit snugly inside the 1 inch pipe, but loosly over the ½ inch pipe. Some experimenting with different sizes may be called for.
- One can of clear PVC cement
- One canning jar to act as our "bell jar"
- One brass barb fitting to match hose. This can be plastic but you will have to use epoxy instead of solder to attach it to the jar lid
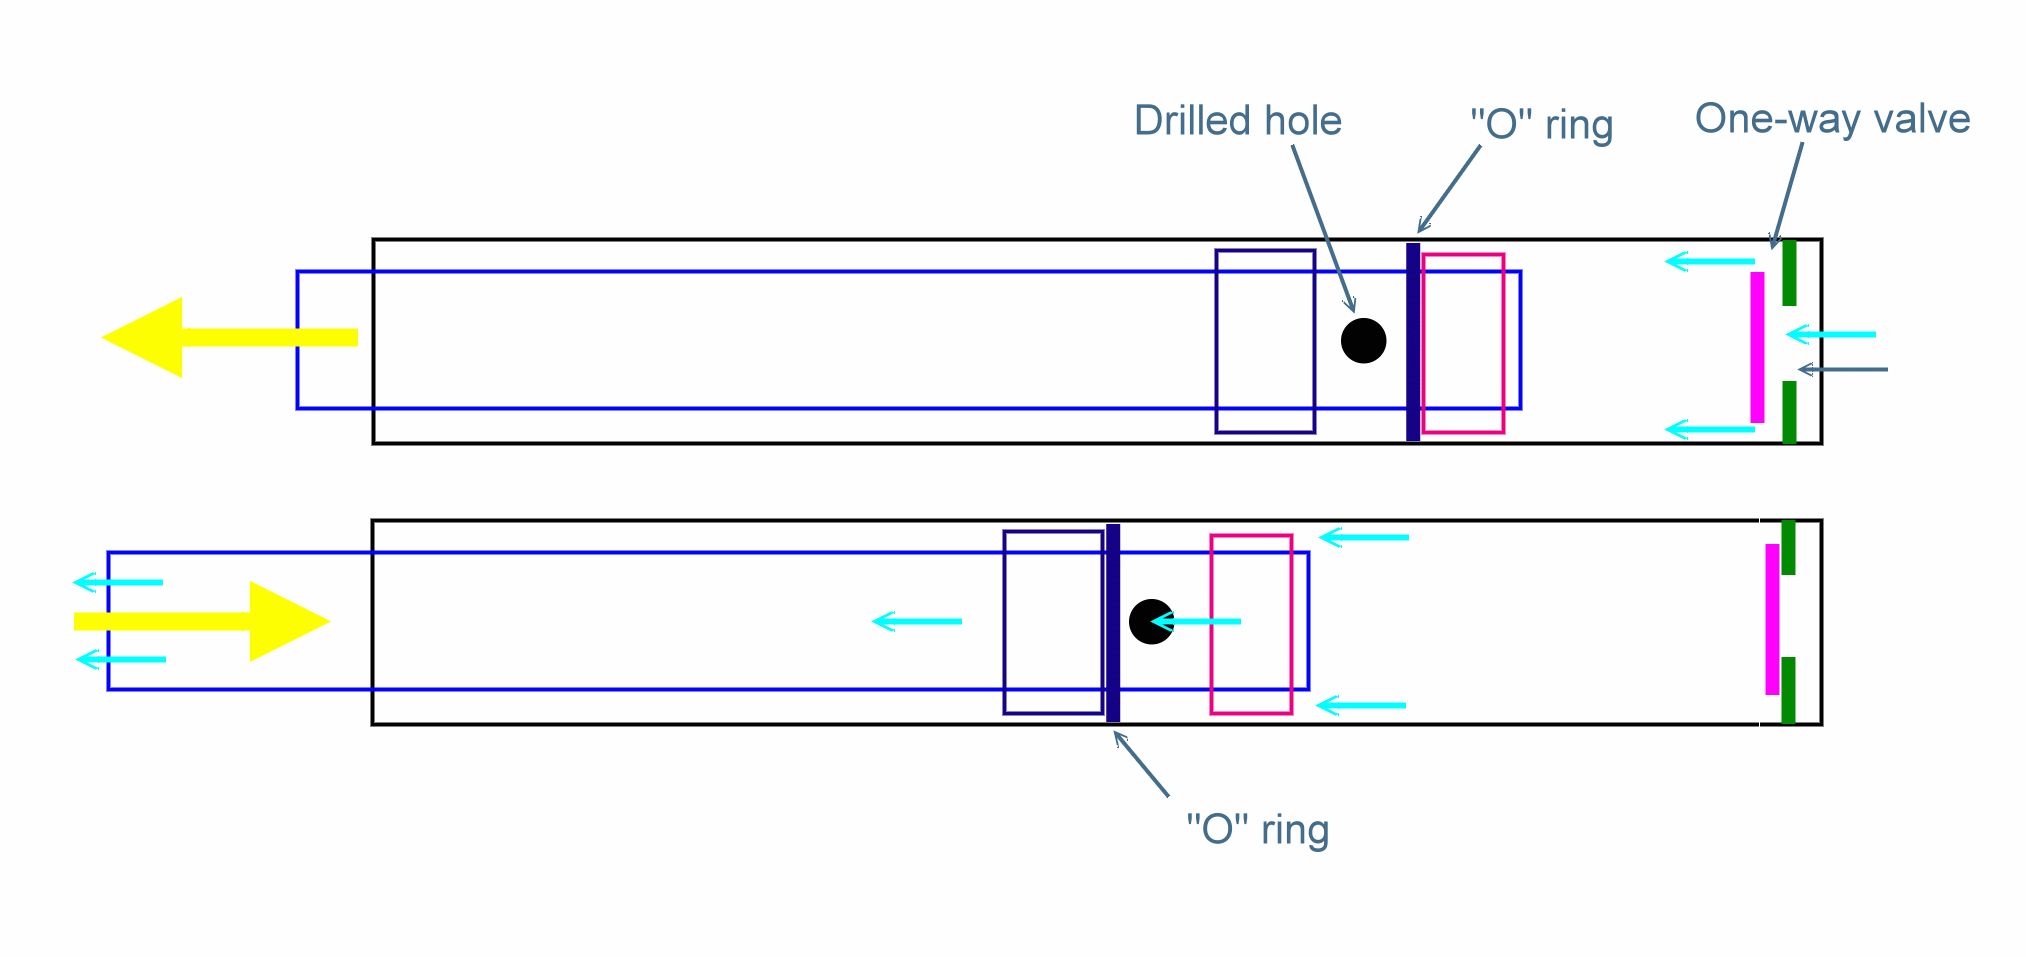
To see how the pump works, look at the drawing below.
The pump consists of a small diameter pipe (called the piston) inserted into a larger diameter pipe (called the cylinder).
The drawing shows the pump at two points during its operation. The top drawing shows air being drawn into the pipe by pulling out the piston. The bottom drawing shows air exiting the pipe when the piston is pushed back in. At the right end of the pipe is a commercially bought one-way valve. This valve lets air into the pipe, but will not let air out of the pipe.
At the end of the piston is a home-made one-way valve.
The home-made one-way valve is made using a rubber "O" ring that slides up or down on the piston. A hole is drilled into the piston, and two "stops" are attached, so the "O" ring cannot slide past them.
When the piston is being pushed into the cylinder, the "O" ring slides back, letting the air in the cylinder exit through the drilled hole, and out through the hollow piston.
When the piston is pulled out of the cylinder, the "O" ring slides towards the stop at the end of the piston, and blocks the air from getting to the drilled hole. The right end of the piston is closed off (the pipe is sealed). The left end is open, to let the air escape.
This will all become easier to understand as you see the parts go together in the photos below.
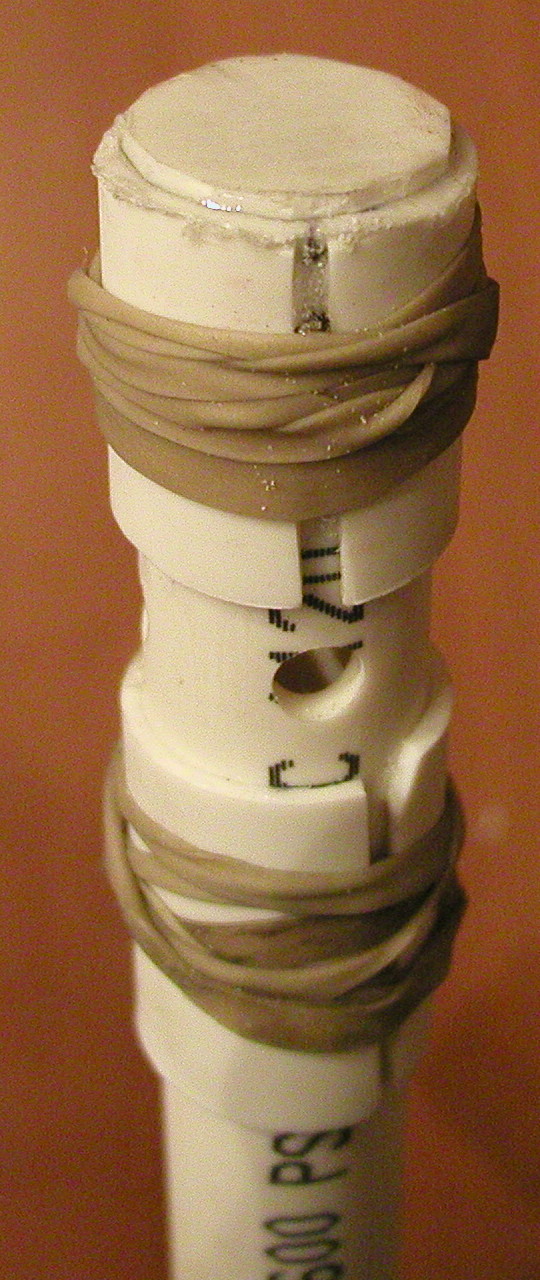
The first step is to make the piston. We start by adding the stops that keep the "O" ring from sliding. These stops are made from short pieces of the thin-walled ¾ inch tubing. We cut slots along the length of the thin-wall tuning to allow it to be compressed onto the ½ inch piston tube.
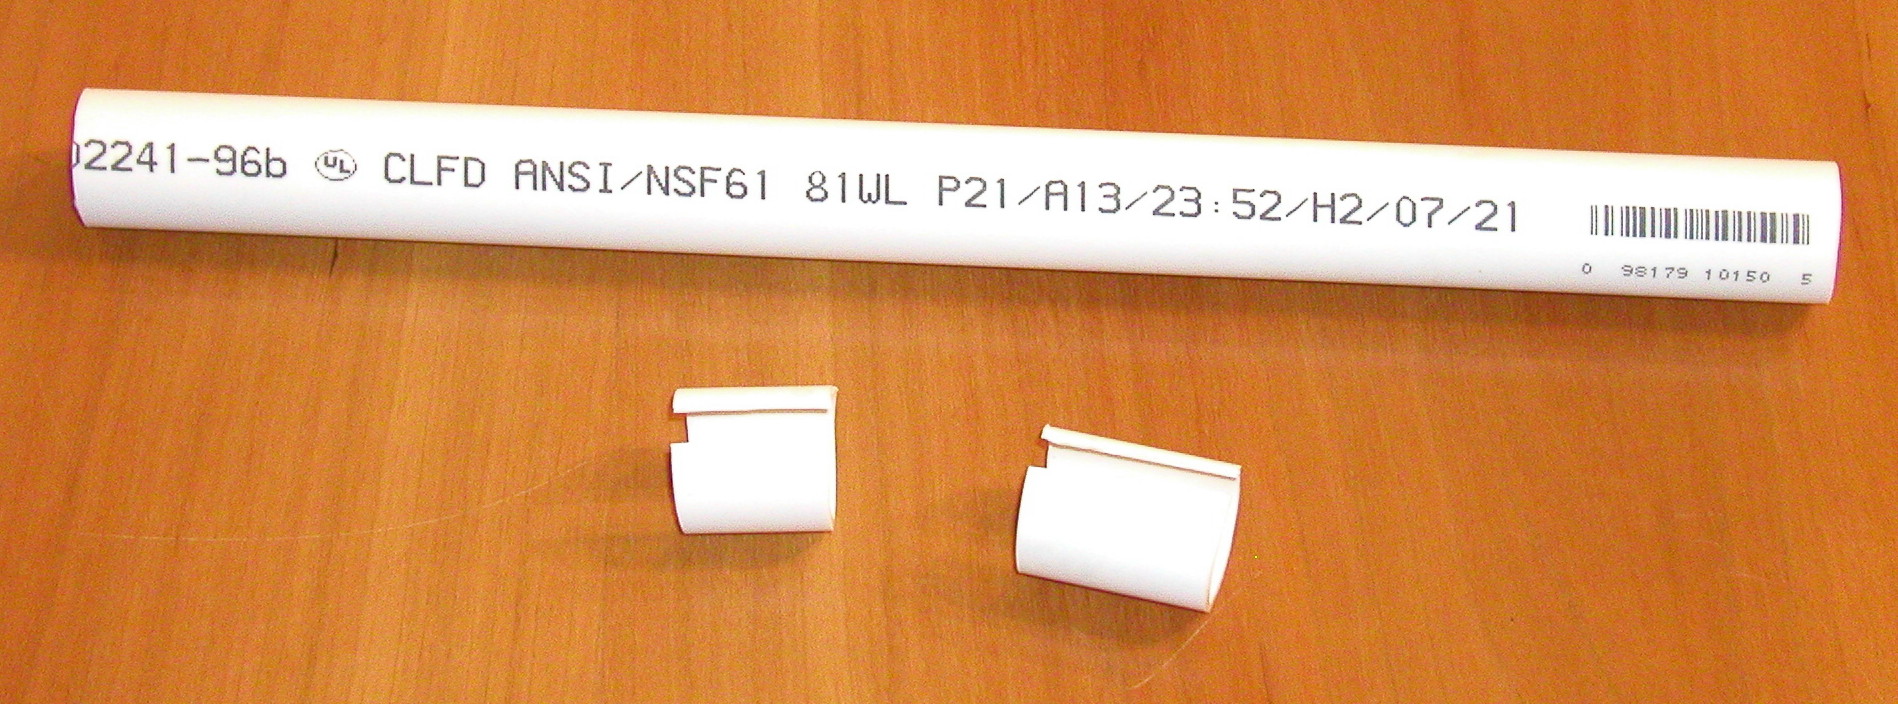
Using liberal amounts of PVC cement, we glue the stops onto the piston, compressing them into place with rubber bands. The stops should be about ¾ inches apart.
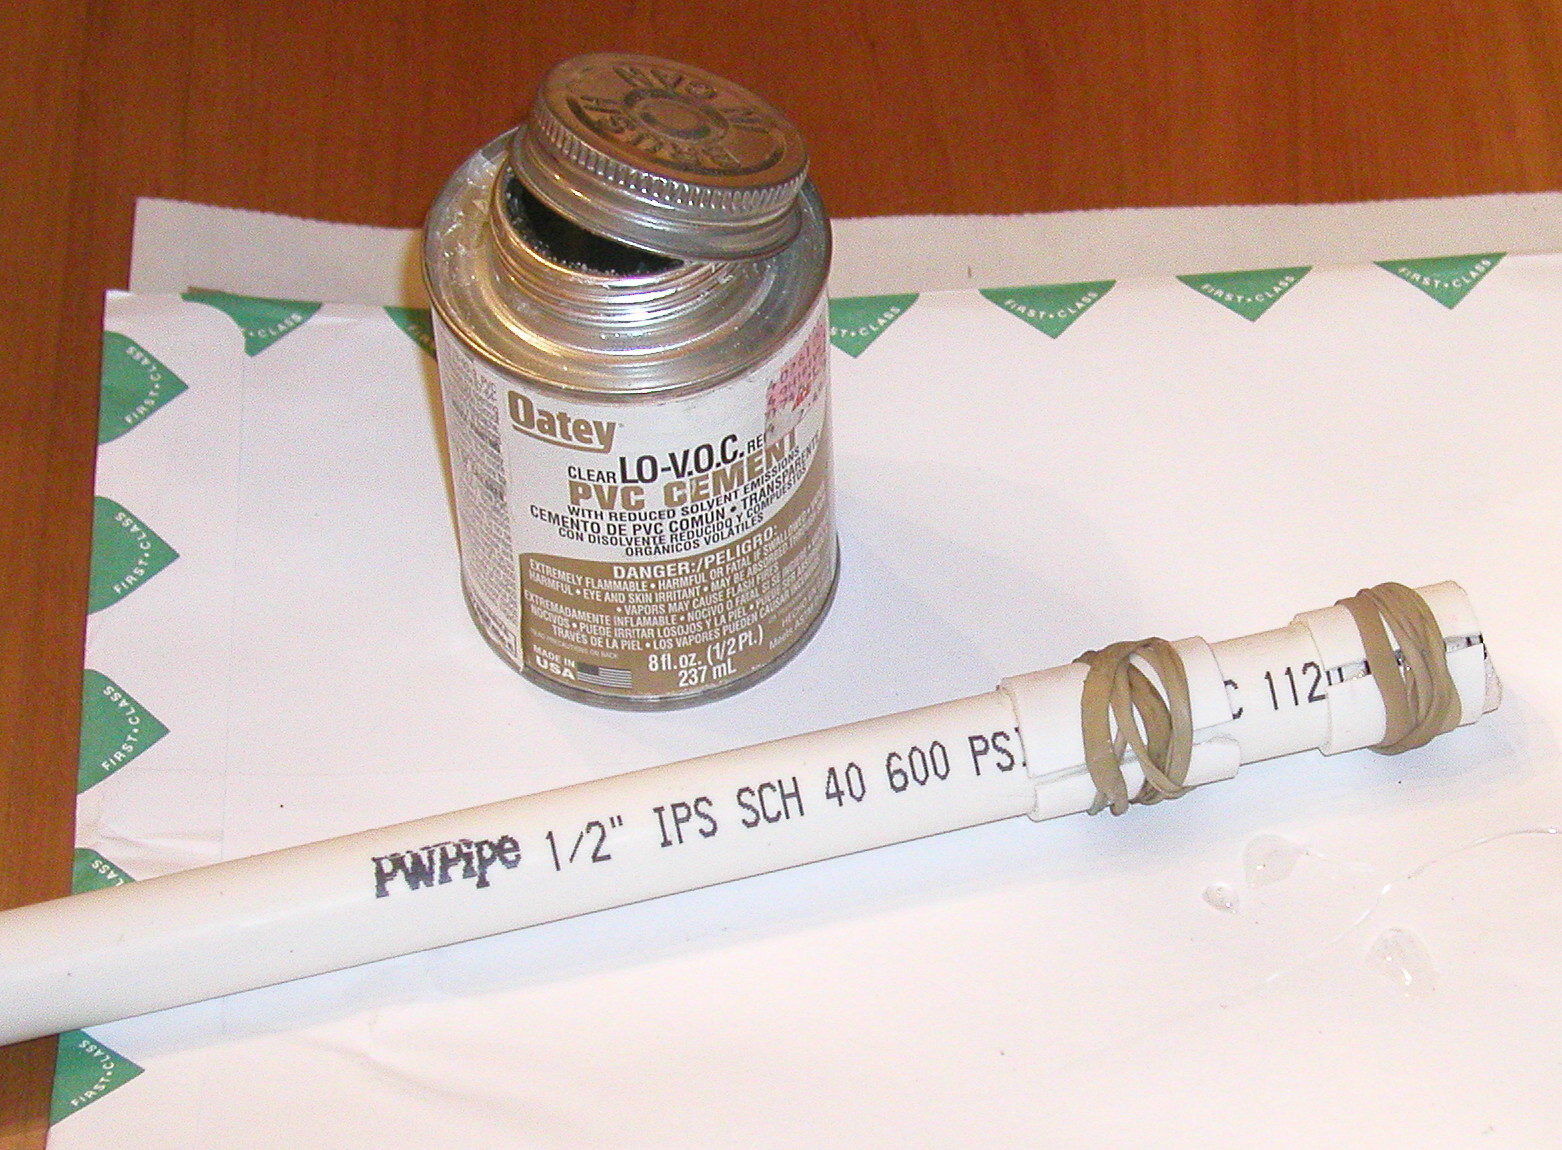
In the center of the space between the stops, we drill holes in the ½ inch pipe. Here you see we have drilled three holes, spaced at roughly equal distances around the pipe.
The photo below shows several simple steps all completed.
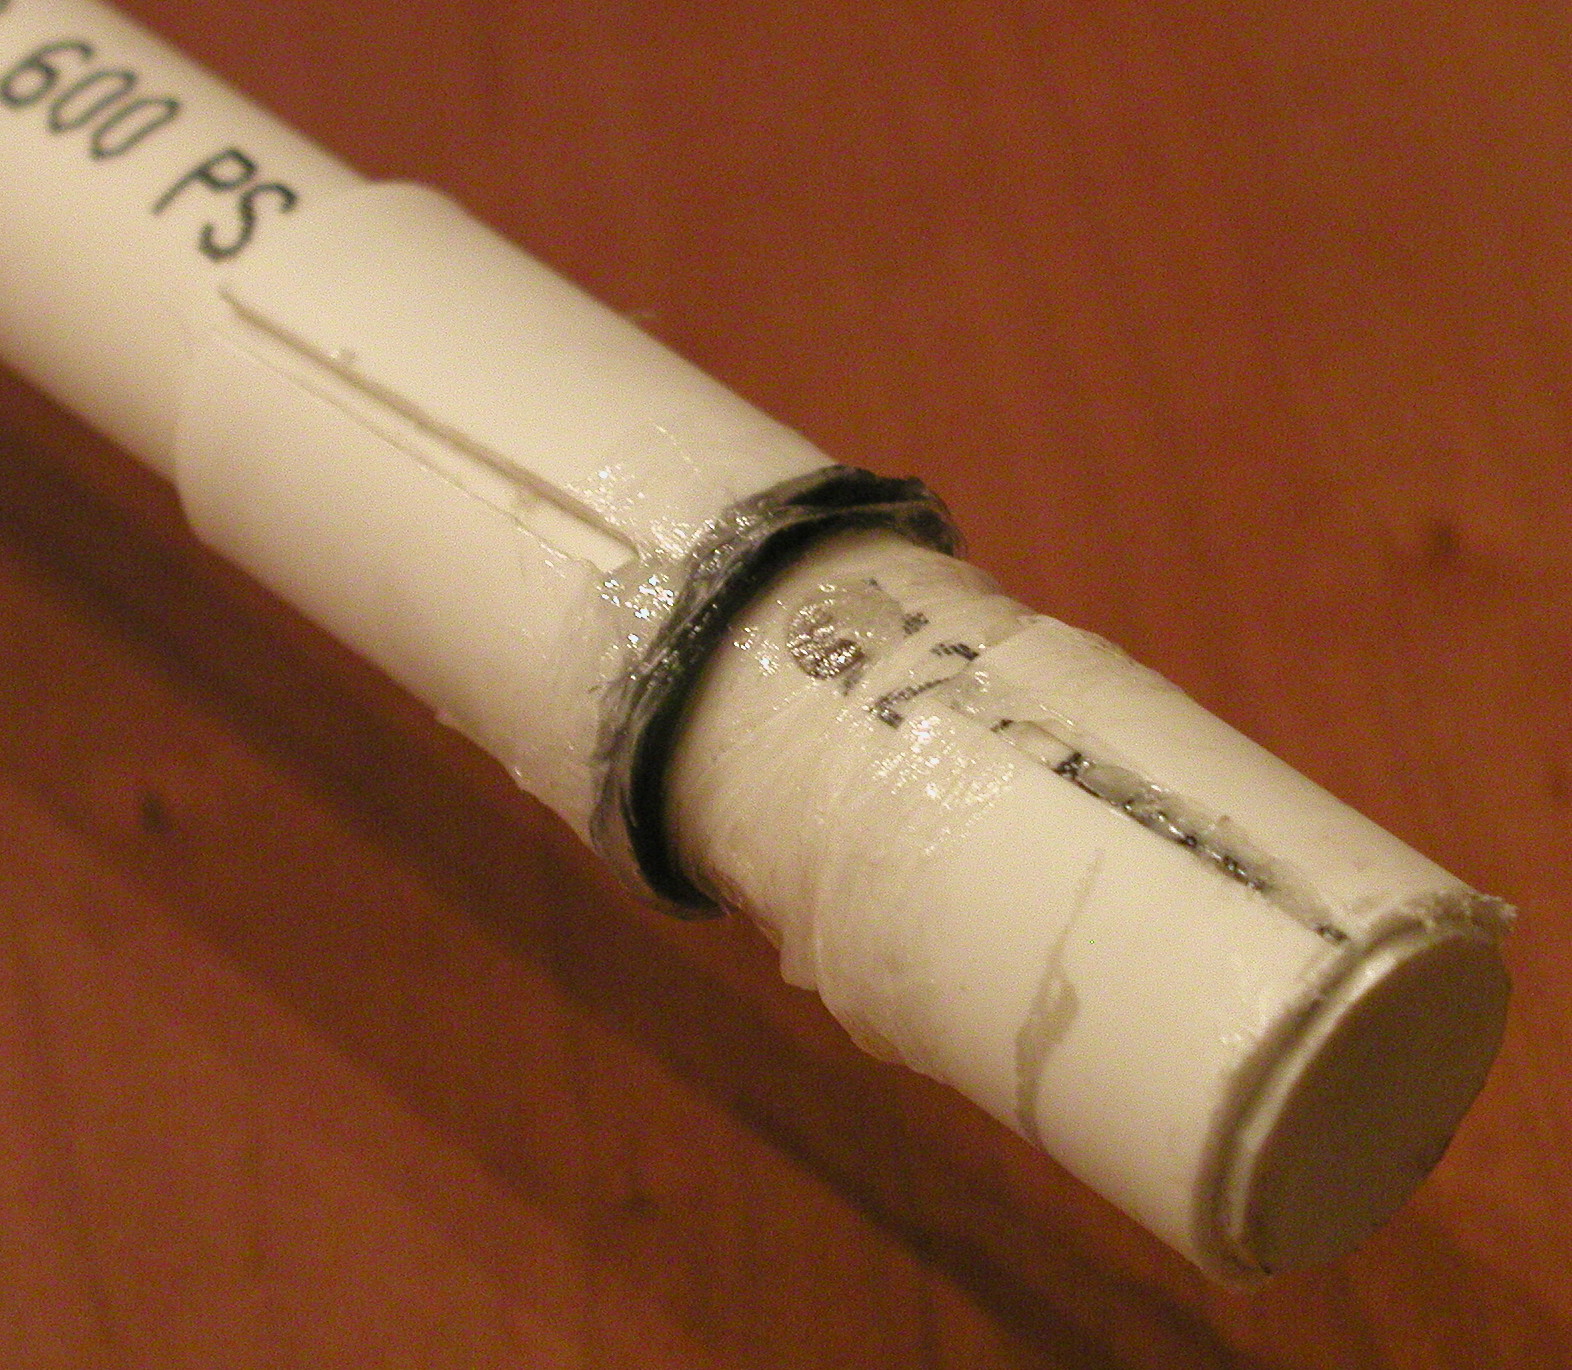
The commercial one-way valve has been cemented onto the 1 inch cylinder pipe. Make sure that the arrow on the valve is pointing towards the cylinder.
A short length of 1 inch pipe is cemented into the other end of the commercial one-way valve, and some reducing fittings are cemented to that so that we end up with a hose barb at the end. I found it convenient to use a right angle reducing fitting, followed by a gray threaded pipe, and a gray hose barb that threads onto the gray pipe. Be sure to cement any threaded parts, to ensure a vacuum tight seal.
We also cemented on a ½ inch "T" fitting onto the far left end of the piston pipe, to act as a convenient handle.
The next step is to make a thin plastic disk to close off the right end of the piston pipe.
We make the thin disk by flattening a small piece of the thin-walled ¾ inch pipe, and then cutting a circle out of it.
To flatten the pipe, cut a slot in it lengthwise, and then heat it over a stove to soften the plastic.
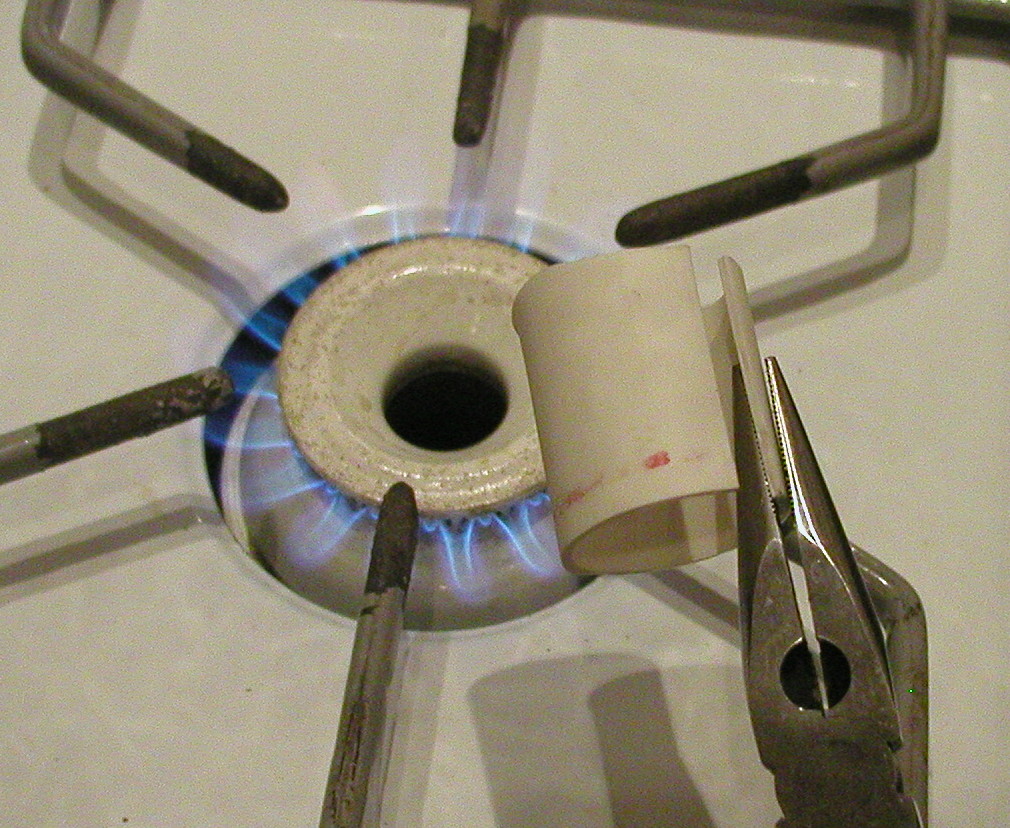
When the plastic is soft, it can be flattened by pressing it against a heat resistant surface such as a tile counter top, or concrete floor. We used pliers, but fingers inside leather gloves (to prevent being burned) will also do the trick. Placing the bottom of a drinking glass onto the plastic will flatten it and cool it at the same time.
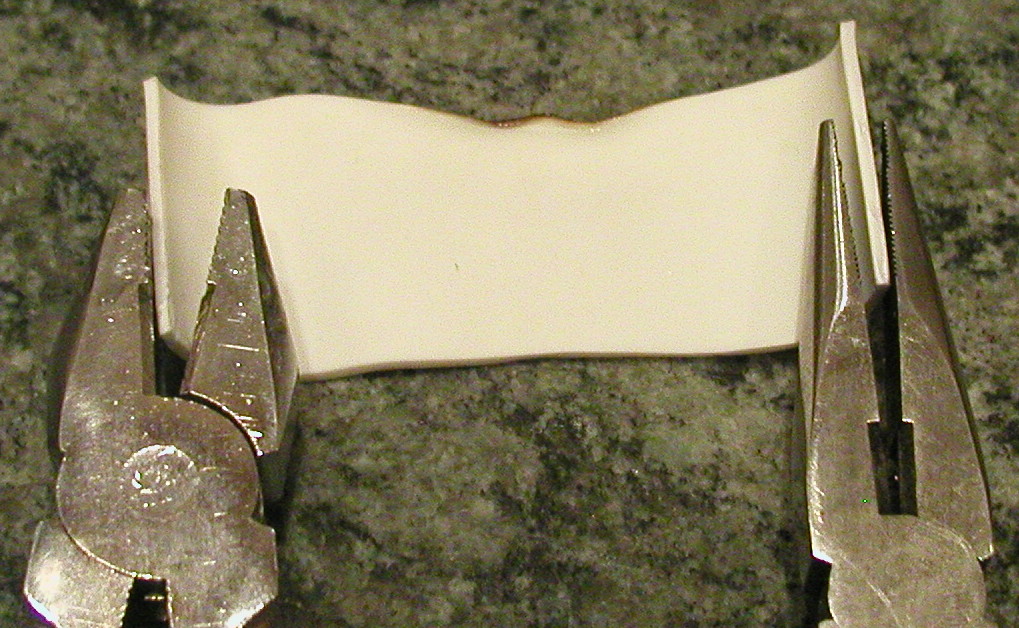
Draw a circle on the flat plastic by tracing around a piece of ½ inch pipe.
Cut the circle out of the plastic using tin snips or some other strong cutting tool.
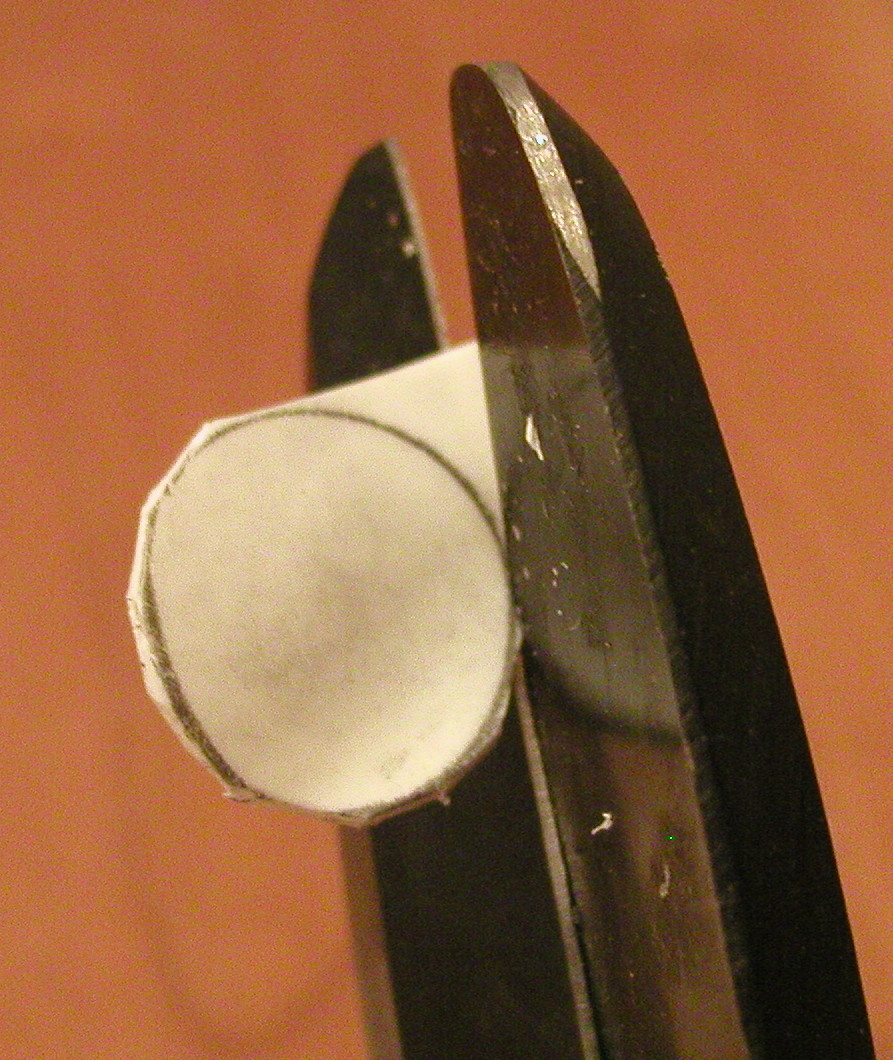
Now glue the disk onto the end of the piston pipe. Be generous with the glue.
Allow the glue to dry, and then remove the rubber bands.
Next we slip the "O" ring over the stop at the end of the piston, and into the space between the stops, where the holes were drilled. We add a generous amount of petroleum jelly to lubricate the "O" ring and ensure a vacuum tight seal.
The piston can now be placed into the cylinder. It should be somewhat of a tight fit getting the "O" ring into the cylinder, but the petroleum jelly should help lubricate it as it slides down in.
The hose can now be attached to the hose barb. To make this easier, place the end of the hose into a cup of very hot water for a few minutes to soften it. It will now fit easily onto the barb, and shrink to fit very tightly.
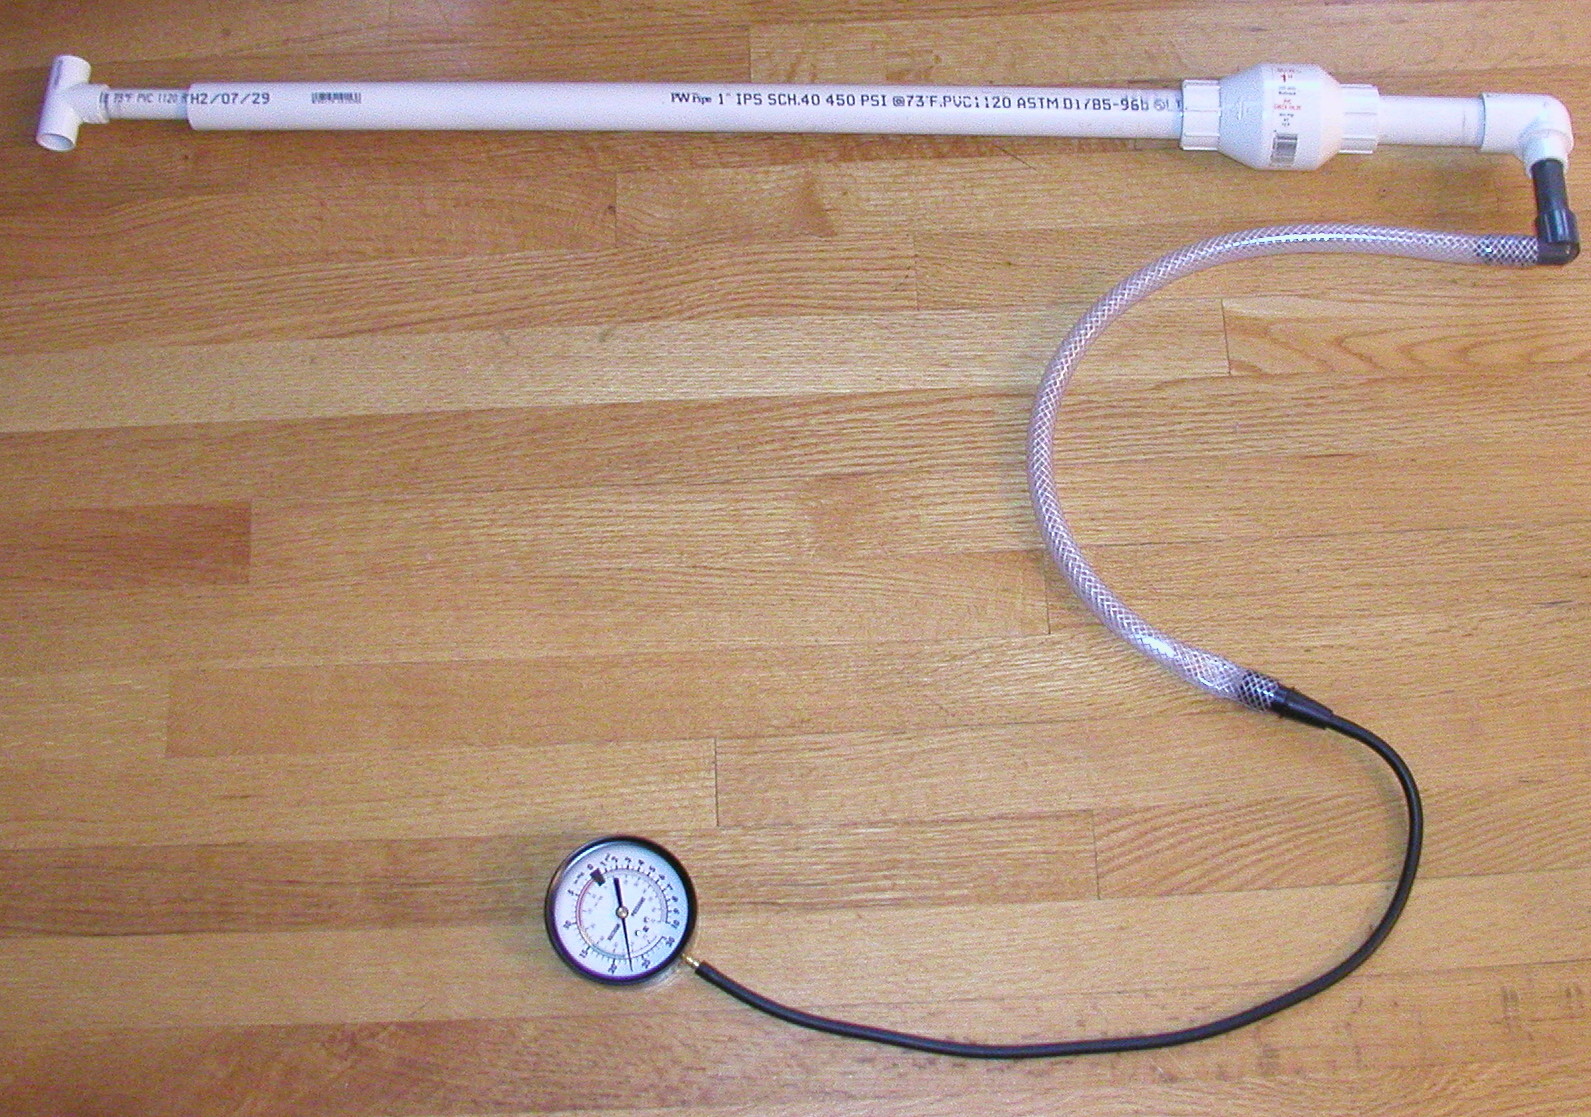
The completed pump is shown below, attached to a vacuum gauge from an automotive parts store. The gauge is showing 23 inches of mercury, although with more pumping we can get up to 26 inches of mercury with this pump.
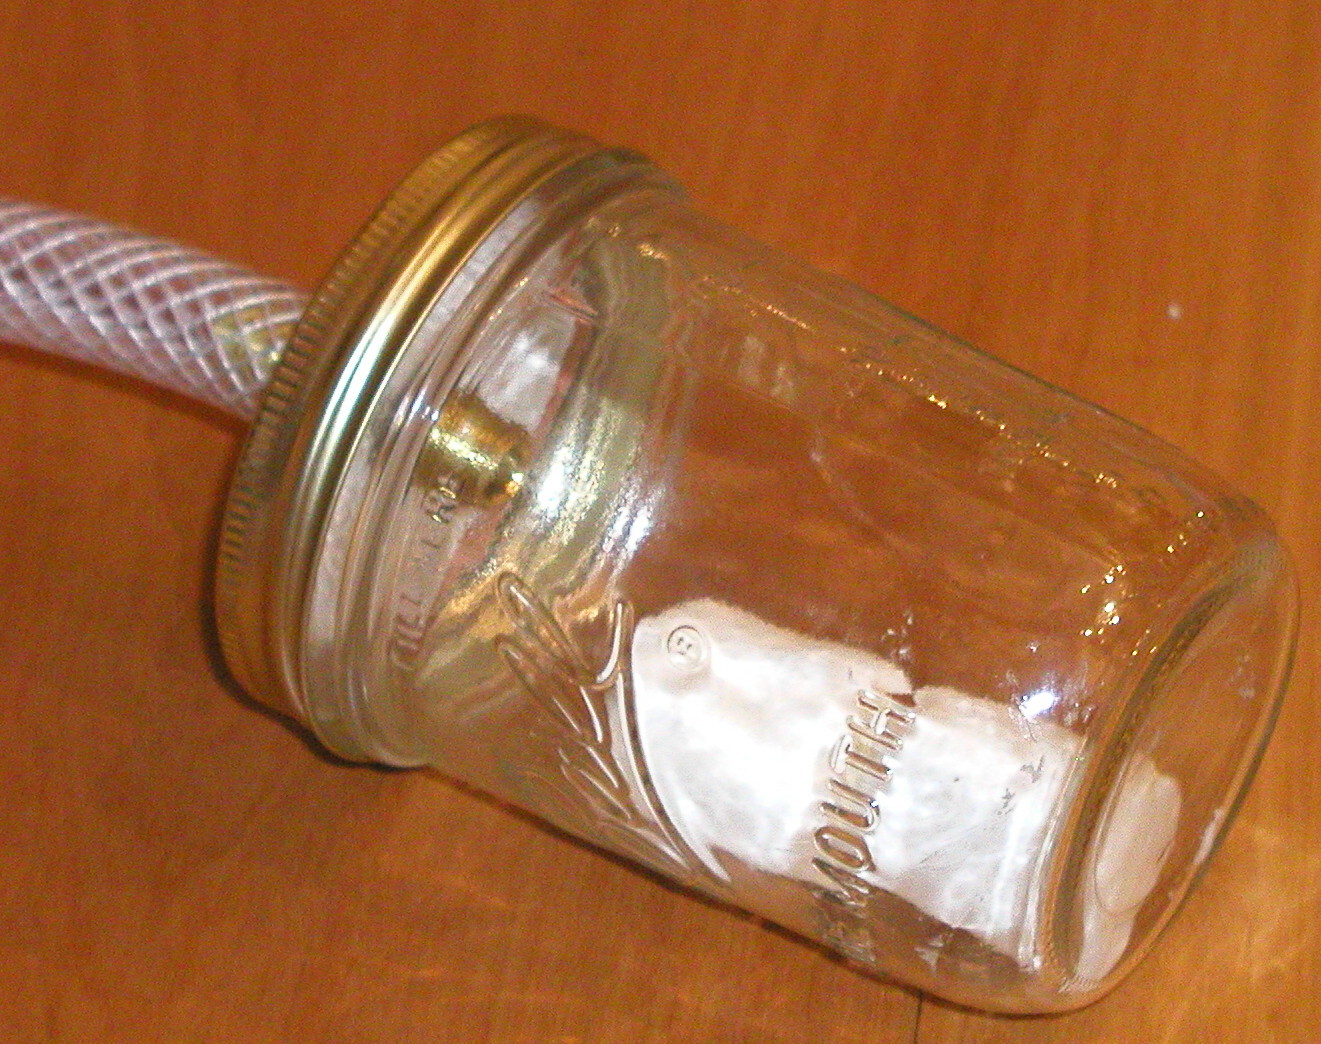
Next, we will make a "bell jar". This is a jar that we will connect to the pump using the hose. We can put things into the jar, and then pump the air out of the jar. Canning jars are best, since they are made to withstand a vacuum.
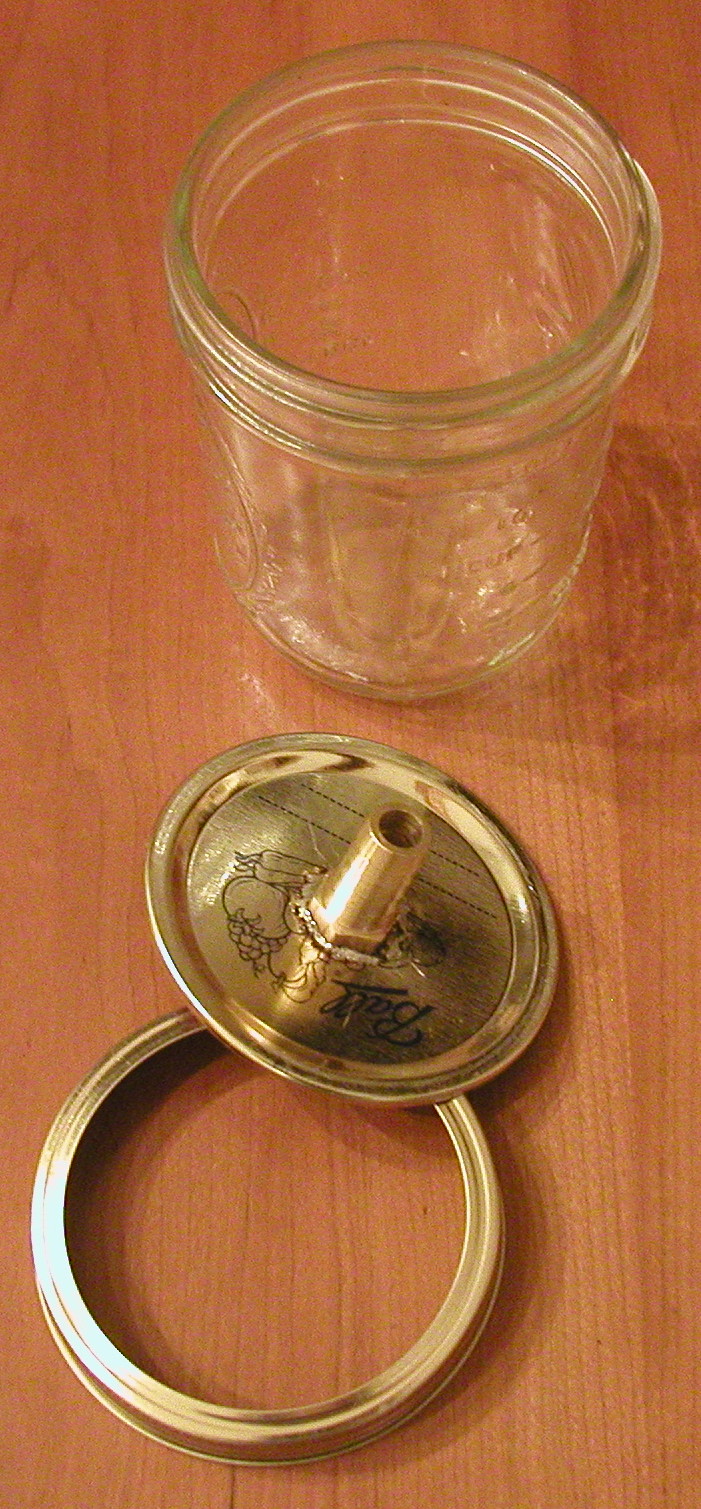
To make the bell jar, we drill a hole in the center of the jar lid, and attach a hose barb. In the photo we used a brass hose barb, and soldered it into the hole. You can use a plastic hose barb if you like, and use epoxy to attach it to the jar lid.
The photo above shows a pair of marshmallows we placed in the jar before screwing the top on. When the air is pumped out of the jar, the marshmallows grow to twice their normal size. Then they gradually shrink, as the air leaks out of the marshmallow, into the evacuated jar. When we later remove the hose from the jar, air rushes into the jar, and the marshmallows shrink into dense, wrinkled candy with the density of a gumdrop. They feel heavy compared to normal marshmallows, although they weigh the same (in air).