A spectroscope is a device that lets us find out what things are made of. It works by taking light and splitting it up into its component colors. Different elements make different colors when they glow. We can make objects and gasses glow by heating them up in a flame, or by passing electricity through them. The spectroscope spreads out the colors of the light, and we can identify the elements by the bright lines we see in the spectroscope.
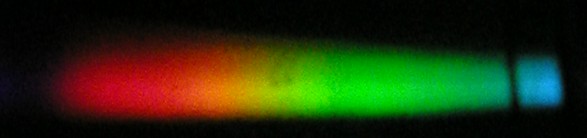
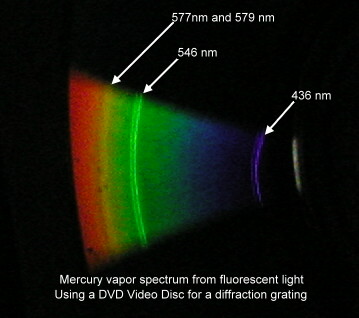
The photograph above was made using the homemade spectroscope we will make in this project. You can see a bright green line, a bright blue-purple line, and a fainter orange line. These lines tell us that the element mercury is making some of the light. The light is coming from a fluorescent light bulb, and these bulbs work by heating up mercury until it glows. The blue-purple light from the mercury (and some invisible ultraviolet light just beyond the blue-purple line) then makes the white phosphor coating on the inside of the glass tube fluoresce bright white.
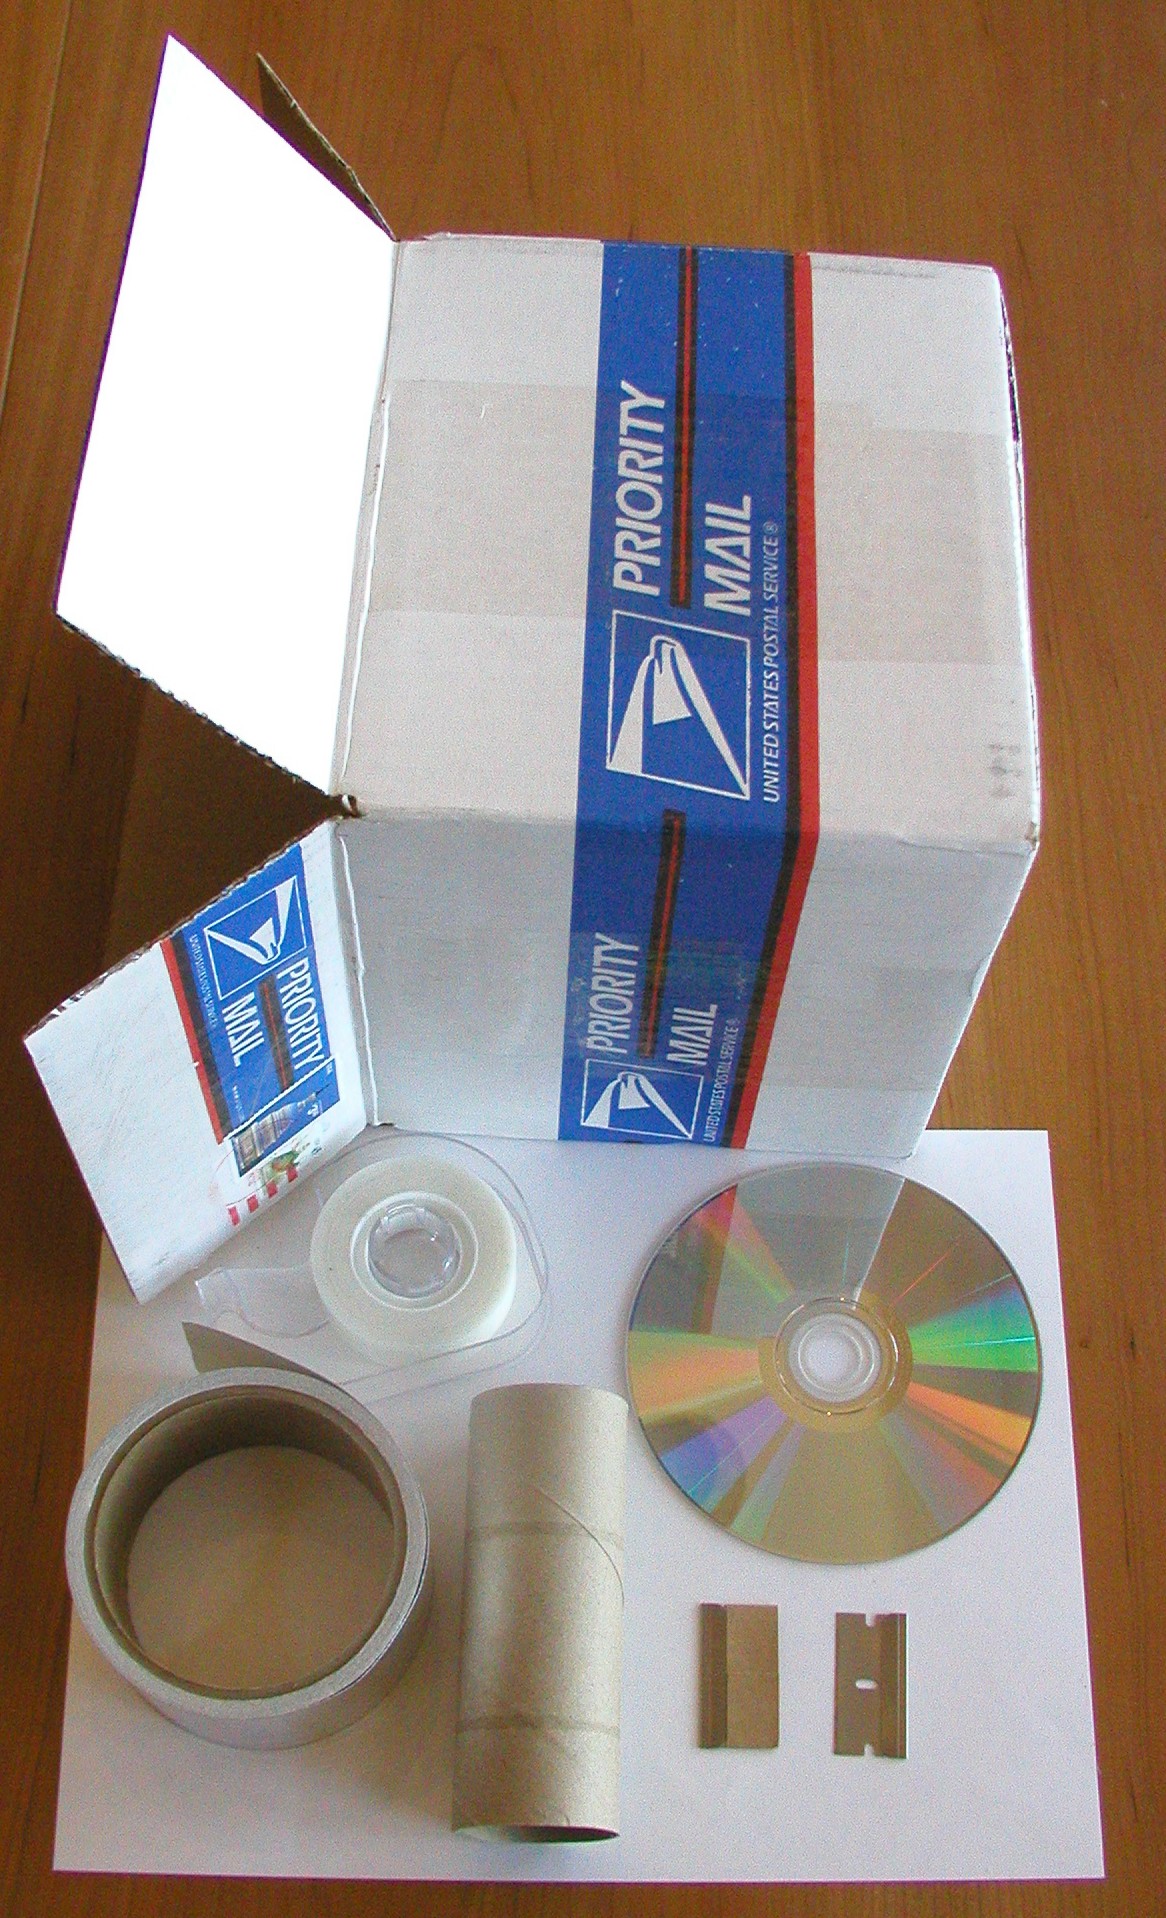
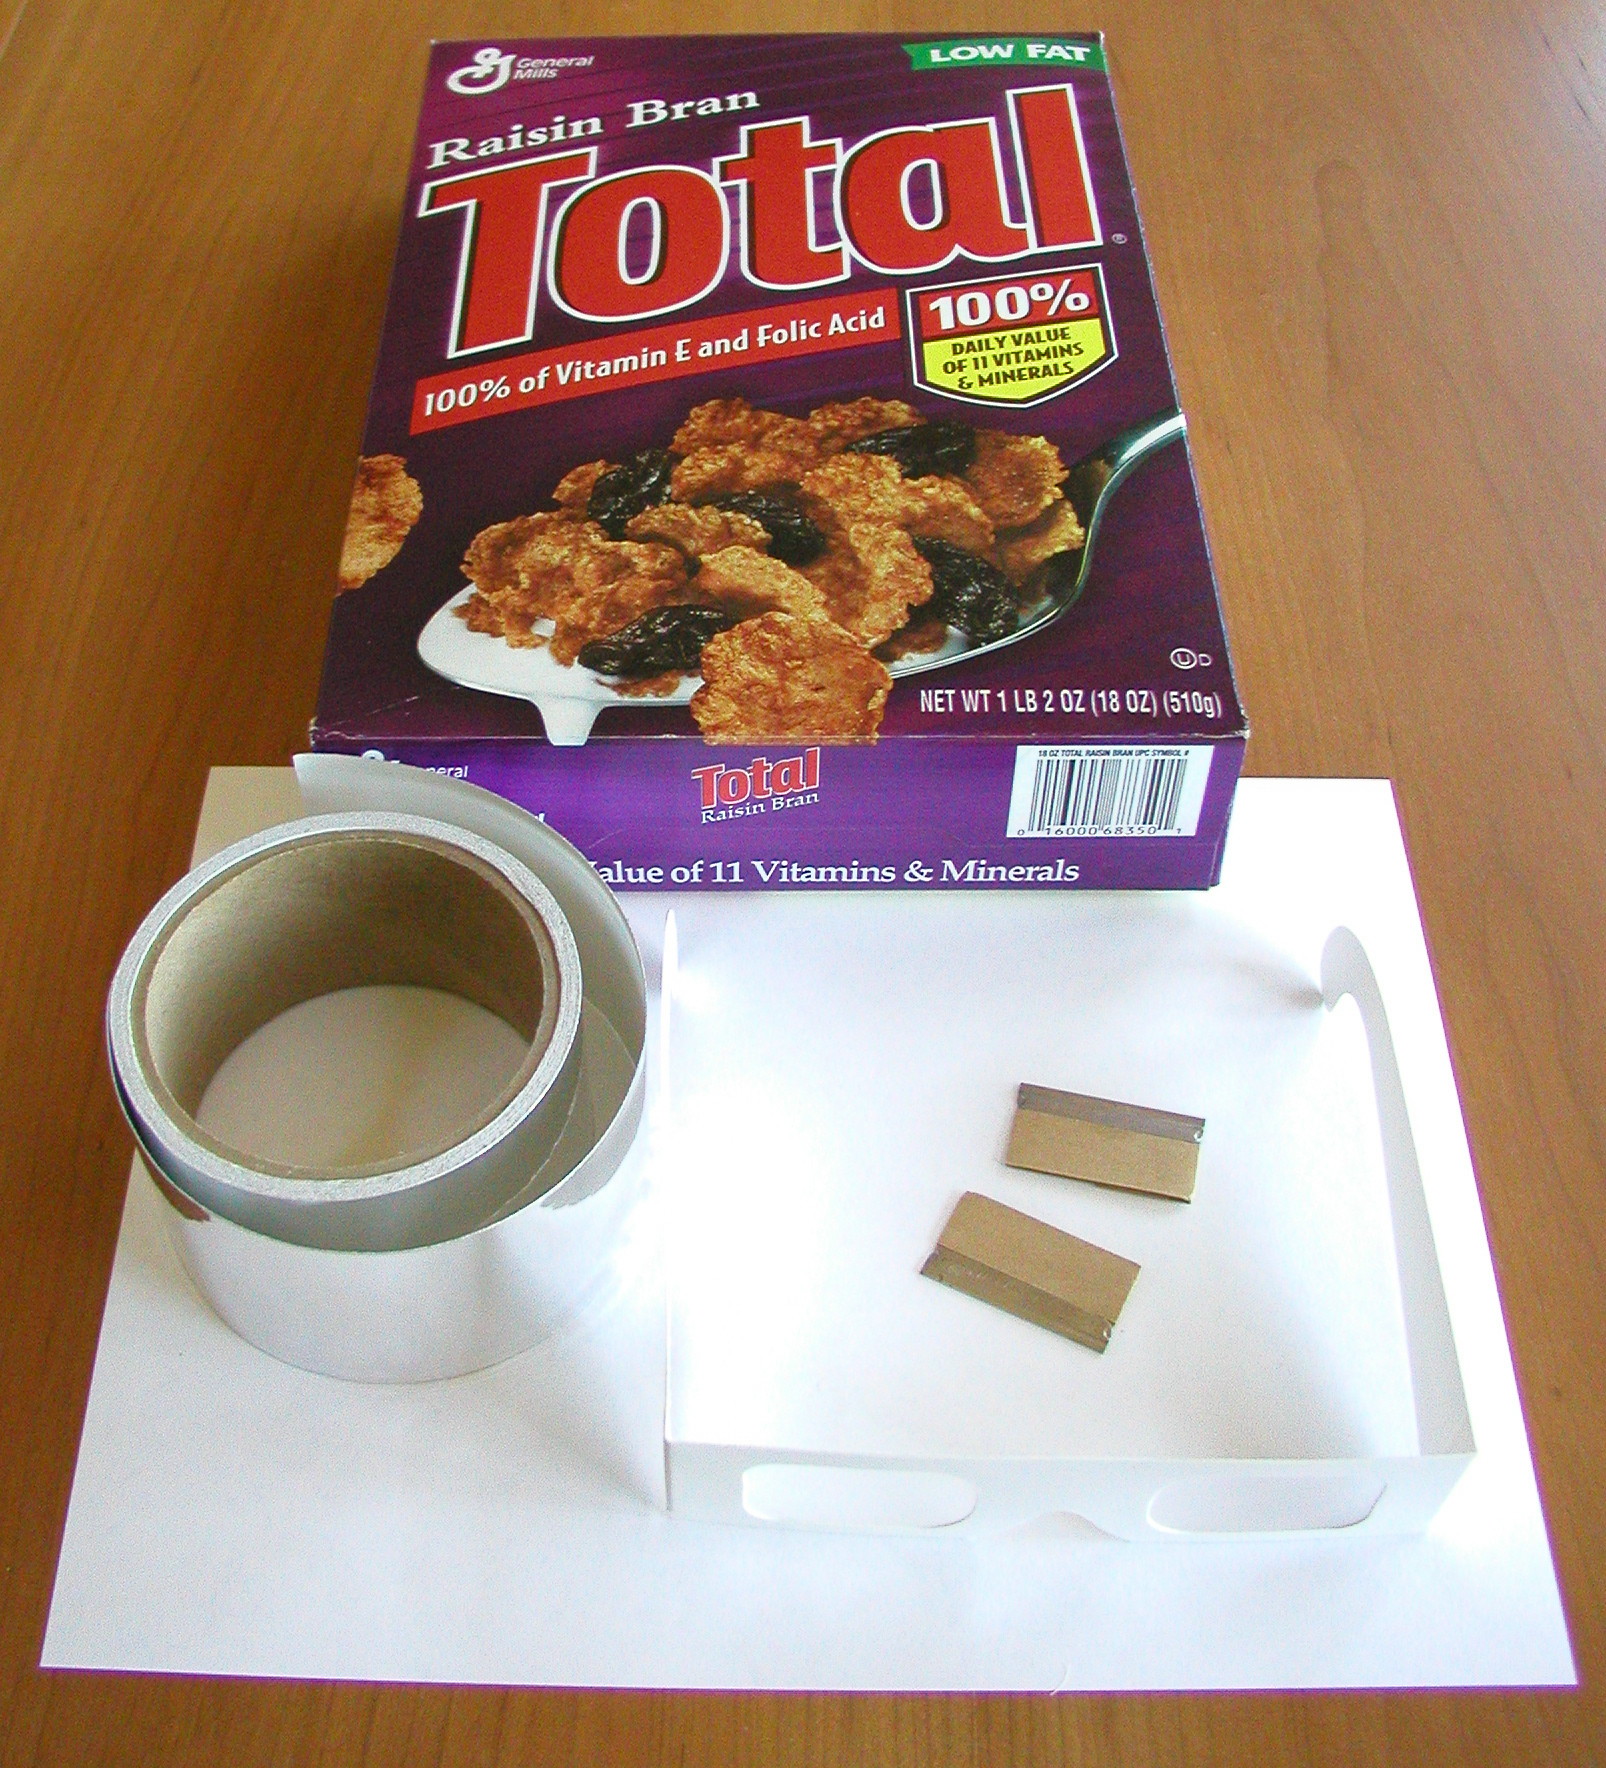
What we will need:
- A CD or DVD that can be sacrificed to this project. We won't damage it, but getting it back will involve destroying our spectroscope. Old software CDROMs work great, and some can be had for free from internet service providers like AOL.
- A cardboard box. An 8 inch cube works fine, but any size that can hold a CD or DVD disk will do.
- Two single edged razor blades. These can be found in paint or hardware stores.
- A small cardboard tube, the kind used as a core to wrap paper on.
- Some cellophane tape.
- Some aluminum tape (found in hardware stores), or some aluminum foil and glue.
Our spectroscope has three main parts. There is a slit made from two razor blades, a diffraction grating made from a CD disk, and a viewing port, made from a paper tube.
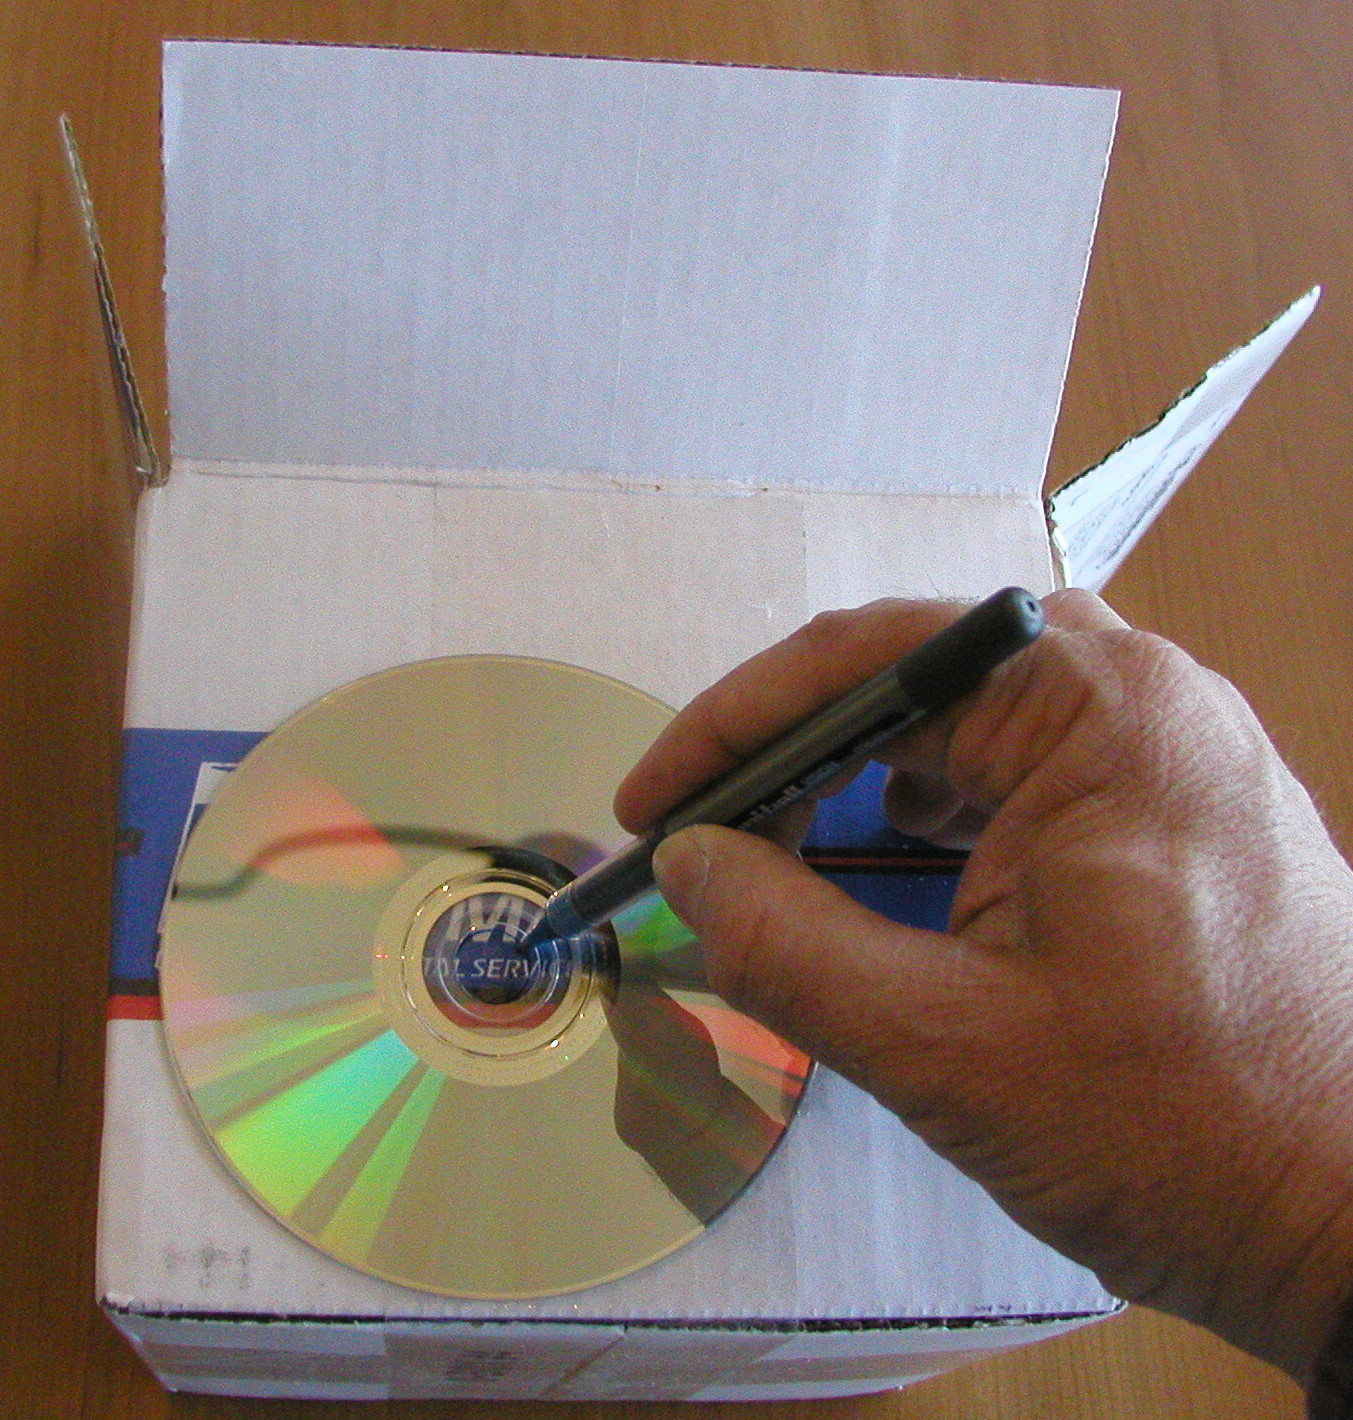
To make sure that all three parts are lined up properly, we will use the CD disk as a measuring device, and mark the spots where the slit and the viewing port will go.
Set the CD disk on top of the box, about a half inch from the left edge, and close to the box's bottom, as shown in the photo. Use a pen to trace the circle inside the CD disk onto the box. This mark shows us where the paper tube will go.
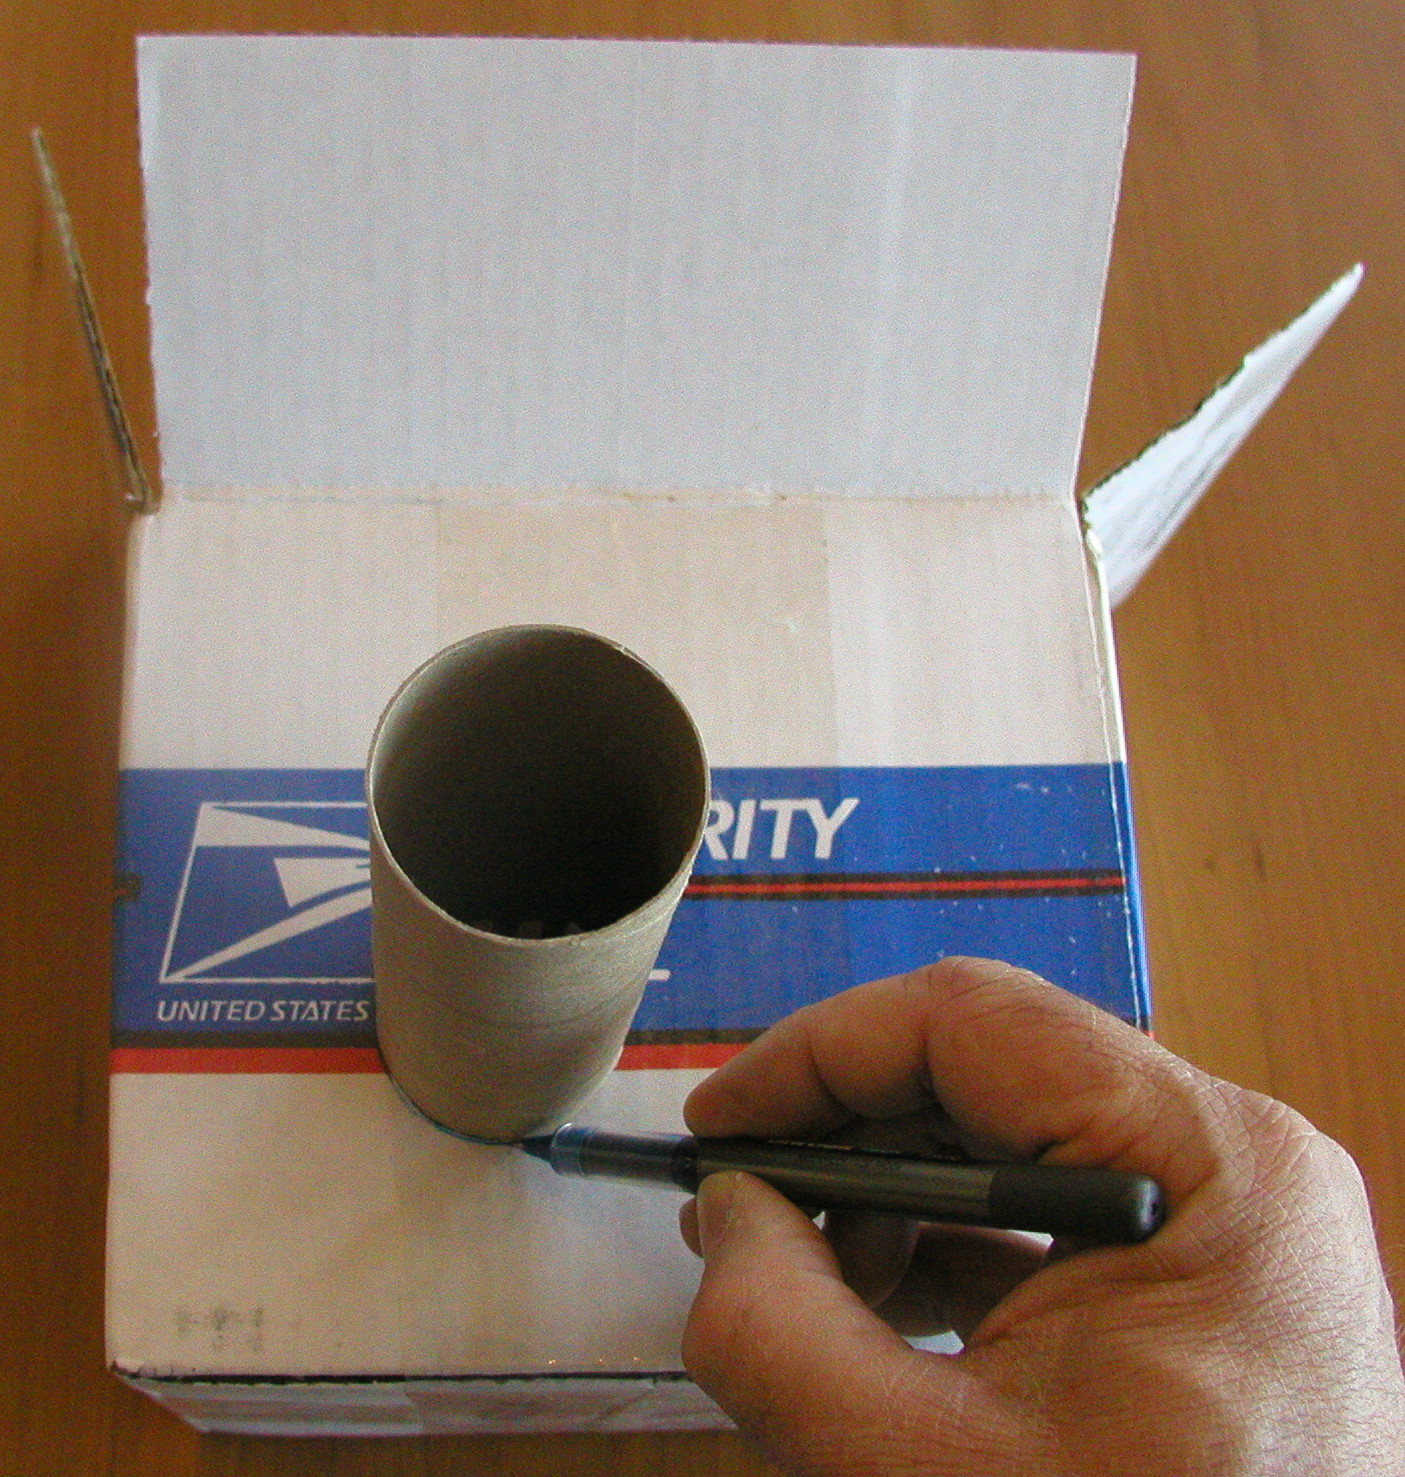
Now place the paper tube on the box, centered over the circle we just drew. Draw another circle on the box by tracing the outline of the paper tube.

Move the paper tube over a little bit. A half-inch is probably fine -- in the photo I placed it much farther to the right than necessary, but the aluminum tape covered up the mistake nicely. Trace another circle around the paper tube. These circles will tell us where to cut the box.
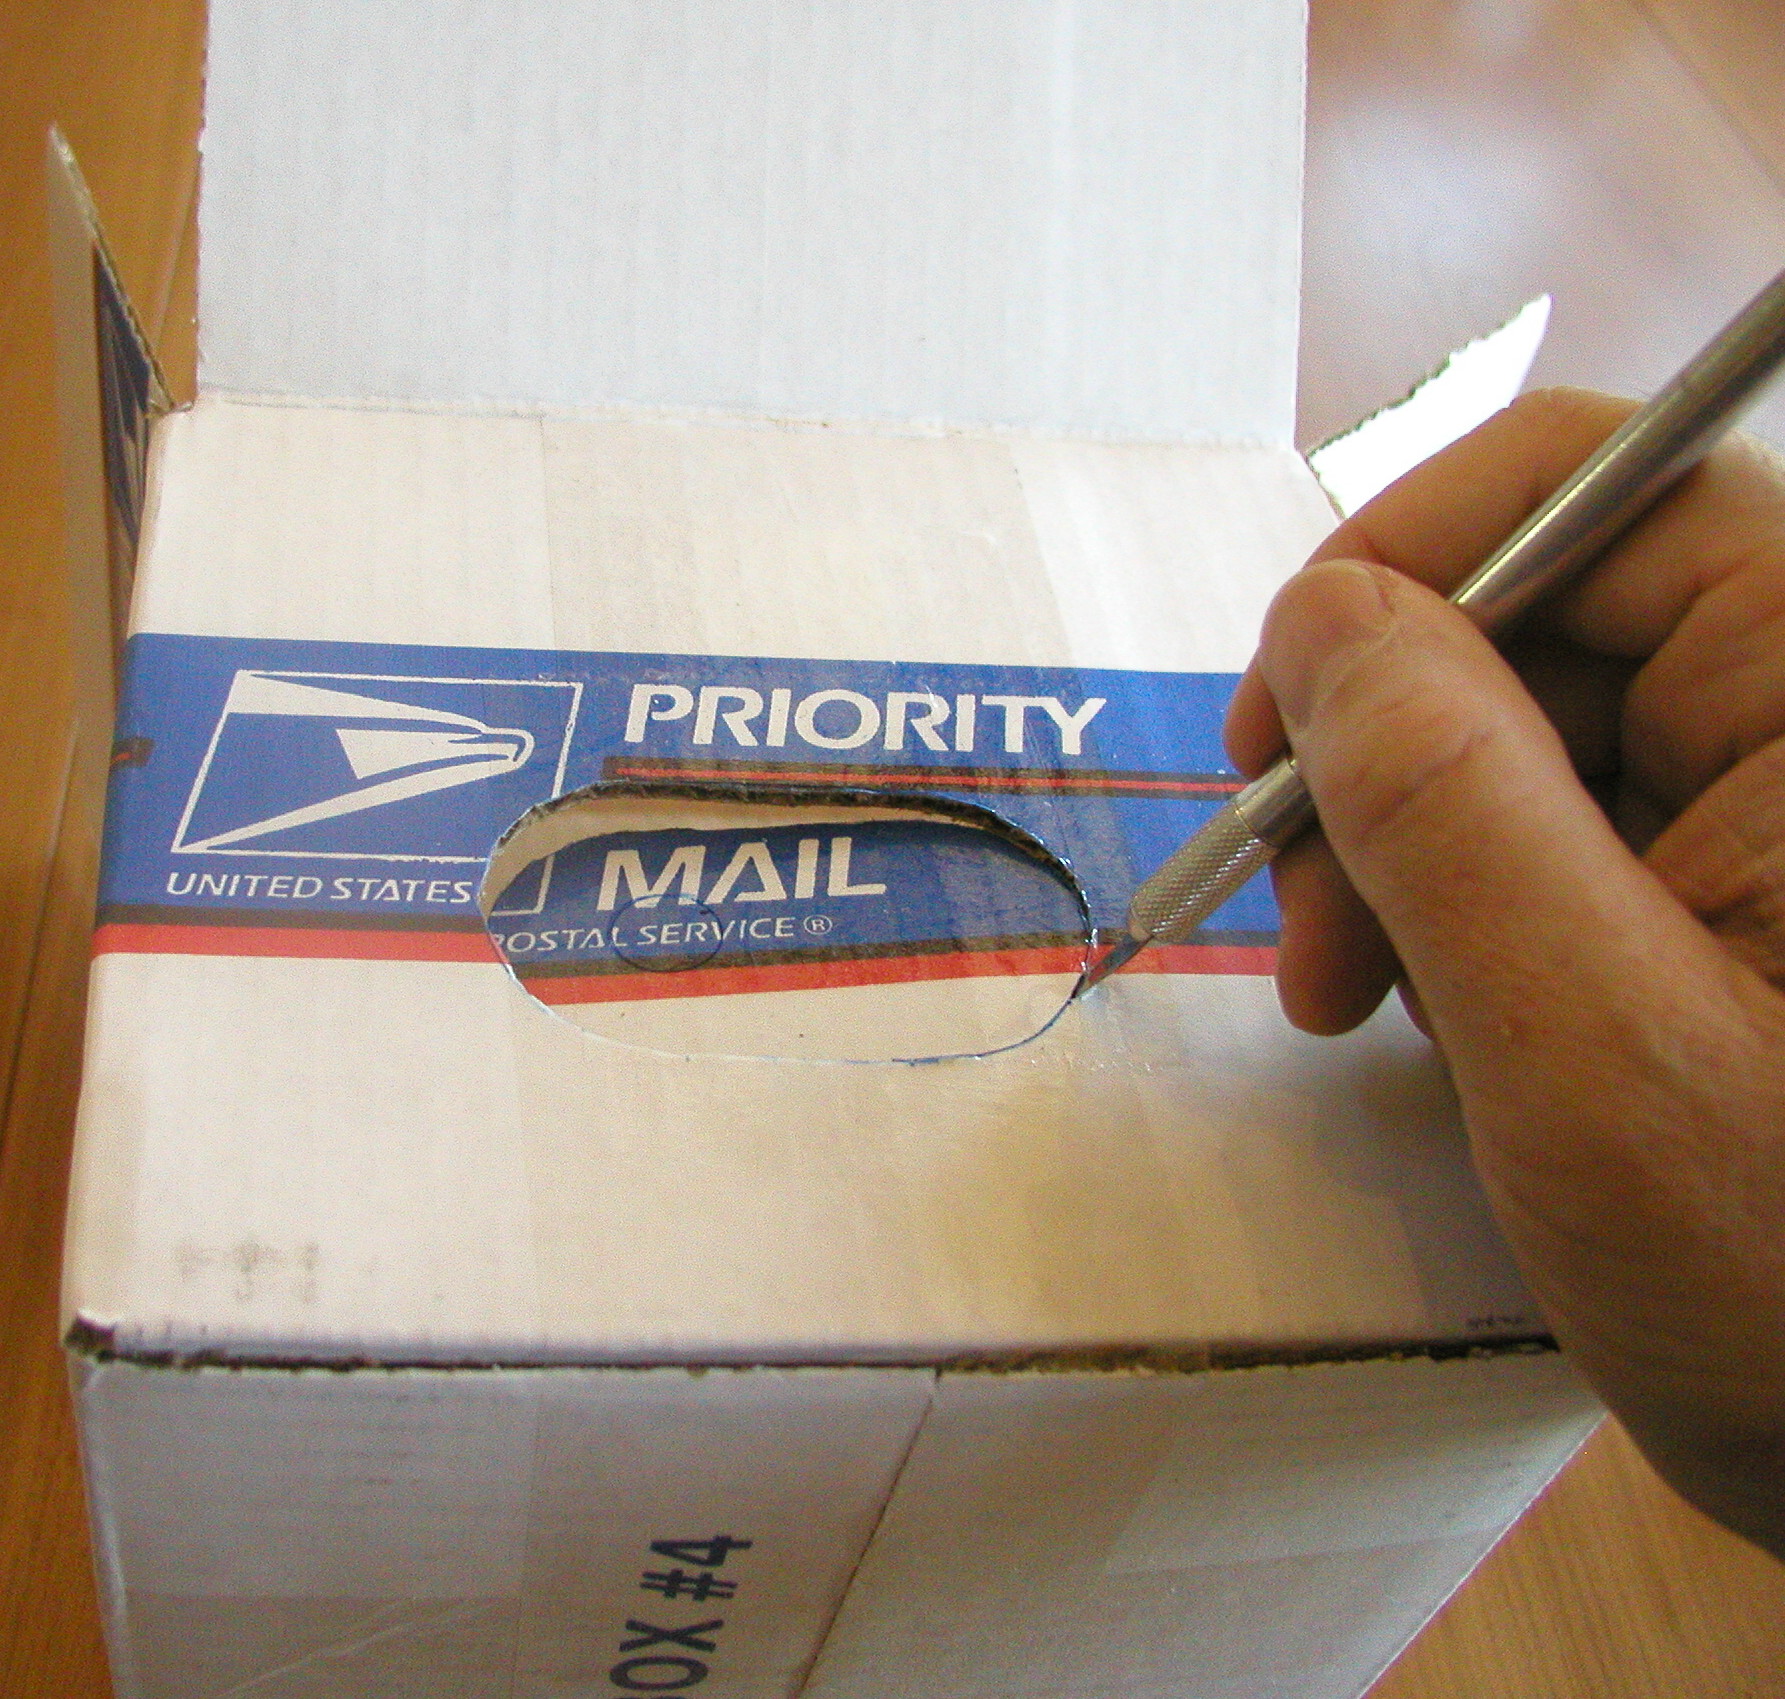
Now cut an oval out of the box with a sharp knife. The oval will allow the paper tube to enter the box at an angle.
The next step is to make the slit. Turn the box one quarter turn so the oval we just cut is to the right. Using the CD disk again, draw another small circle close to the left side of the box.
The slit will be on the far left of the box. Cut a small rectangle out of the box at the height marked by the small circle we made with the CD disk. The rectangle should be about a half inch wide, and two inches high.
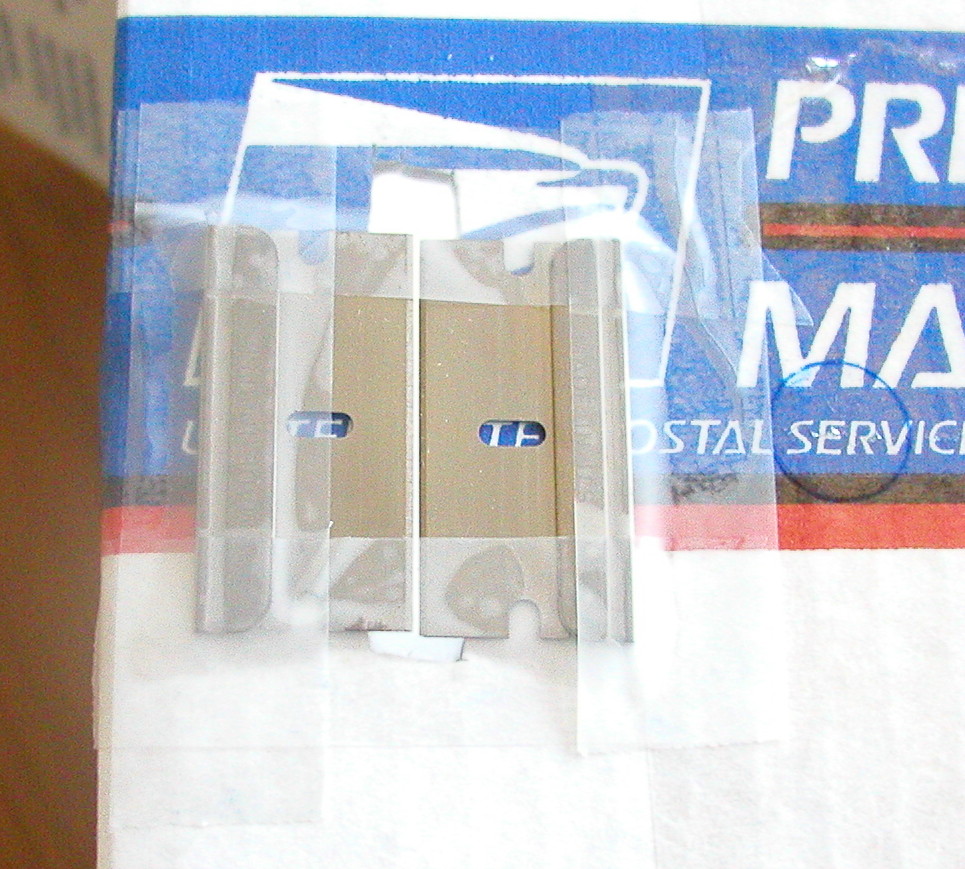
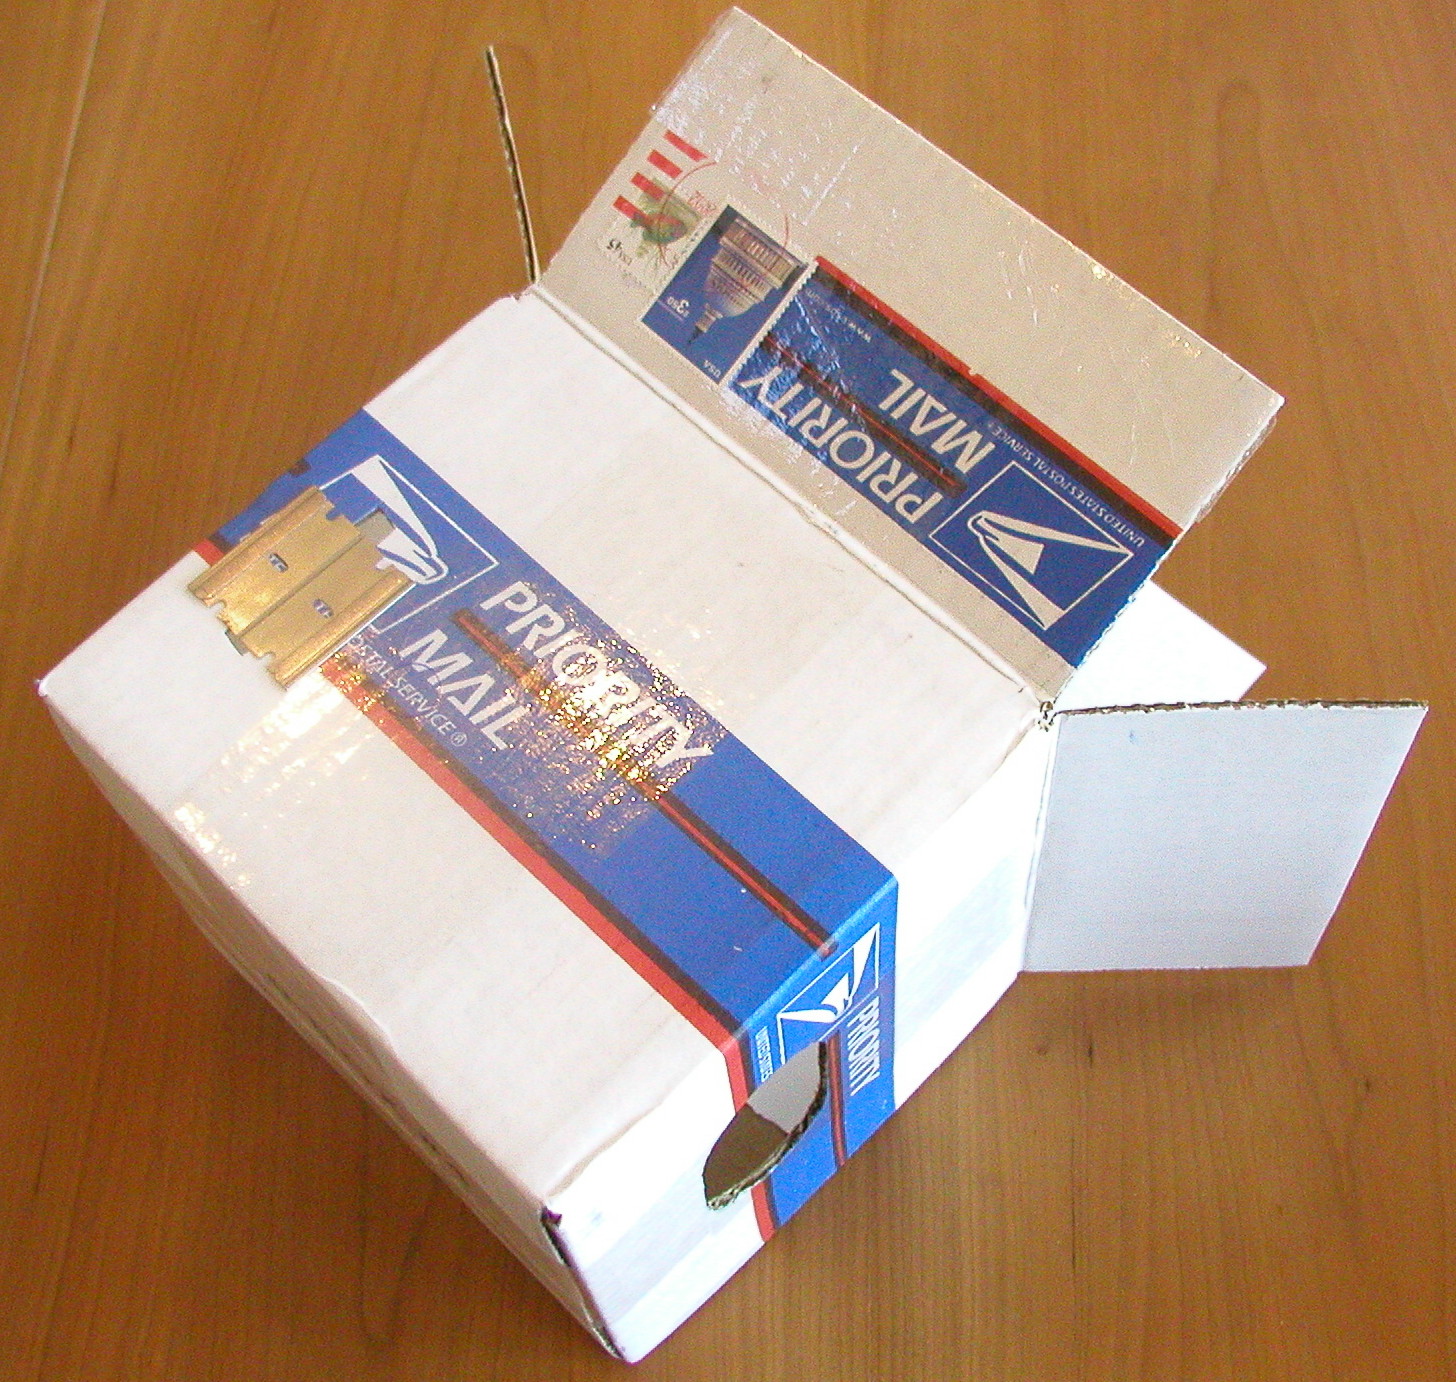
Carefully unwrap the two razor blades, and set them over the rectangular hole. Make their sharp edges almost touch. Tape the razor blades to the box, being careful to leave a gap between the sharp edges that is nice and even, and not wider at the top or bottom.
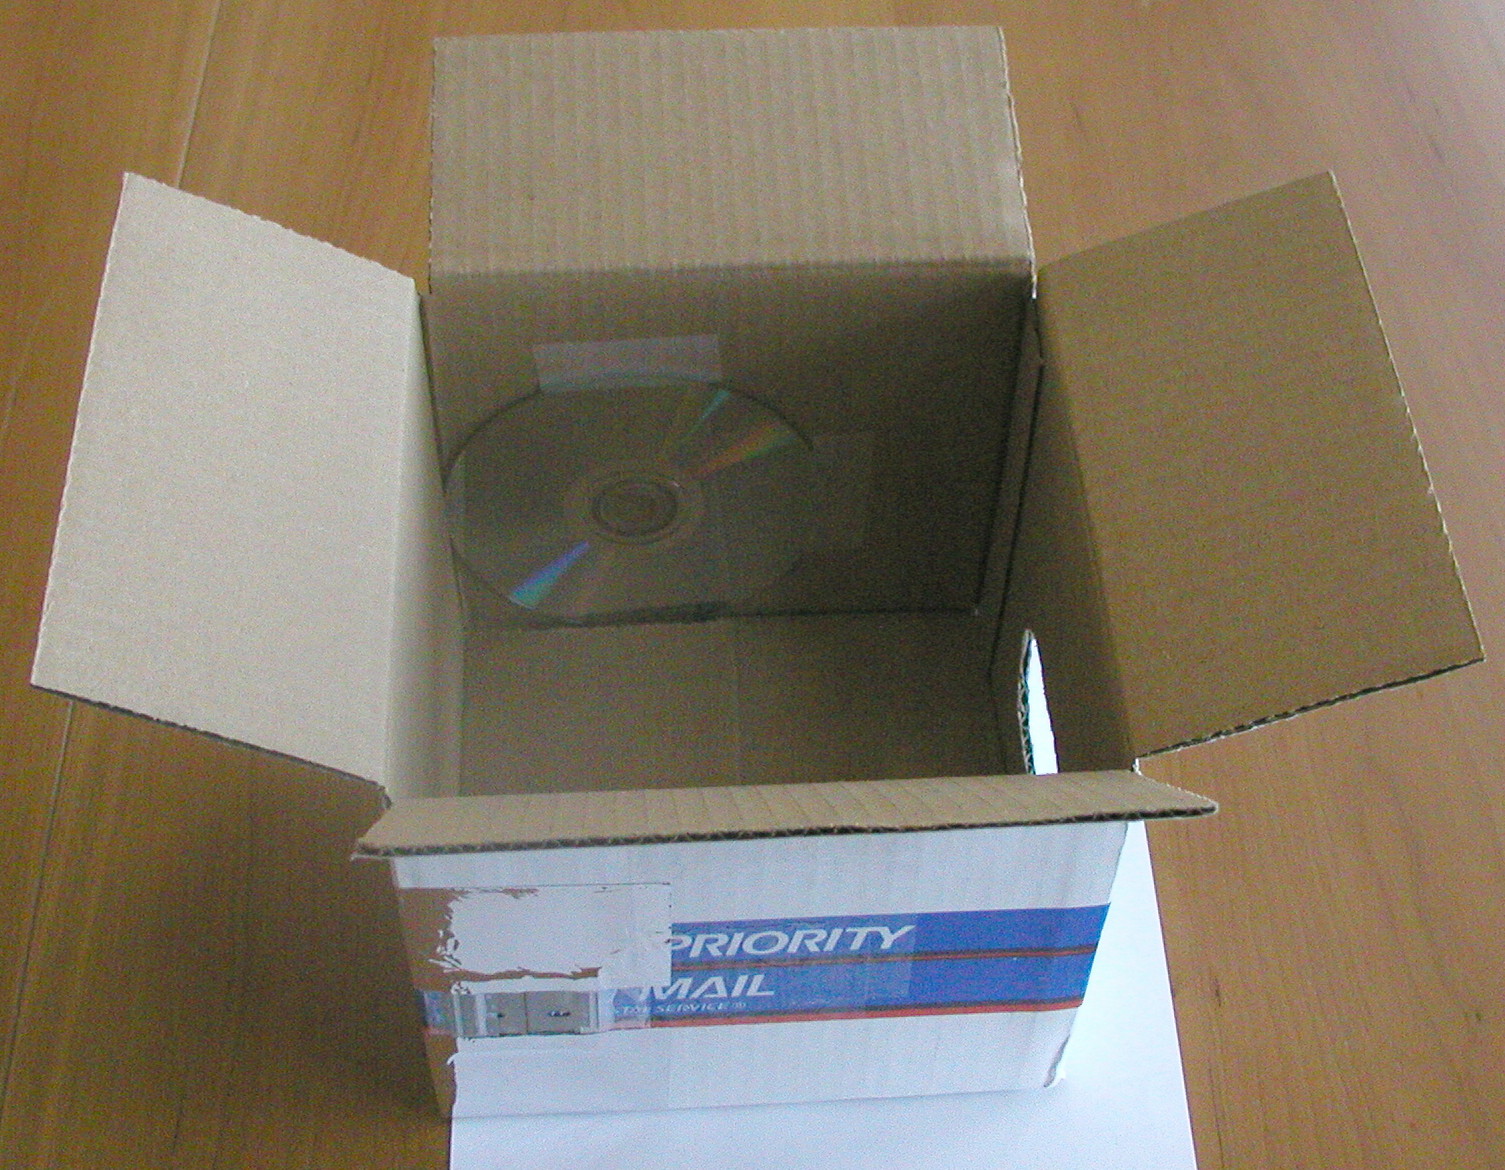
Next, set the box right-side-up, with the slit towards you. Now tape the CD disk onto the back wall of the box. The rainbow side should face you, with the printed side touching the cardboard. The photo shows the disk a little too far to the left. The left edge of the disk should be the same distance from the left of the box as the slit is.
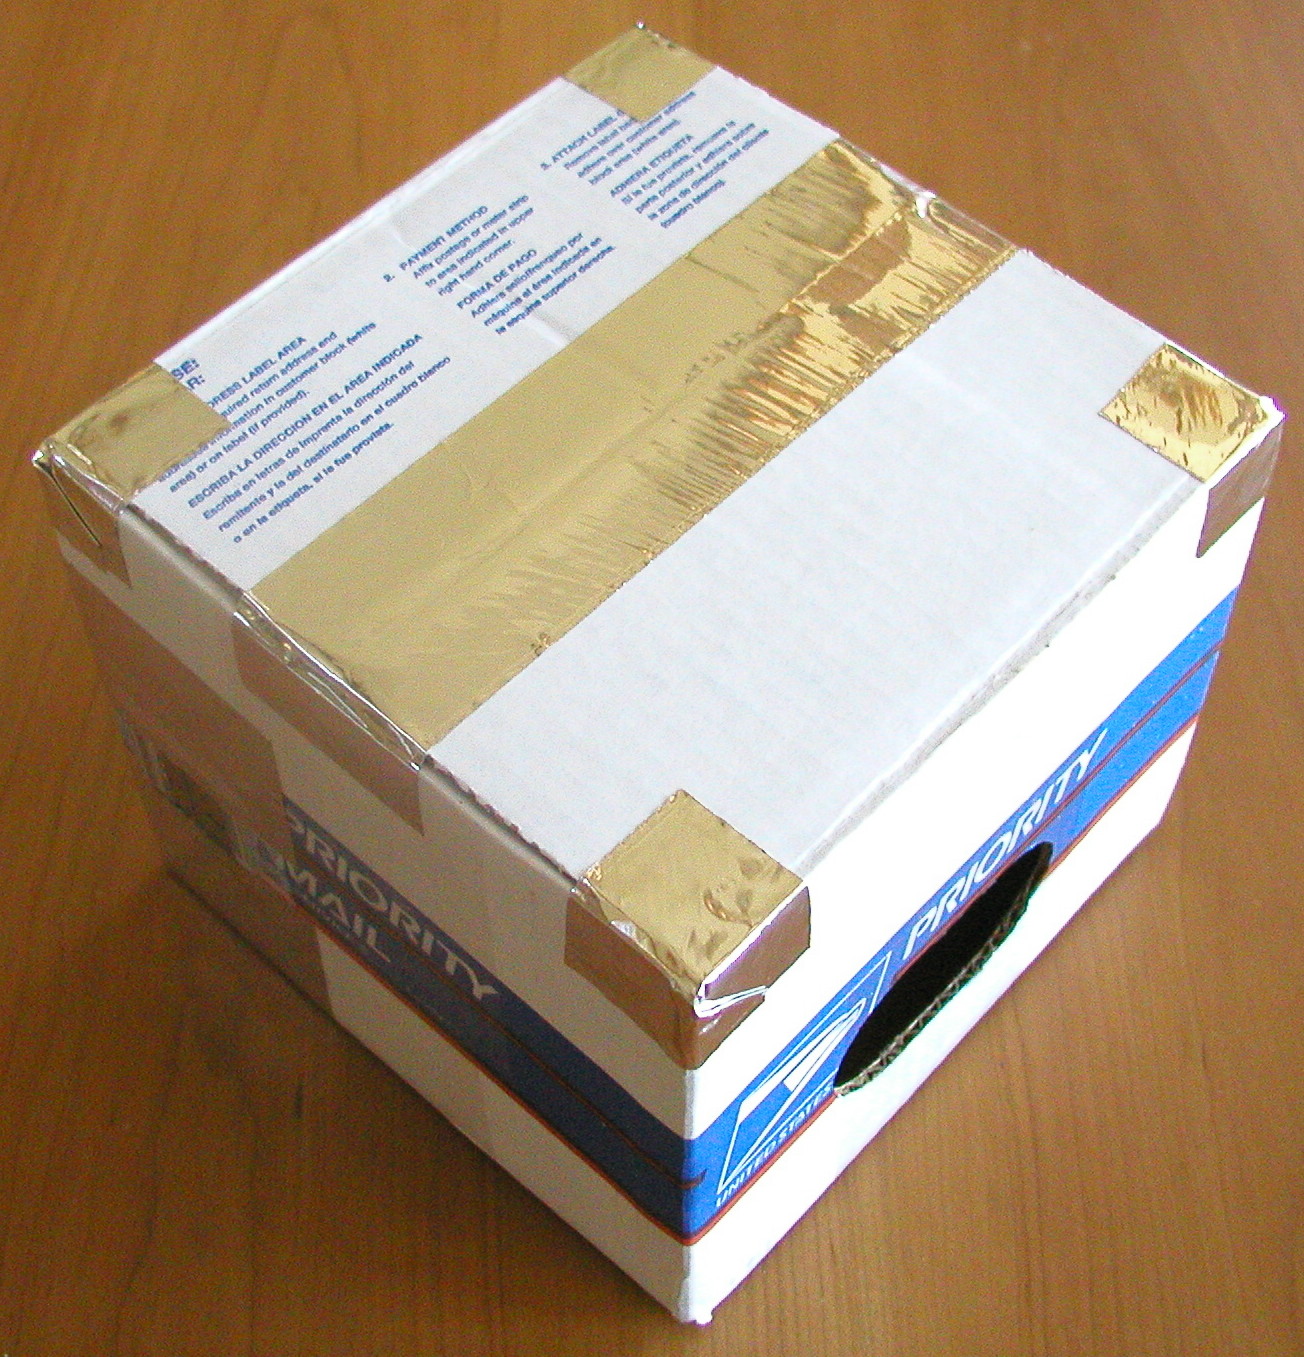
Now seal up any places on the box where light might leak in. Use the aluminum tape for this. You can also use aluminum foil for this purpose if you don't have any aluminum tape.
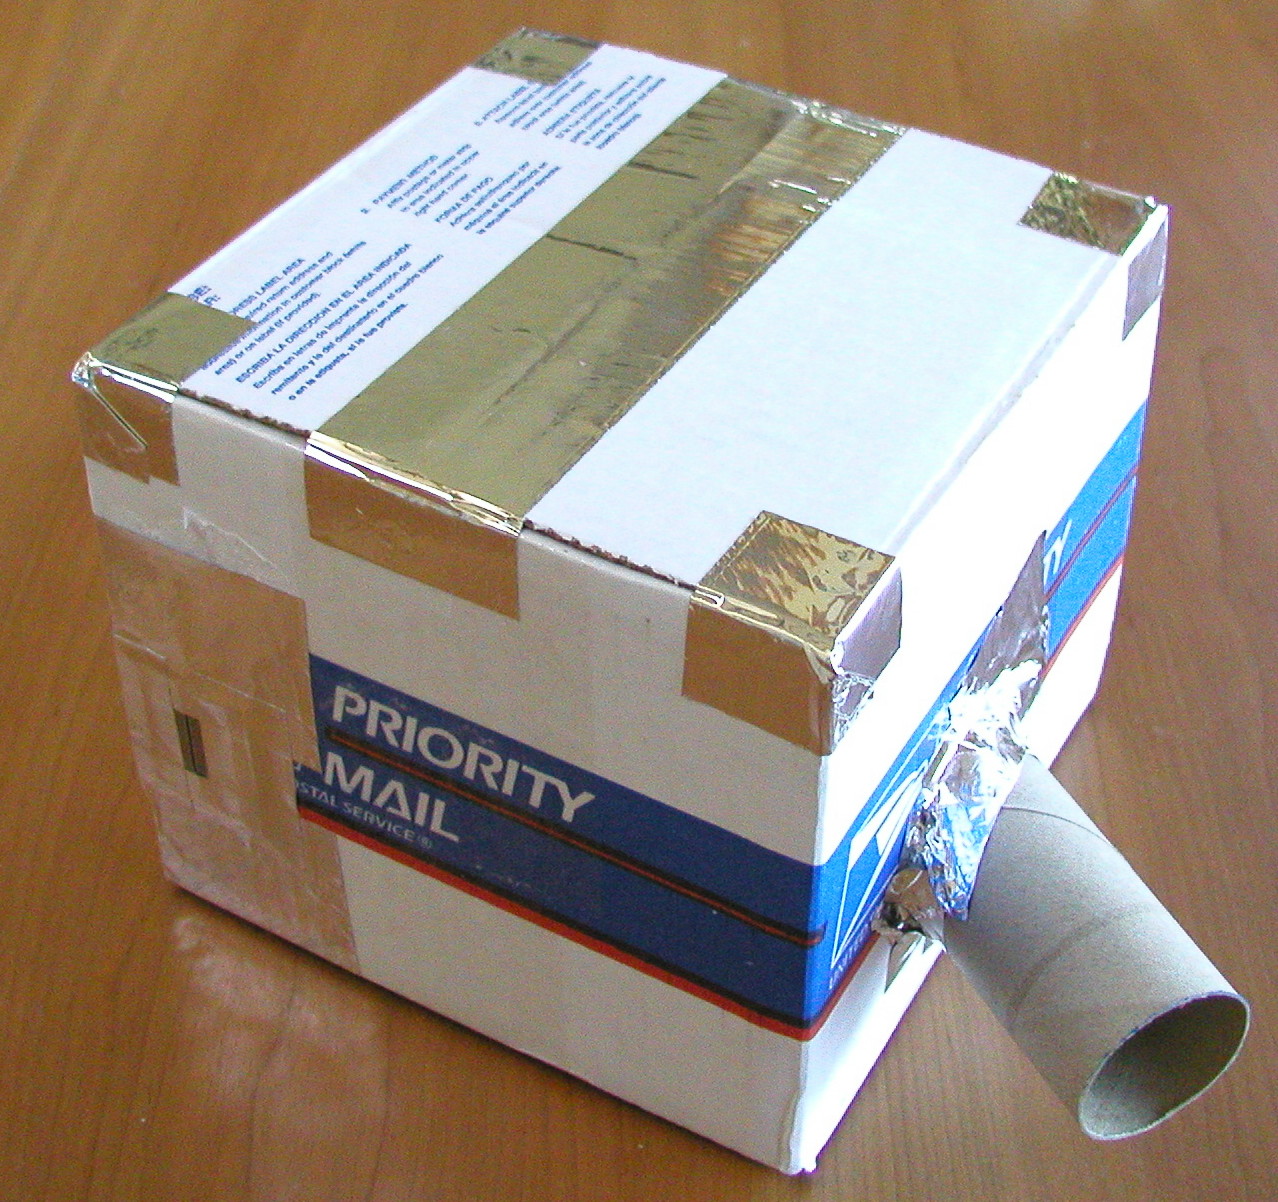
The last step is to use the aluminum tape to attach the paper tube. The aluminum tape will make a light-tight seal around the tube. To make sure the angle is correct, hold the slit up to a light, and look through the paper tube, adjusting it until you can see the full spectrum from red to purple.
That's it! We are ready to use the spectroscope.
How to use the spectoscope
Hold the slit up to a source of light. An incandescent light will show a simple spectrum with no bright lines. This is because the light comes from a hot solid (the tungsten filament in the light bulb).
Hot gasses will produce light that is made up of only a few colors. The spectroscope will spread these colors out, so we can see them individually.
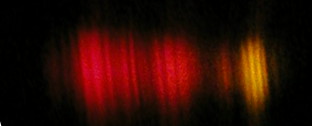
The photo above shows the light from a neon light bulb. We can see that the hot neon gas is made of several colors, but they are mostly in the red and orange parts of the spectrum.
Light is made up of waves, and each different wavelength is a different color. The neon light is showing waves of these lengths:
- 540 nanometers (very faint) green
- 585 nanometers yellow
- 588 nanometers yellow
- 603 nanometers orange
- 607 nanometers orange
- 616 nanometers orange
- 621 nanometers red-orange
- 626 nanometers red-orange
- 633 nanometers red
- 638 nanometers red
- 640 nanometers red
- 650 nanometers red
- 660 nanometers red
- 692 nanometers red
- 703 nanometers red
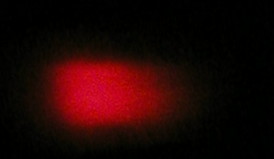
A red LED makes light, but there is no hot gas, so it has a continuous spectrum.

Some green LEDs look very green. Others look more like a yellowish-green. By looking at their spectrum, as in the photo above, we can see that the yellow-green LEDs have a lot of green, but also some yellow, orange, and red.
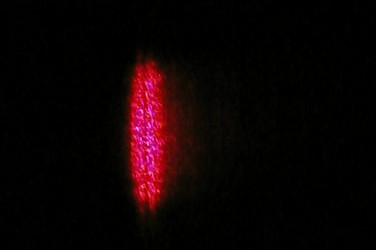
The LEDs we looked at had broad spectra. Their light consists of many different wavelengths. A red laser diode has a much narrower spectrum. It has only a few different wavelengths, and is said to be monochromatic, meaning "one color".
A white LED is actually a blue LED and a phosphor. It works in a way similar to the fluorescent light bulb, where the blue light excites the phosphors to make a white glow.
We can see the broad spectrum in the spectroscope. The dark band in the photo is the bare spot on the CD disk close to the center. The spectrum is so broad that it covered the entire width of the CD.
The photos above were done using a spectroscope made from an audio CD. The photo below was done using a DVD, which has lines that are closer together. The closer lines cause the spectrum to spread out a little more.
The spectrum is not quite spread enough to show the two orange lines as separate lines. A diffraction grating with finer lines would show finer distinctions, allowing us to distinguish elements better.
A spectroscope made from a cereal box
A CD is an example of a reflection diffraction grating. But you can also find transmission diffraction gratings, that you look through, instead of look at.
A fairly common toy using a transmission grating is a pair of paper "rainbow glasses". These are often sold at carnivals or fairs, or at fireworks displays. We also carry them in our catalog

These glasses typically make rainbows up and down as well as left and right.
Making a spectroscope with rainbow glasses is very simple. We use most of the same materials and techniques as we did for the CD spectroscope.
We need a cereal box, some aluminum tape, two single edged razor blades, and a pair of rainbow glasses. You can substitute aluminum foil and glue for the aluminum tape.
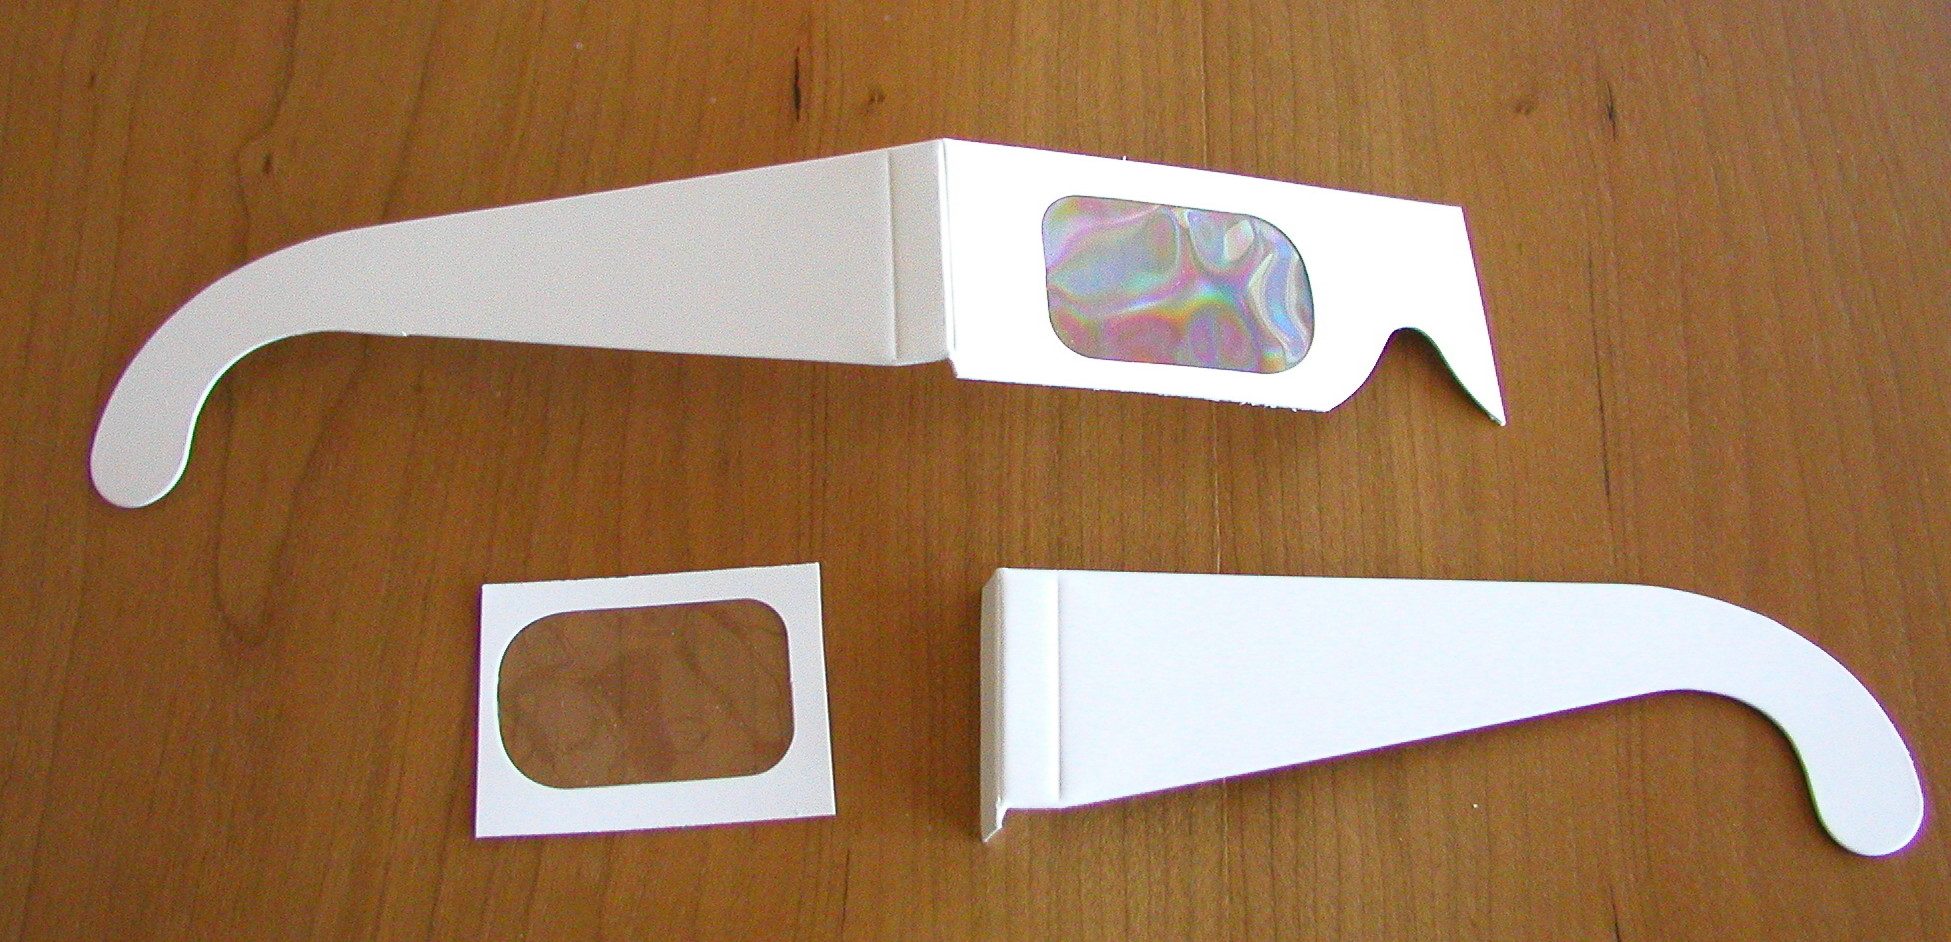
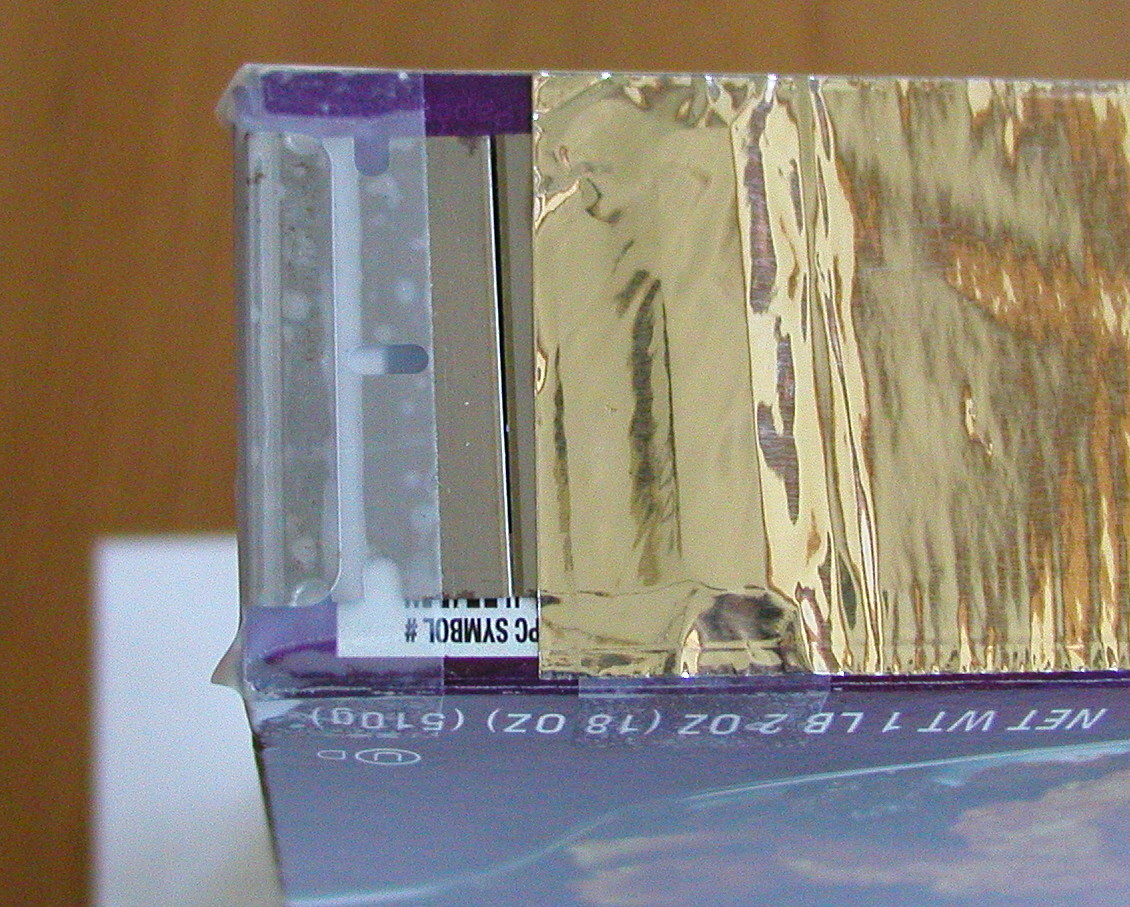
We will only need one side of the rainbow glasses. Or you can make two spectroscopes. Cut the plastic material from the glasses, leaving a paper border to keep it easy to handle.
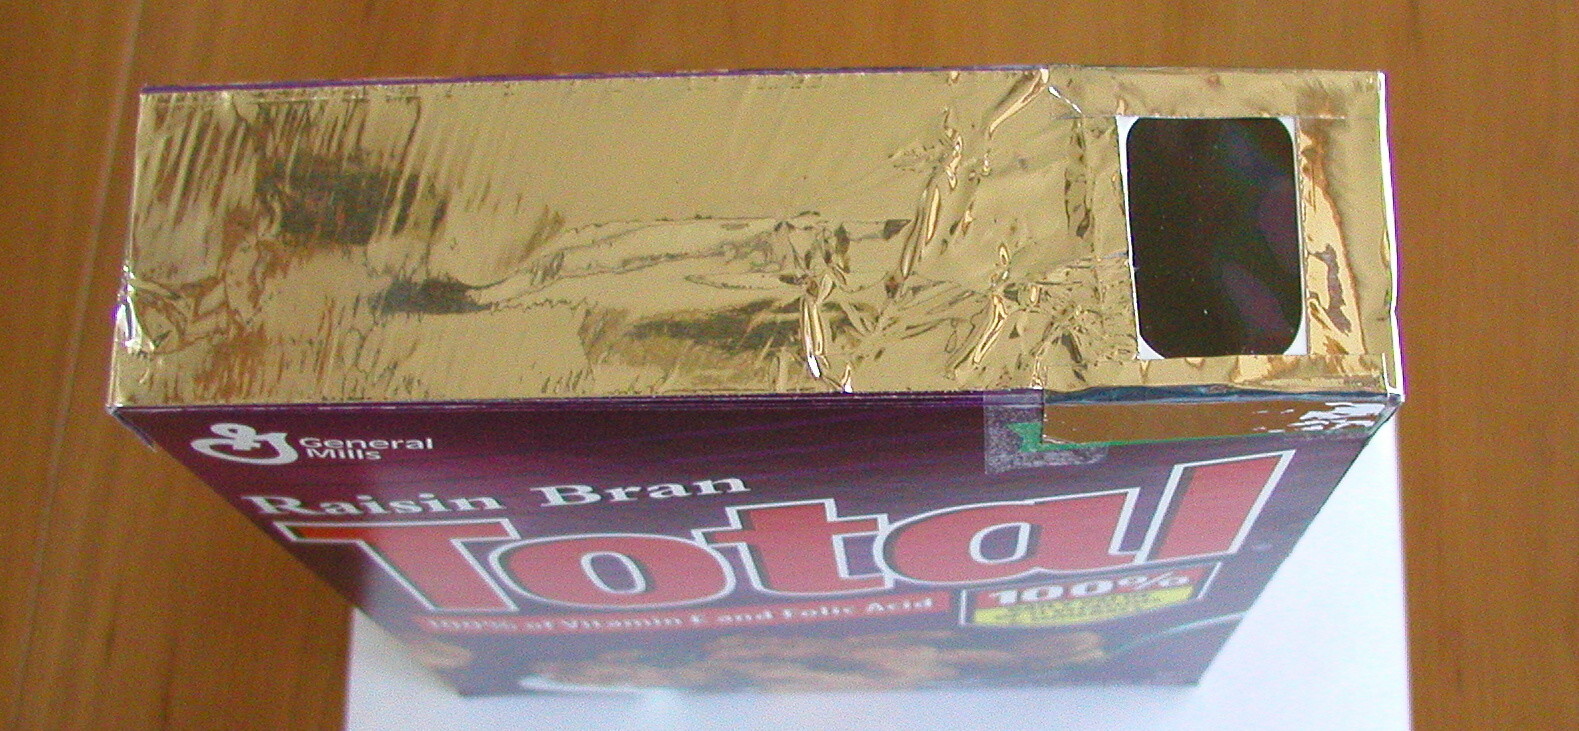
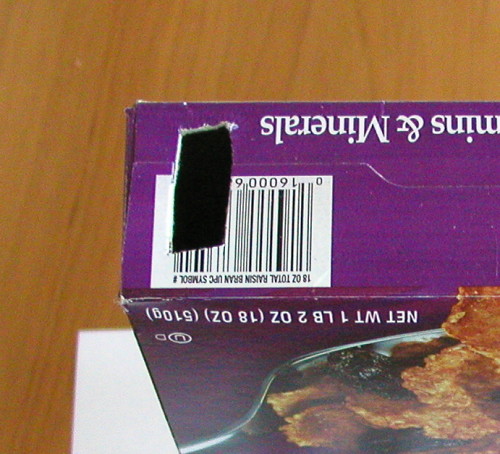
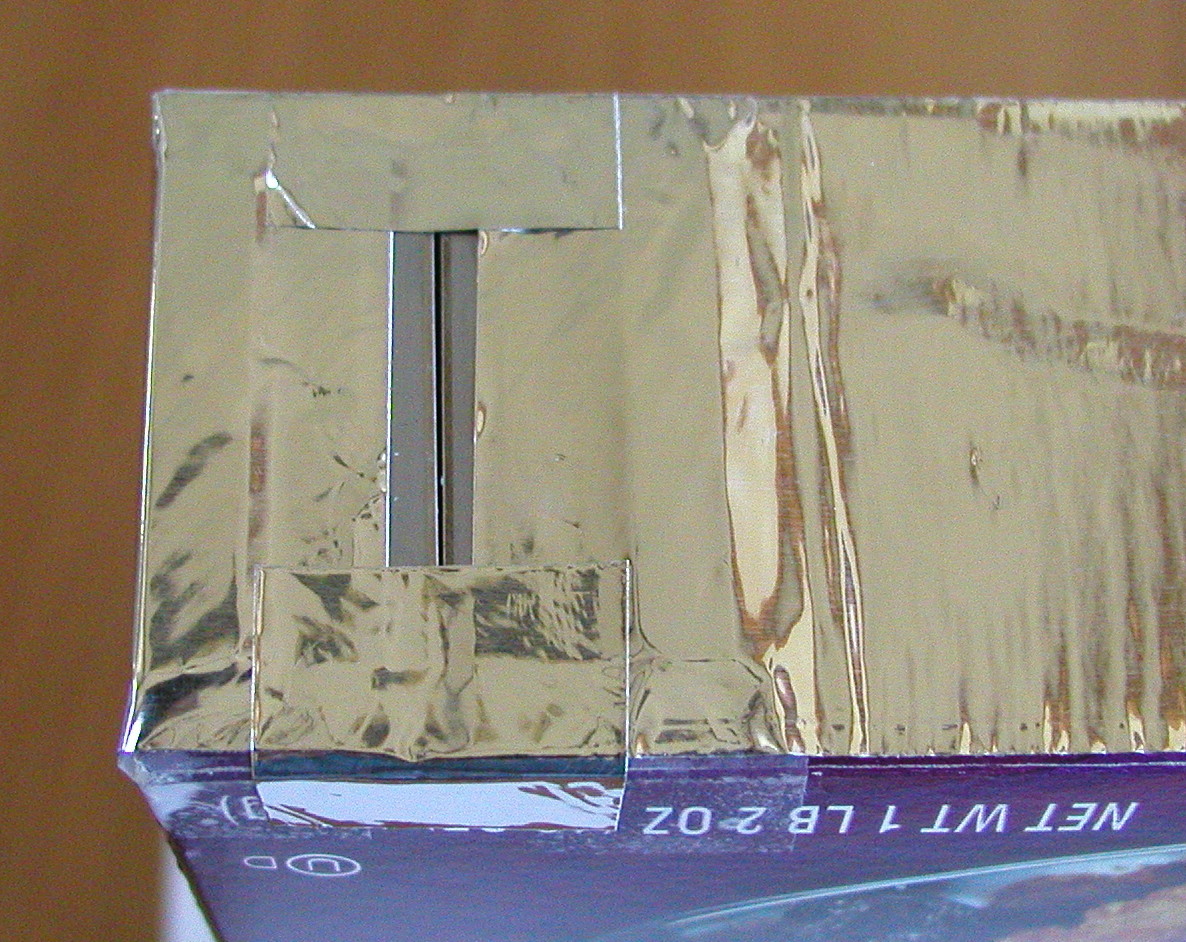
Cut a hole in the top of the cereal box, on the right side, just big enough for the plastic window of the rainbow glasses. The hole should be smaller than the paper border around the plastic, so the plastic doesn't fall into the box.
Tape the plastic window over the hole, and seal out any extra light with the aluminum tape.
Cut a thin rectangle out of the bottom of the cereal box, opposite the plastic window. This is where our slit will be.
Seal all around the slit with aluminum tape, to keep out stray light.
That's it! You now have another spectroscope!
Hold the slit up to a fluorescent light bulb, and look into the plastic window. You will see something like the photo below.
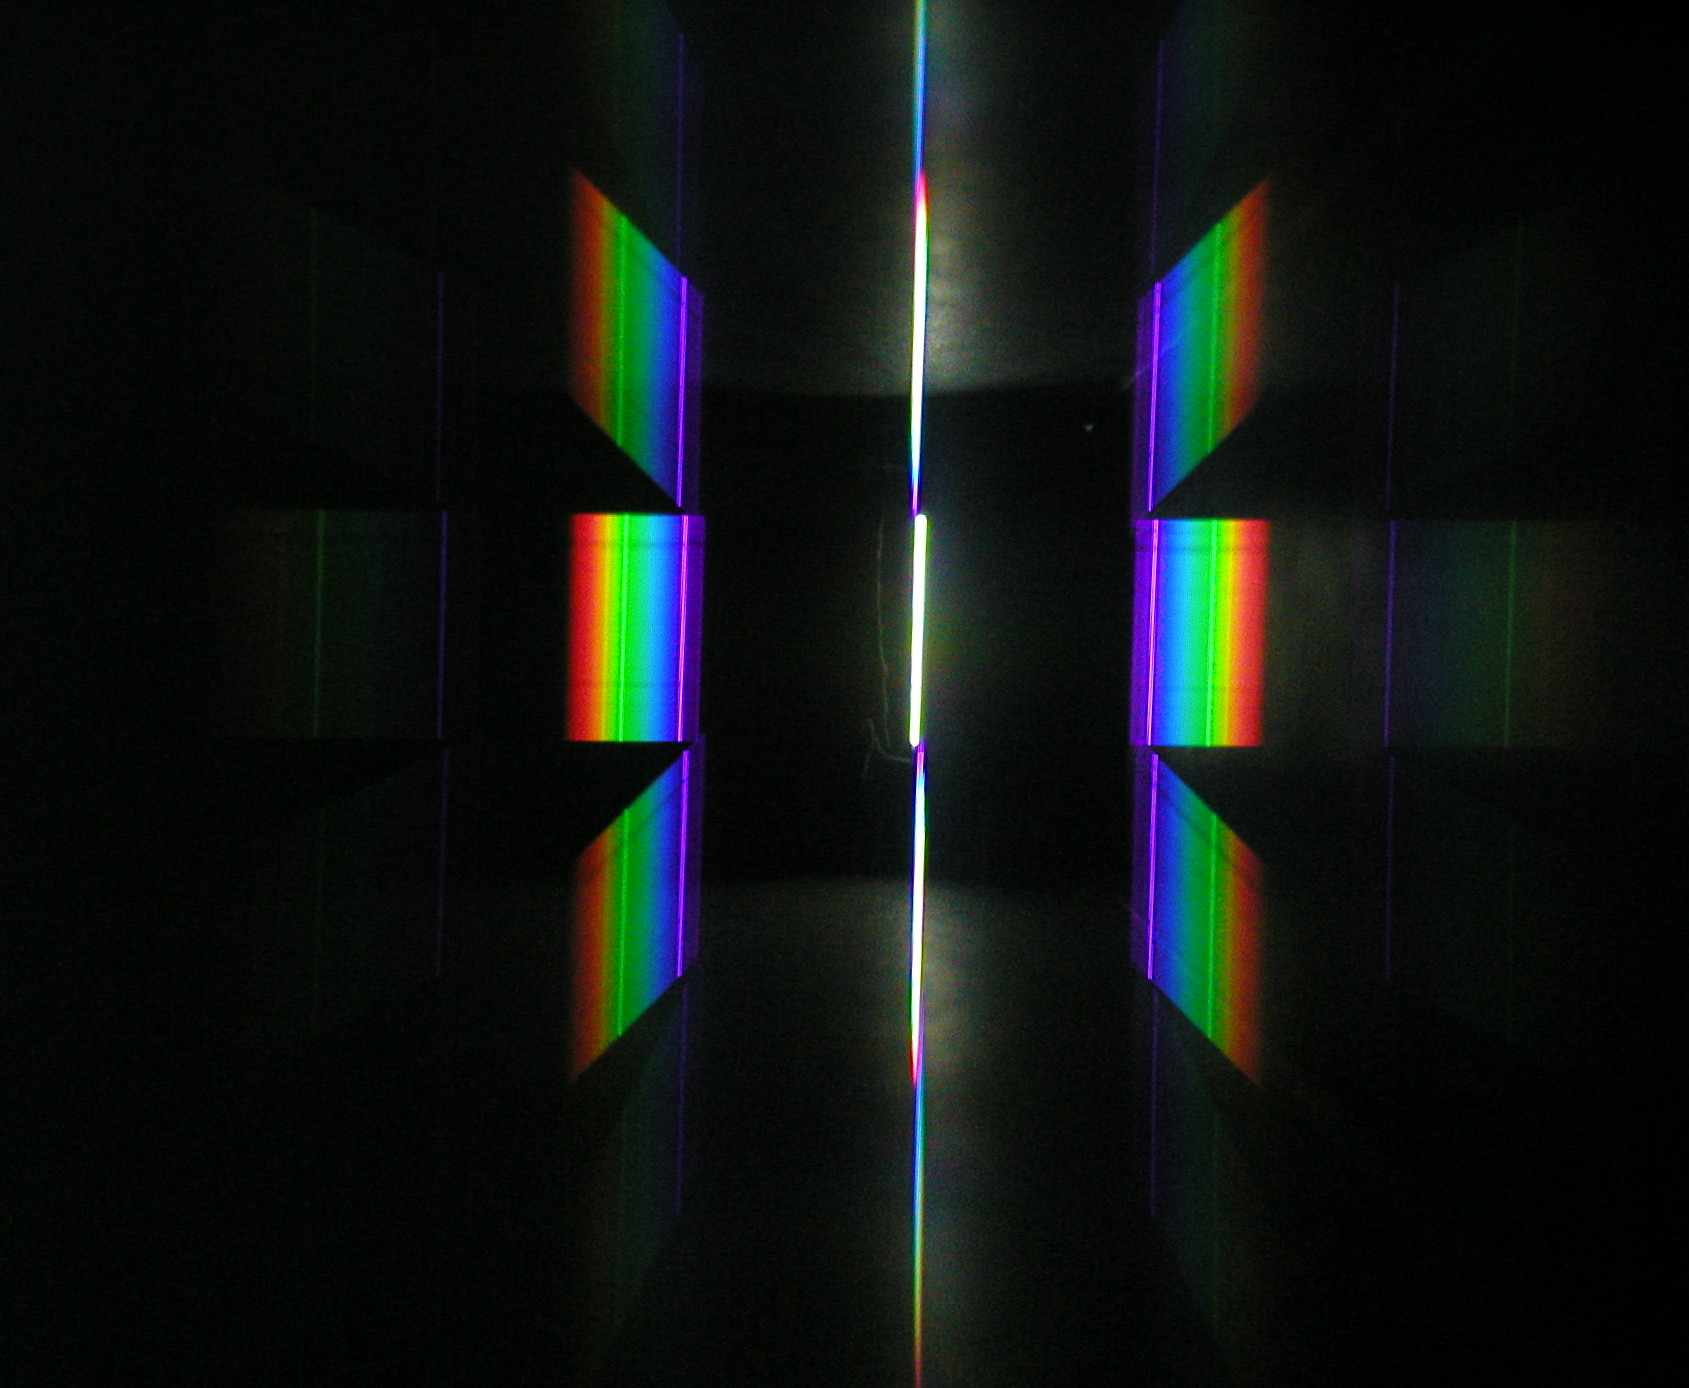
The photo above was taken using a very fast shutter speed, since the image was quite bright. The fast shutter speed only captures the primary rainbows -- those closest to the slit.

However, there are also secondary rainbows farther from the slit, and they are spread out more, allowing us to more easily see the bright lines in the spectrum. The second photo used a slower shutter speed, and shows the secondary spectra, while washing out the primary.
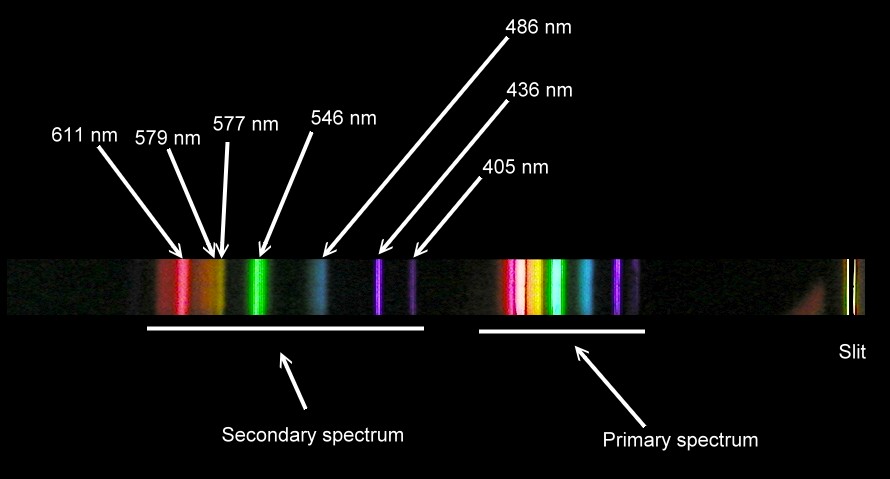
The photo above was taken from about 20 feet away from a bright (90 watt) fluorescent bulb. The lines are bright and nicely separated. With a narrower slit, I suspect the green line would resolve into two lines, and the orange line would become five or six separate lines.
I have digitally cropped out the extra spectra above and below the horizontal band.
Higher resolution
You can get high efficiency holographic diffraction gratings from scientific supply stores. We also carry them in our catalog. With 1000 lines per millimeter, these gratings separate the spectral lines well, and the lines are still quite bright.
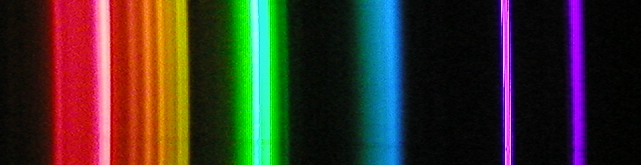
I replaced the grating in the cereal box spectroscope with one of these high resolution gratings, and you can now clearly see several lines in the yellow and orange that were smeared together in the earlier version.